Hey there!
SEE A NEW PATTERN HERE
It’s Julie here, your friendly crafting enthusiast!
I remember the first time I decided to take a plunge into quilting, and let me tell you, it was an adventure full of fabric, colors, and a sprinkle of chaos!
I almost lost my sanity when a piece didn’t line up the way I wanted, but as it turns out, that little hiccup became an incredible learning experience!
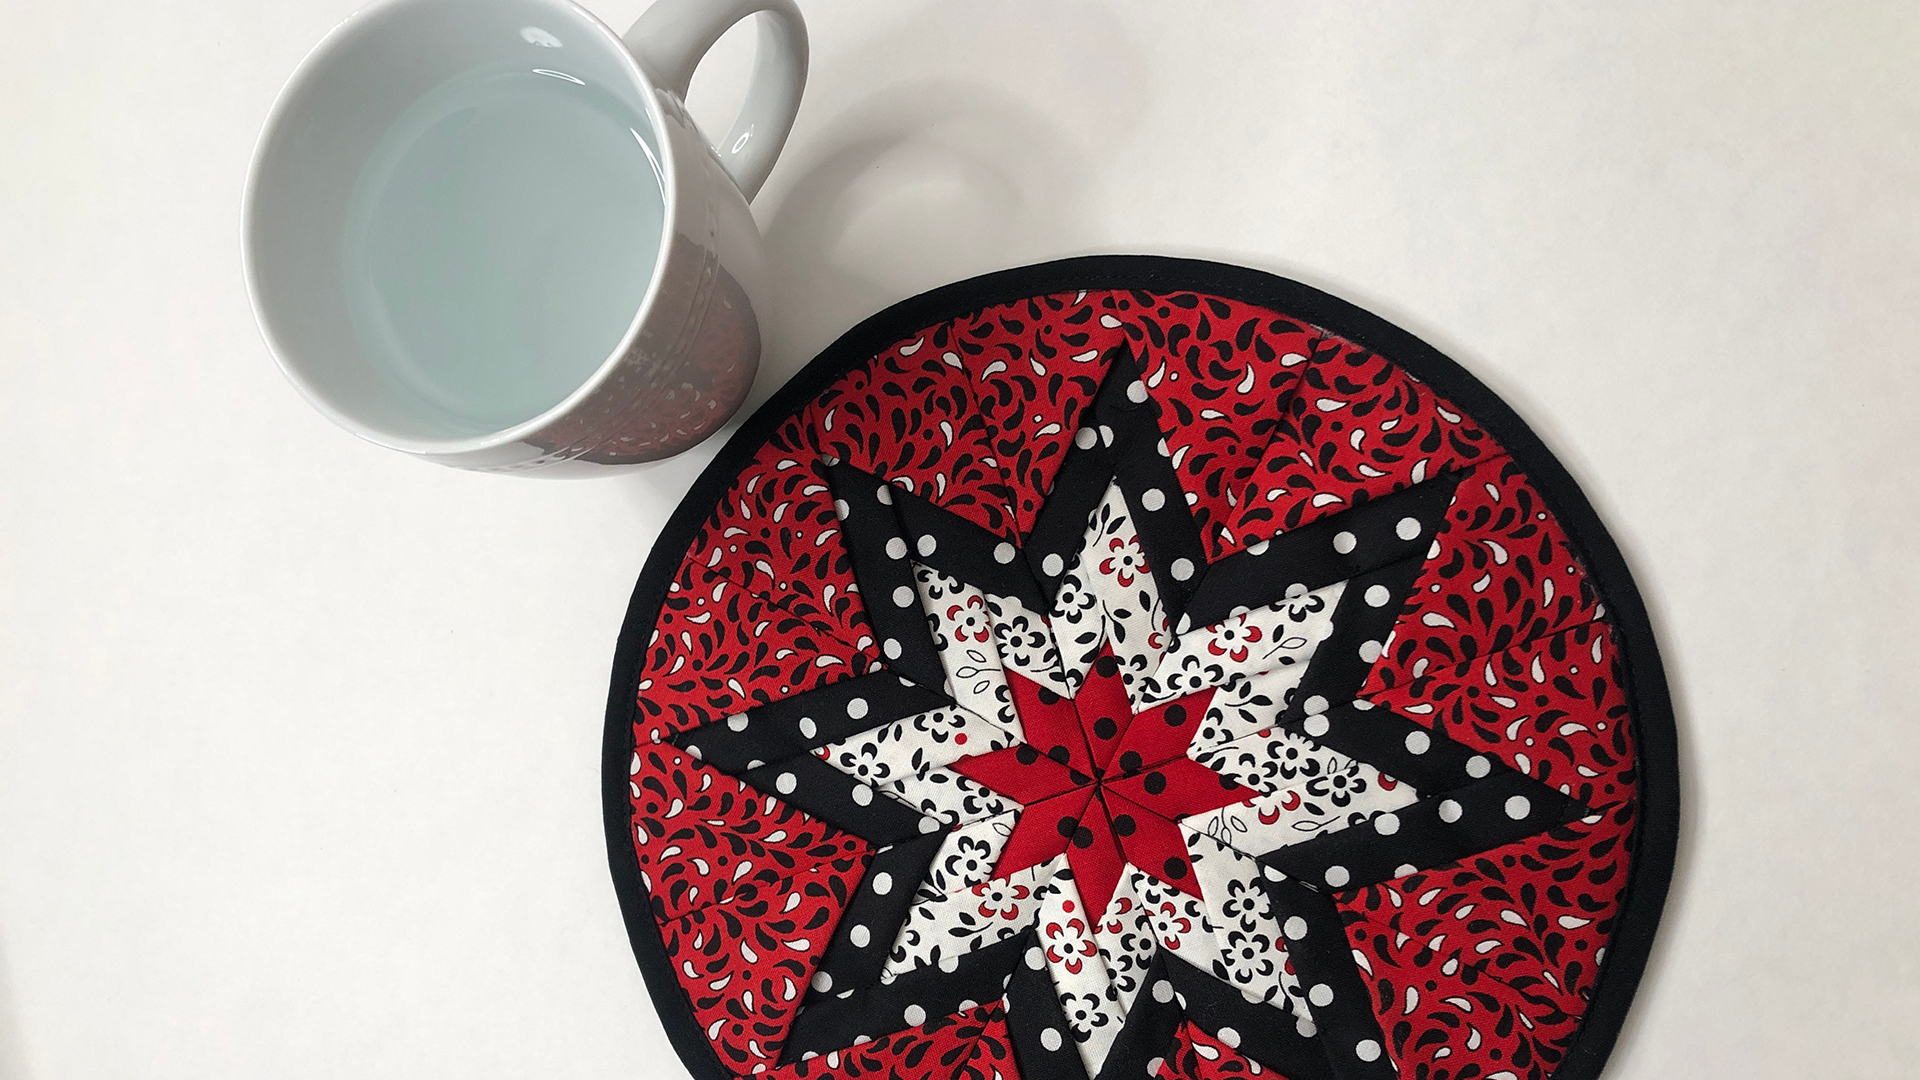
This is why I’m so excited to share with you the Layered Star Trivet pattern – it’s perfect for those hands that yearn for creativity but maybe feel a tad intimidated by intricate quilts.
Fast forward to today, and I’m here, passionate about quilting and eager to inspire you to whip up your own beautiful Layered Star Trivet.
There’s something pure magic about creating functional art, and this little project serves not just as an eye-catching table piece but also as a great starting point to experiment with colors and shapes.
This fun and fulfilling quilt not only spices up your kitchen décor but makes for a lovely gift, too!
Foundation of Style: Design Elements
The design of the Layered Star Trivet is incredibly versatile, allowing you to mix and match different fabric patterns and colors to personalize your masterpiece.
My favorite part about this design is the geometric flair that transforms an everyday kitchen necessity into a stylish décor item.
Imagine serving hot dishes straight from the oven onto this radiant trivet!
It’s a small yet impactful addition to any gathering.
Each layer in the Layered Star Trivet comes together harmoniously, creating a stunning visual effect that captivates anyone who lays eyes on it.
Plus, the sense of accomplishment when you’re finished?
Priceless!
And let’s be honest; who doesn’t love a little creative challenge that serves a practical purpose?
Choosing Your Fabrics Wisely
The colors and patterns you choose are what ultimately make the Layered Star Trivet uniquely yours.
For a more classic vibe, consider opting for timeless tones like deep reds and whites, or go wild with a playful mix of prints!
It’s an opportunity to step outside your color comfort zone and embrace something fabulous!
Consider gathering fabric remnants as well, making this project not just a beautiful outcome but an eco-friendly endeavor.
The Layered Star Trivet can turn bits of beloved fabric into a treasured piece of art.
It’s a true win-win!
Materials
- 1/8 yd – red dot – center
- 1/4 yd – white print – round 1
- 1/4 yd – block dot – round 2
- 1/4 yd – red print – round 3
- (1) 12” square base – light color
- (1) 12” square backing
- 1/2 yd – black – binding
- Rotary Cutter
- Cutting Mat
- 8-1/2” X 14-1/2” ruler or similar
- Seam gauge
- Fabric glue stick
- Fabric marking pen/pencil
- Thread
- Scissors
- Pins
- Iron and pressing mat
- Batting – (2) 12” squares
Setting the Stage for Success
Before you dive into making the Layered Star Trivet, I encourage you to take a moment to gather all your materials.
It’s like setting the scene for a fantastic play; everything should be ready to go!
Lay out your fabrics and tools, and clear a spacious area where you can work comfortably without distractions.
Trust me, the last thing you want is to be halfway through and realize you are missing a vital piece!
Oh, and don’t forget to give your fabrics a good press; it’ll make everything easier to work with and help you achieve that clean, professional look!
Step-by-Step Instructions:
Now that you have everything prepped, below are the step-by-step instructions for creating your Layered Star Trivet.
If you’d like to follow along with additional reference material, you can find the full pattern linked below!
Full Pattern: Click Here
Additional Tips
As you go through the steps, remember that precision in cutting and measuring goes a long way in achieving a perfect Layered Star Trivet.
In case you’re new to quilting, take your time!
Don’t rush through the process because each stage is another opportunity to polish your skills and understand the craft better.
Also, use fabric glue generously to hold everything in place, especially those tricky triangle tips, before you hit them with the sewing machine.
You’ll be surprised how much this helps keep your pieces seamlessly aligned while sewing!
Elevating the Design with Techniques
If you’re ready to step into advanced techniques, consider adding quilting motifs to your Layered Star Trivet.
These can elevate its look and make it not just a trivet but a work of art.
It’s a fun way to showcase your personality and style.
You’ll also want to ensure that the stitches are even and neatly run across the triangles.
This detail adds finesse and transforms your project from average to a true masterpiece anyone would be proud to display in their home.
Celebrate Your Creation!
Congratulations on crafting your very own Layered Star Trivet!
Take a moment to admire and celebrate the beautiful piece you’ve created.
Remember, every project begins with small steps, and each quilt is a testament to your creativity and persistence.
Feeling inspired?
There’s a whole world of projects waiting for you on the blog, overflowing with creativity!
I’ve prepared an incredible piece you can check out by exploring other articles here.
So go on, keep that creative spirit alive!


