There’s something absolutely magical about creating your own quilt.
I remember the first time I laid eyes on a colorful quilt displayed at a local craft fair.
The patterns danced, colors sang, and I was mesmerized.
From that moment on, I knew I had to try my hand at quilt-making.
And let me tell you, the first project I tackled was the Binding Tool Star quilt pattern.
This quilt ignited a spark in me, combining creativity with an achievable challenge.
Trust me, once you get started with the Binding Tool Star, you won’t want to stop!
As I delved into making the Binding Tool Star, I found it to be more than just a project; it was a journey.
It’s a quilt that genuinely showcases how versatile a few simple tools can be.
With the Binding Tool, I not only managed to craft this stunning quilt but also perfect the art of binding it.
The further I went, the more I felt in control of my creativity.
I know you’re going to love this pattern as much as I do!
A Two-in-One Wonder: The Magic of the Binding Tool
The Binding Tool Star is not just a feast for the eyes; it’s also incredibly practical.
This fantastic tool serves two major purposes—it’s your key player in creating those charming quilt tops and also helps achieve a flawless finish on your quilts.
I can’t tell you how many compliments I’ve received because of the Binding Tool.
It transforms what initially appears complex into a delightful and approachable undertaking that anyone can enjoy.
When working with the Binding Tool Star, I discovered that the process isn’t all about the finished quilt but the joy of making it as well.
The pattern allows for a wide range of creativity, from choosing your favorite prints to experimenting with color combinations that might surprise you.
Whether you prefer vibrant hues or more muted tones, this quilt pattern provides endless possibilities!
Your Journey Starts with the Right Materials
- 1 roll of 2½” print strips
- 2½ yards of background fabric
- ¾ yard for the inner border
- 1 package of print 5″ squares for the outer border
- ¾ yard for the binding
- 4¾ yards of backing (or 2½ yards of 108″ wide fabric)
- The Binding Tool by TQM Products
Gathering these materials was one of my favorite parts.
I enjoyed selecting the fabric colors that sparked joy in me!
When I went fabric shopping, I would let my imagination take the lead, playing around with bold combinations for the Binding Tool Star.
I found joy in visualizing how all these swatches would come together to create something larger than life.
In my experience, having the right tools on hand helps facilitate a smooth quilting process.
Consider buying a high-quality rotary cutter and a cutting mat, as they go hand-in-hand with the Binding Tool.
Each tool acts as a partner in this beautiful quilt-making journey!
Preparation is Key!
Before diving into the Binding Tool Star quilt, I highly recommend preparing your workspace.
A clean, organized area will work wonders for your creativity and productivity.
I like to lay everything out, ensuring I have my materials close at hand.
You don’t want to be scrambling around in the middle of stitching.
Next, it can be beneficial to pre-cut your fabric strips and squares before starting.
For the Binding Tool Star, cutting your fabric into manageable pieces ensures that everything aligns beautifully as you sew.
You’ll be amazed at how much smoother the process is once you’ve sorted everything!
Step-by-Step Instructions:
Ready to get started?
Below, I’ve included step-by-step instructions to guide you through your Binding Tool Star adventure.
Make sure you check the image below for a visual reference, and remember the full pattern is just a click away!
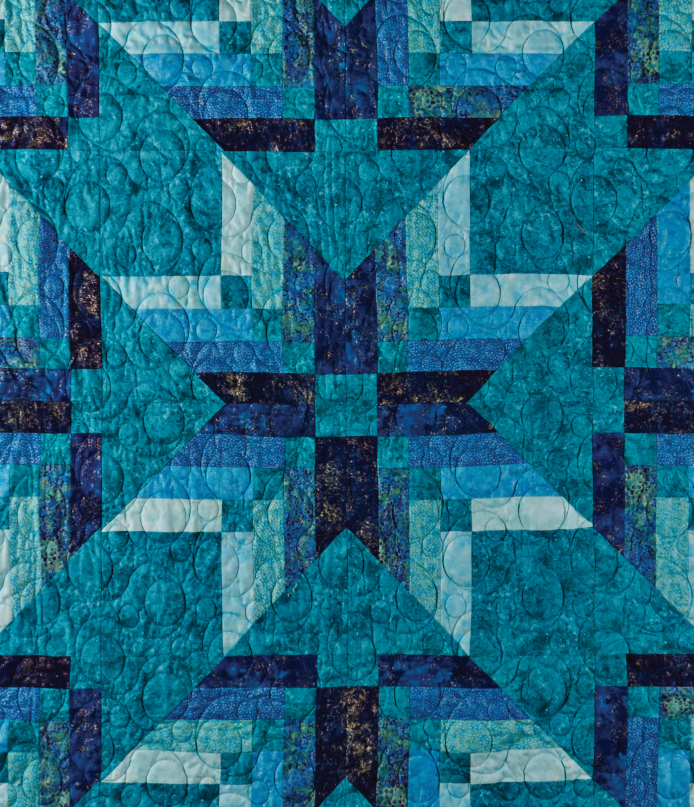
Full Pattern: Click Here
Additional Tips for Success!
The key to a successful Binding Tool Star quilt is precision.
Take your time when measuring and cutting your fabrics; it pays off!
I learned this the hard way—some of my early cuts were slightly off, and it certainly hindered my progress.
Don’t be afraid to double-check your measurements!
Also, keep an eye on your seam allowances.
Trust me, sticking to a 1/4″ seam makes all the difference in ensuring everything fits perfectly together.
You’ll thank yourself later when you see those beautiful seams coming together!
Exploring Various Design Considerations
When it comes to the Binding Tool Star, each quilter has the chance to put their personal touch.
You can play with contrasting borders or even vary the colors of the Binding Tool shapes in your quilt blocks.
The design is flexible enough that it allows you to let your creative instincts shine!
Pro Tip: Consider mixing and matching different fabric collections to make a truly unique masterpiece.
With the superb versatility of the Binding Tool Star, you’ll find it easy to integrate your favorite fabric lines and create something memorable!
Celebrate Your Creative Triumph!
As you finish your Binding Tool Star quilt, take a moment to admire your work.
Completing this quilt isn’t just about the end result—it’s about the journey, the creativity, and the joy you experienced along the way.
Remember that every stitch is a labor of love, and it’s something to be proud of!
For more quilting inspiration and handy tips, be sure to explore other articles on my blog.
There’s a treasure trove of fabulous projects waiting for you, bursting with vibrant patterns and ideas.
I’ve prepared an incredible piece that you can discover by clicking here.
Go ahead, let your creativity run wild!
Reflecting on this whole experience with the Binding Tool Star brings me so much joy.
I hope you feel the same excitement as you embark on your quilting journey.
It’s a wonderfully enriching adventure waiting for you!


