Quilting is an age-old art passed down through generations, each stitch weaving together stories of connection and creativity.
Growing up in Missouri, I was surrounded by the rich quilting traditions that have flourished here for decades.
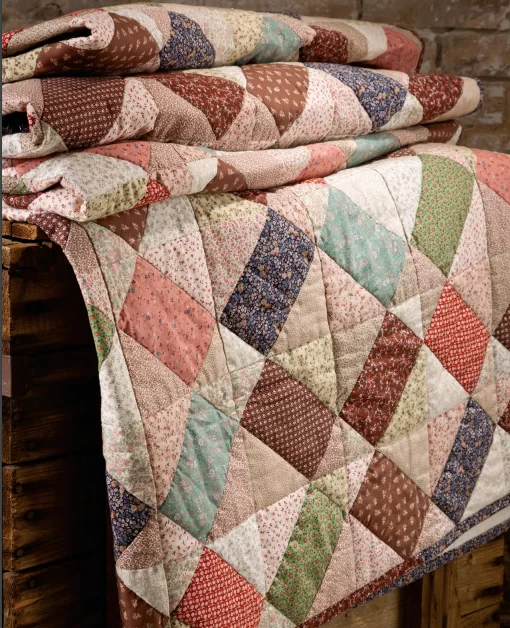
One thing I’ve always loved about quilting is how traditional patterns can be a gateway to exploring new ideas. The Scrappy Crossings Free Pattern is a perfect example—it blends the nostalgia of classic designs with a modern, scrappy flair.
In quilting, traditional patterns are more than just designs; they are a bridge to our past, linking us to the generations that came before. The Scrappy Crossings Free Pattern embraces this legacy by incorporating a classic cross motif—a timeless symbol of unity and connection. With its scrappy aesthetic, this pattern not only preserves tradition but also celebrates the resourcefulness and creativity of quilters.
Celebrating Creativity with the Scrappy Crossings Free Pattern
The Scrappy Crossings Free Pattern is ideal for confident beginners and seasoned quilters alike. This quilt’s charm lies in its scrappy nature, which allows you to repurpose a variety of dark and light fabric scraps. Each block features a simple yet elegant cross design, and the beauty of this pattern is that no two blocks will look exactly the same. As you create the Scrappy Crossings Free Pattern, you’ll be stitching together pieces of fabric—and pieces of history.
Materials Needed for the Scrappy Crossings Free Pattern
Quilt Specifications:
- Difficulty Level: Suitable for Confident Beginners
- Finished Quilt Dimensions: 60 inches x 90 inches
- Block Size: 6 inches x 6 inches (Finished)
- Number of Blocks: 150
Fabric and Supplies:
- Assorted dark scraps (minimum size: 4 inches x 6 inches), totaling 2 yards
- Assorted light scraps (minimum size: 3.5 inches square), totaling 2 yards
- Assorted strips (size: 2.25 inches x 10 to 20 inches), totaling 31.2 inches for binding
- Backing fabric: 5 5/8 yards
- Batting: 68 inches x 98 inches
- Template material for cutting piece A
- Basic sewing tools and supplies
Preparation for the Scrappy Crossings Free Pattern
Before you start cutting, be sure to review the instructions thoroughly. The Scrappy Crossings Free Pattern requires careful preparation of templates and precise cutting. Make sure your scraps are organized by light and dark shades, and keep all pieces labeled for a smooth assembly process. This pattern is all about embracing a scrappy style, so don’t worry about having matching fabrics—let the variety add to the charm!

Full Pattern: Click Here
Step-by-Step Instructions
Cutting the Fabric
- Prepare the Templates: Use the template provided with the pattern insert to create a template for piece A. Ensure that it is accurately sized.
- Cut Piece A: From your assorted dark scraps, cut a total of 150 A pieces.
- Cut Piece B: From assorted light scraps, cut 150 squares measuring 3 1/8 inches each. Then, cut each square in half diagonally to create 300 B triangles.
- Cut Piece C: From assorted light scraps, cut 150 squares measuring 4 5/8 inches each. Again, cut each square in half diagonally to yield 300 C triangles.
Assembling the Blocks
- Start with Piece A: Choose one dark A rectangle and two different fabric B and C triangles to create a single block.
- Sew the B Triangles: Sew a B triangle to each short end of piece A, following Figure 1. Press the seams toward the B triangles.
- Attach the C Triangles: Sew a C triangle to each long side of the A-B unit to complete one Scrappy Crossing block, as shown in Figure 2. Press the seams toward the C triangles.
- Repeat: Continue this process to create a total of 150 blocks for your Scrappy Crossings Free Pattern quilt.
Completing the Quilt Top
- Form the Rows: Lay out 10 Scrappy Crossing blocks to form a single row, following the Assembly Diagram. Ensure that the blocks are rotated and aligned as desired. Sew the blocks together and press the seams in one direction. Repeat this process to create 15 rows in total.
- Join the Rows: Connect the rows, alternating and matching the seams to create a cohesive quilt top. Follow the Assembly Diagram for guidance on aligning the rows. Press all seams in one direction for a neat finish.
Finishing the Scrappy Crossings Quilt
- Layer the Quilt: Place the pieced quilt top over the batting and prepared backing fabric. Secure the layers together with pins or adhesive spray. Quilt the layers by hand or machine, depending on your preference.
- Trim the Edges: Once quilting is complete, trim the excess batting and backing fabric to match the raw edges of the quilt top.
- Prepare the Binding: Join the assorted binding strips together at the short ends to create a continuous strip. Press the seams open. Fold the strip in half lengthwise, wrong sides together, and press.
- Attach the Binding: Sew the binding to the quilt edges, mitering the corners for a polished look. Fold the binding over to the back side and stitch it in place to complete your Scrappy Crossings Free Pattern quilt.
Embrace Tradition with the Scrappy Crossings Free Pattern
The Scrappy Crossings Free Pattern beautifully merges tradition with creativity, allowing you to craft a quilt that is both meaningful and unique. Each block in this quilt represents not just a piece of fabric, but a connection to the rich legacy of quilting. As you gather your scraps and stitch each piece together, you’re not just making a quilt—you’re continuing a tradition that spans generations.
So, embrace the spirit of resourcefulness and let the Scrappy Crossings Free Pattern inspire your next quilting journey. With each stitch, you’re not only crafting a beautiful quilt but also adding your own chapter to the timeless story of quilting. Happy quilting!


