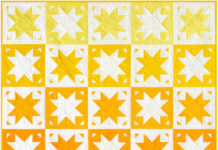
Hey there, quilting enthusiasts!
I’m Julie, and today I’m beyond excited to share with you my journey of creating the Just Kisses quilt.
You wouldn’t believe how much joy crafting something from scratch can bring.
Just last week, I found a treasure trove of vibrant fabrics that sparked my creativity and led me to this delightful pattern.
As I dove into the intricacies of the Just Kisses quilt, I felt an exhilarating mix of challenge and relaxation that only sewing can bring.
There’s nothing quite like losing yourself in a world of colors and fabric textures.
As I laid out the fabric pieces for the Just Kisses quilt, I couldn’t help but reminisce about the very first quilt I ever made.
That project was filled with mishaps—improper measurements, tangled threads, and late-night stitching marathons.
However, with every mishap came a lesson learned, and with it, the thrill of trying again.
So here we are!
Let’s explore the fun and engaging process of creating the Just Kisses quilt together!
Finding the Perfect Balance
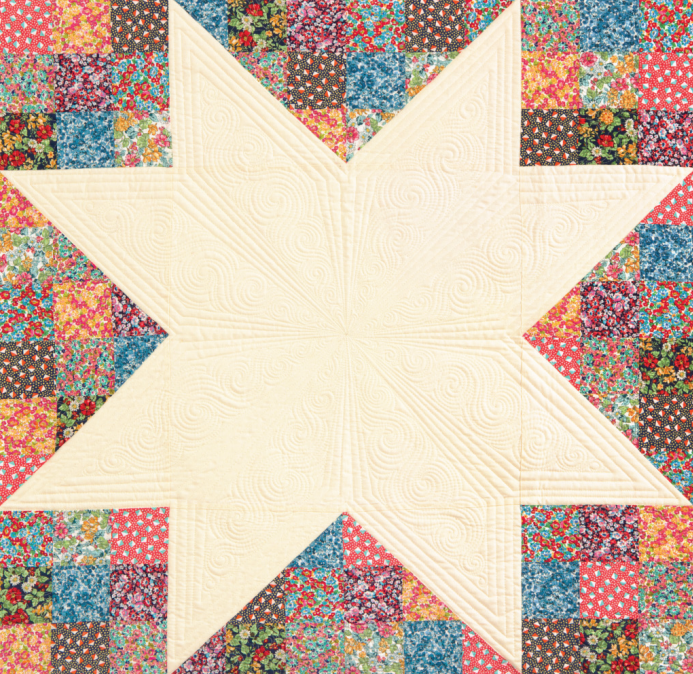
The Just Kisses quilt is designed to bring a touch of whimsy into your space while offering a great balance of playful designs and practical techniques.
It’s perfect for both beginner quilters and those looking to challenge themselves with new piecing methods.
This quilt features vibrant fabrics that blend beautifully, creating a harmonious feel whenever you snuggle underneath.
Each block within the Just Kisses quilt tells its own story through its colors and patterns.
That’s the beauty of quilting: no two quilts are exactly alike!
The variations you can create with fabric choices and arrangements are absolutely endless, and I find that inspiring.
This quilt can be anything you want it to be: modern, traditional, or entirely unique!
Gather Up Your Supplies!
Alright, let’s talk about materials.
You’ll need to gather these joyous items before we begin crafting your Just Kisses quilt:
- 1 yard of Fabric A (I used Sorbet)
- 1/8 yard each of Fabrics B-J (I chose Americana, Spring, Coral, and more vibrant colors!)
- 2-7/8 yards of fabric for the backing
- 3/8 yard for binding
- Quilting ruler
- Rotary cutter or scissors
- Sewing machine
- Thread (choose one that matches or contrasts boldly!)
- Iron and ironing board
- Cutting mat
With your materials gathered for the Just Kisses quilt, you are ready to embark on this delightful journey.
Take your time to select fabrics you adore; it makes a huge difference in your crafting experience.
I believe that when you love your materials, it shows in your finished project!
Preparation is Key!
Before we dive into sewing, I suggest you familiarize yourself with the layout of the Just Kisses quilt.
Take a moment to visualize how you want your quilt to look.
You can even lay out your blocks on the floor or a large table to get a sense of the flow and arrangement.
Planning your layout before you begin sewing will save you loads of time and stress!
Check your fabric for any irregularities, and press everything down neatly, especially if it has been folded or wrinkled.
Little details, such as pressing seams and ensuring clean cuts, will make a world of difference in the final look of your Just Kisses quilt.
Remember, it’s all in the preparation!
Step-by-Step Instructions:
Alright, folks!
Let’s get into the fun part.
I’ll guide you through the steps to create your Just Kisses quilt.
Don’t forget, you can find the full pattern [here](http://example.com) for detailed guidance.
Once you’re ready, let’s get this quilt started!
Full Pattern: Click Here
Extra Tips for Success
Here are a few golden nuggets I’ve learned along the way while working on the Just Kisses quilt.
First, don’t rush your piecing steps.
Allow yourself time to enjoy each part of the process.
When you take your time, mistakes become a rare occurrence.
Second, always press your seams as you go.
It makes all the difference in achieving flat blocks that fit nicely together.
Also, if you find yourself overwhelmed at any point, just take a break.
Grab a cup of tea, breathe, and come back to your project with fresh eyes.
This delicate balance of persistence and patience will lead to the stunning Just Kisses quilt you’re dreaming of!
Design Exploration
As you explore the Just Kisses quilt, consider experimenting with various color combinations and fabric textures.
Maybe use some unexpected prints or solids to add a unique flair to your finished quilt.
Every quilter has a distinct style, and it’s thrilling to see how your personality can shine through your choices!
There’s something incredibly rewarding about stepping outside your comfort zone.
Perhaps play with asymmetrical layouts or mix in a few modern interpretations.
Design choices are entirely yours to explore, and it’s a fantastic way to enhance your quilting skills while enjoying the creative process!
Embrace the Journey
As you lay those finishing stitches on your Just Kisses quilt, I encourage you to take a moment to appreciate all your efforts!
The joy that comes from creating something with your own hands is unparalleled.
Whether this quilt becomes a family heirloom or a cozy addition to your living room, it holds a piece of your heart within its stitches.
Before you go off to create your masterpiece, I warmly invite you to explore more of my articles!
Trust me, this blog is brimming with inspiration and crafty goodness.
I’ve prepared an incredible piece waiting just for you, so dive into another adventure by clicking right here.
You won’t regret it!
Now grab that fabric, fire up your sewing machine, and enjoy every moment of piecing together your Just Kisses quilt.
I can’t wait to see what amazing creations you create!

