The first time I pinned these parcel blocks on my design wall, they looked like wrapped boxes left just under a ribboned tree, even though it was just an ordinary Tuesday in my sewing room.
I kept tilting the squares and rectangles until the whole top started to feel like it was gently stacked and ready to be carried to someone’s hands.
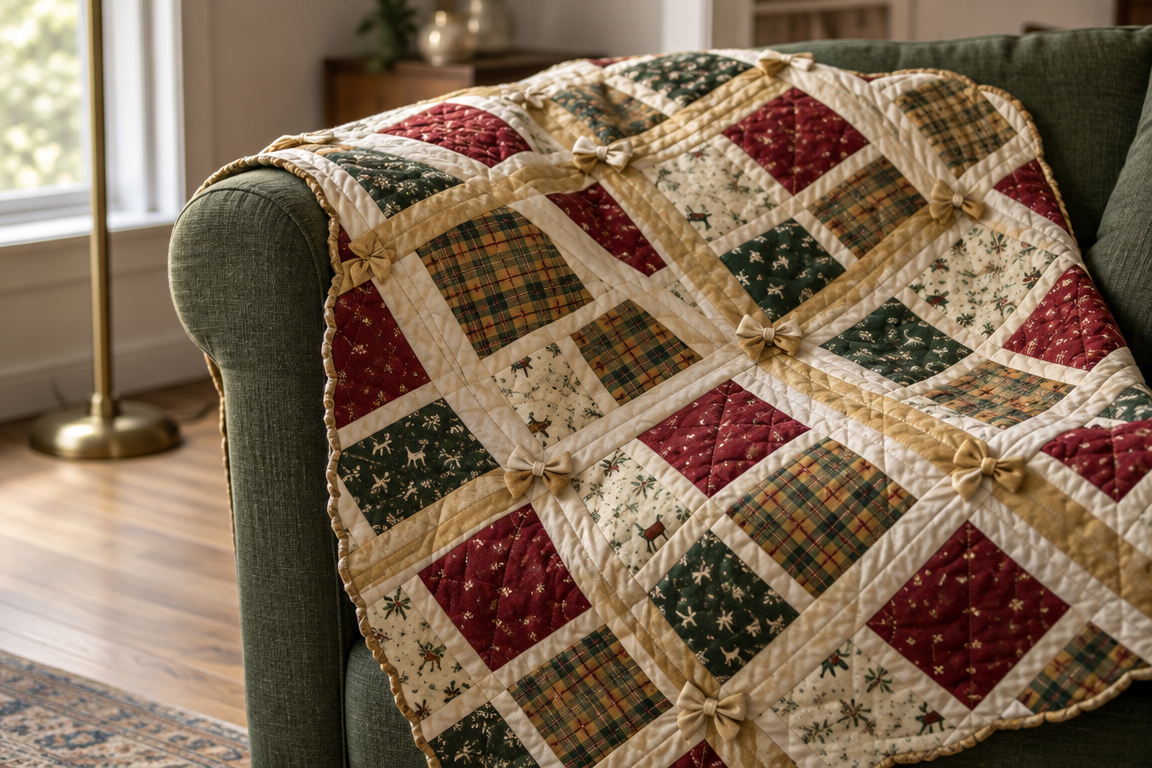
When I added the pale gold and ivory diagonal ribbon bands, the quilt suddenly read as a whole story—less holiday icon, more cozy wrapped surprise.
The room in the photo is my favorite kind of still life: deep green linen, a warm brass lamp, and that soft, fading light that makes every stitch feel slower.
I wanted this throw to have a wholecloth vibe, but with texture you can trace with your fingers along the parcel outlines.
And that is exactly why I’m sharing the pattern link below—so you can build your own stack of wrapped parcels too.
The Look: Wrapped Parcels Without the Usual Symbols
Bundled in Ribbon feels like gift wrapping you can live with all year, because the focus is on the parcels and ribbons rather than the typical holiday shapes.
The tilted square-and-rectangle blocks create a laid-back, slightly askew stack, like packages set down mid-laugh and mid-unwrapping.
Narrow cream sashing frames every “box,” while the diagonal ribbon bands cross the quilt top and visually tie everything together.
Why It Works: Color-Play That Looks Like Real Wrapping
Cranberry red and pine green bring that classic wrapped-parcel contrast, and the cream helps everything breathe between the parcels.
The brass-gold plaid is the secret sparkle, because it reads warm and dimensional without needing any glittery details.
To keep it from looking too uniform, I mix small-scale novelty cotton prints with softer chambray and flannel so the quilt has both crisp edges and gentle movement.
Materials for Your Throw-Size Quilt
- Backing fabric: 4 to 5 yards (a soft neutral like cream or warm light tan to echo the sashing)
- Batting: 1 throw-size package (about 80 x 90 inches, or enough to cover your finished top with a little ease)
- Binding: 1 yard to 1 1/4 yards of coordinating fabric for a hand-bound scalloped finish
- Cream sashing: 1 1/2 to 2 yards (solid or tiny dot)
- Ribbon bands (pale gold and ivory): 2 to 2 1/2 yards total (split between the two tones based on your layout)
- Parcel blocks (cranberry red, pine green, and brass-gold plaid): 3 to 4 yards total depending on print variety
- Bow appliqués (folded-fabric shapes): 1/2 to 3/4 yard of a main bow tone plus small scraps for accents
If you love fabric variety, this is a great project to use a few prints you keep meaning to combine, especially for the parcel faces.
If you prefer a calmer look, you can select fewer novelty prints and lean more on chambray and flannel for that soft wrapped feeling.
Prep and Workspace: Make the “Tilt” Easy
Before I sew, I clear my table and lay out the parcel fabrics in small piles by color family so I’m not hunting mid-step.
I press everything well, then pre-check that my sewing machine is happiest with the needle and thread combination you’ll use for thicker flannel moments.
When assembling tilted parcel blocks, I keep my seam allowances consistent and pause to re-square whenever a corner starts to drift.
It also helps to mark a light guide line for the ribbon band intersections so those crossings feel intentional instead of accidental.
Download the Pattern: Full Instructions Below
The complete step-by-step instructions are below the photo in the link, including how to assemble parcels, place the diagonal ribbon bands, and position the folded-fabric bow appliqués.
Cleaner Finish Tips: Press, Pin, and Trace Carefully
For stitch-in-the-ditch along each parcel, I like to test on a scrap first to ensure the needle catches just the seam line without nudging the fabric layers.
When joining the diagonal ribbon bands, pin early and pin often, then press the seam allowances in the same direction across the band so they don’t fight each other.
For the hand-bound scalloped edge, I recommend basting the binding in small sections so the curve stays smooth and your final scallop shape stays true.
A Slightly Advanced Twist: Ribbon-Diagonal Quilting
If you want to take the texture up a notch, follow the ribbon diagonals with quilting lines that echo the band angles while keeping the parcel stitch outlines intact.
You can also add a gentle extra outline around each bow appliqué with a slightly wider spacing, which gives a stitched-paper wrapped-bow look without feeling too busy.
And if you enjoy scrap mixing, try swapping one parcel print with a different scale novelty, because the plaid and solids will still keep the overall “wrapping” cohesive.
The Cozy Payoff: A Throw That Looks Like a Present
When your top is finished and the ribbon diagonals line up, it’s the kind of quilt that makes you pause like, did I really just sew something that looks this gift-ready?
Once it’s quilted and bound, the parcel outlines and diagonal ribbon quilting make the whole top feel sturdy, plush, and softly dimensional.
If you’re ready for another wrapped-adventure, head back through Quilt Dreams for more patterns that turn everyday motifs into heirloom-worthy comfort.