Hi there!
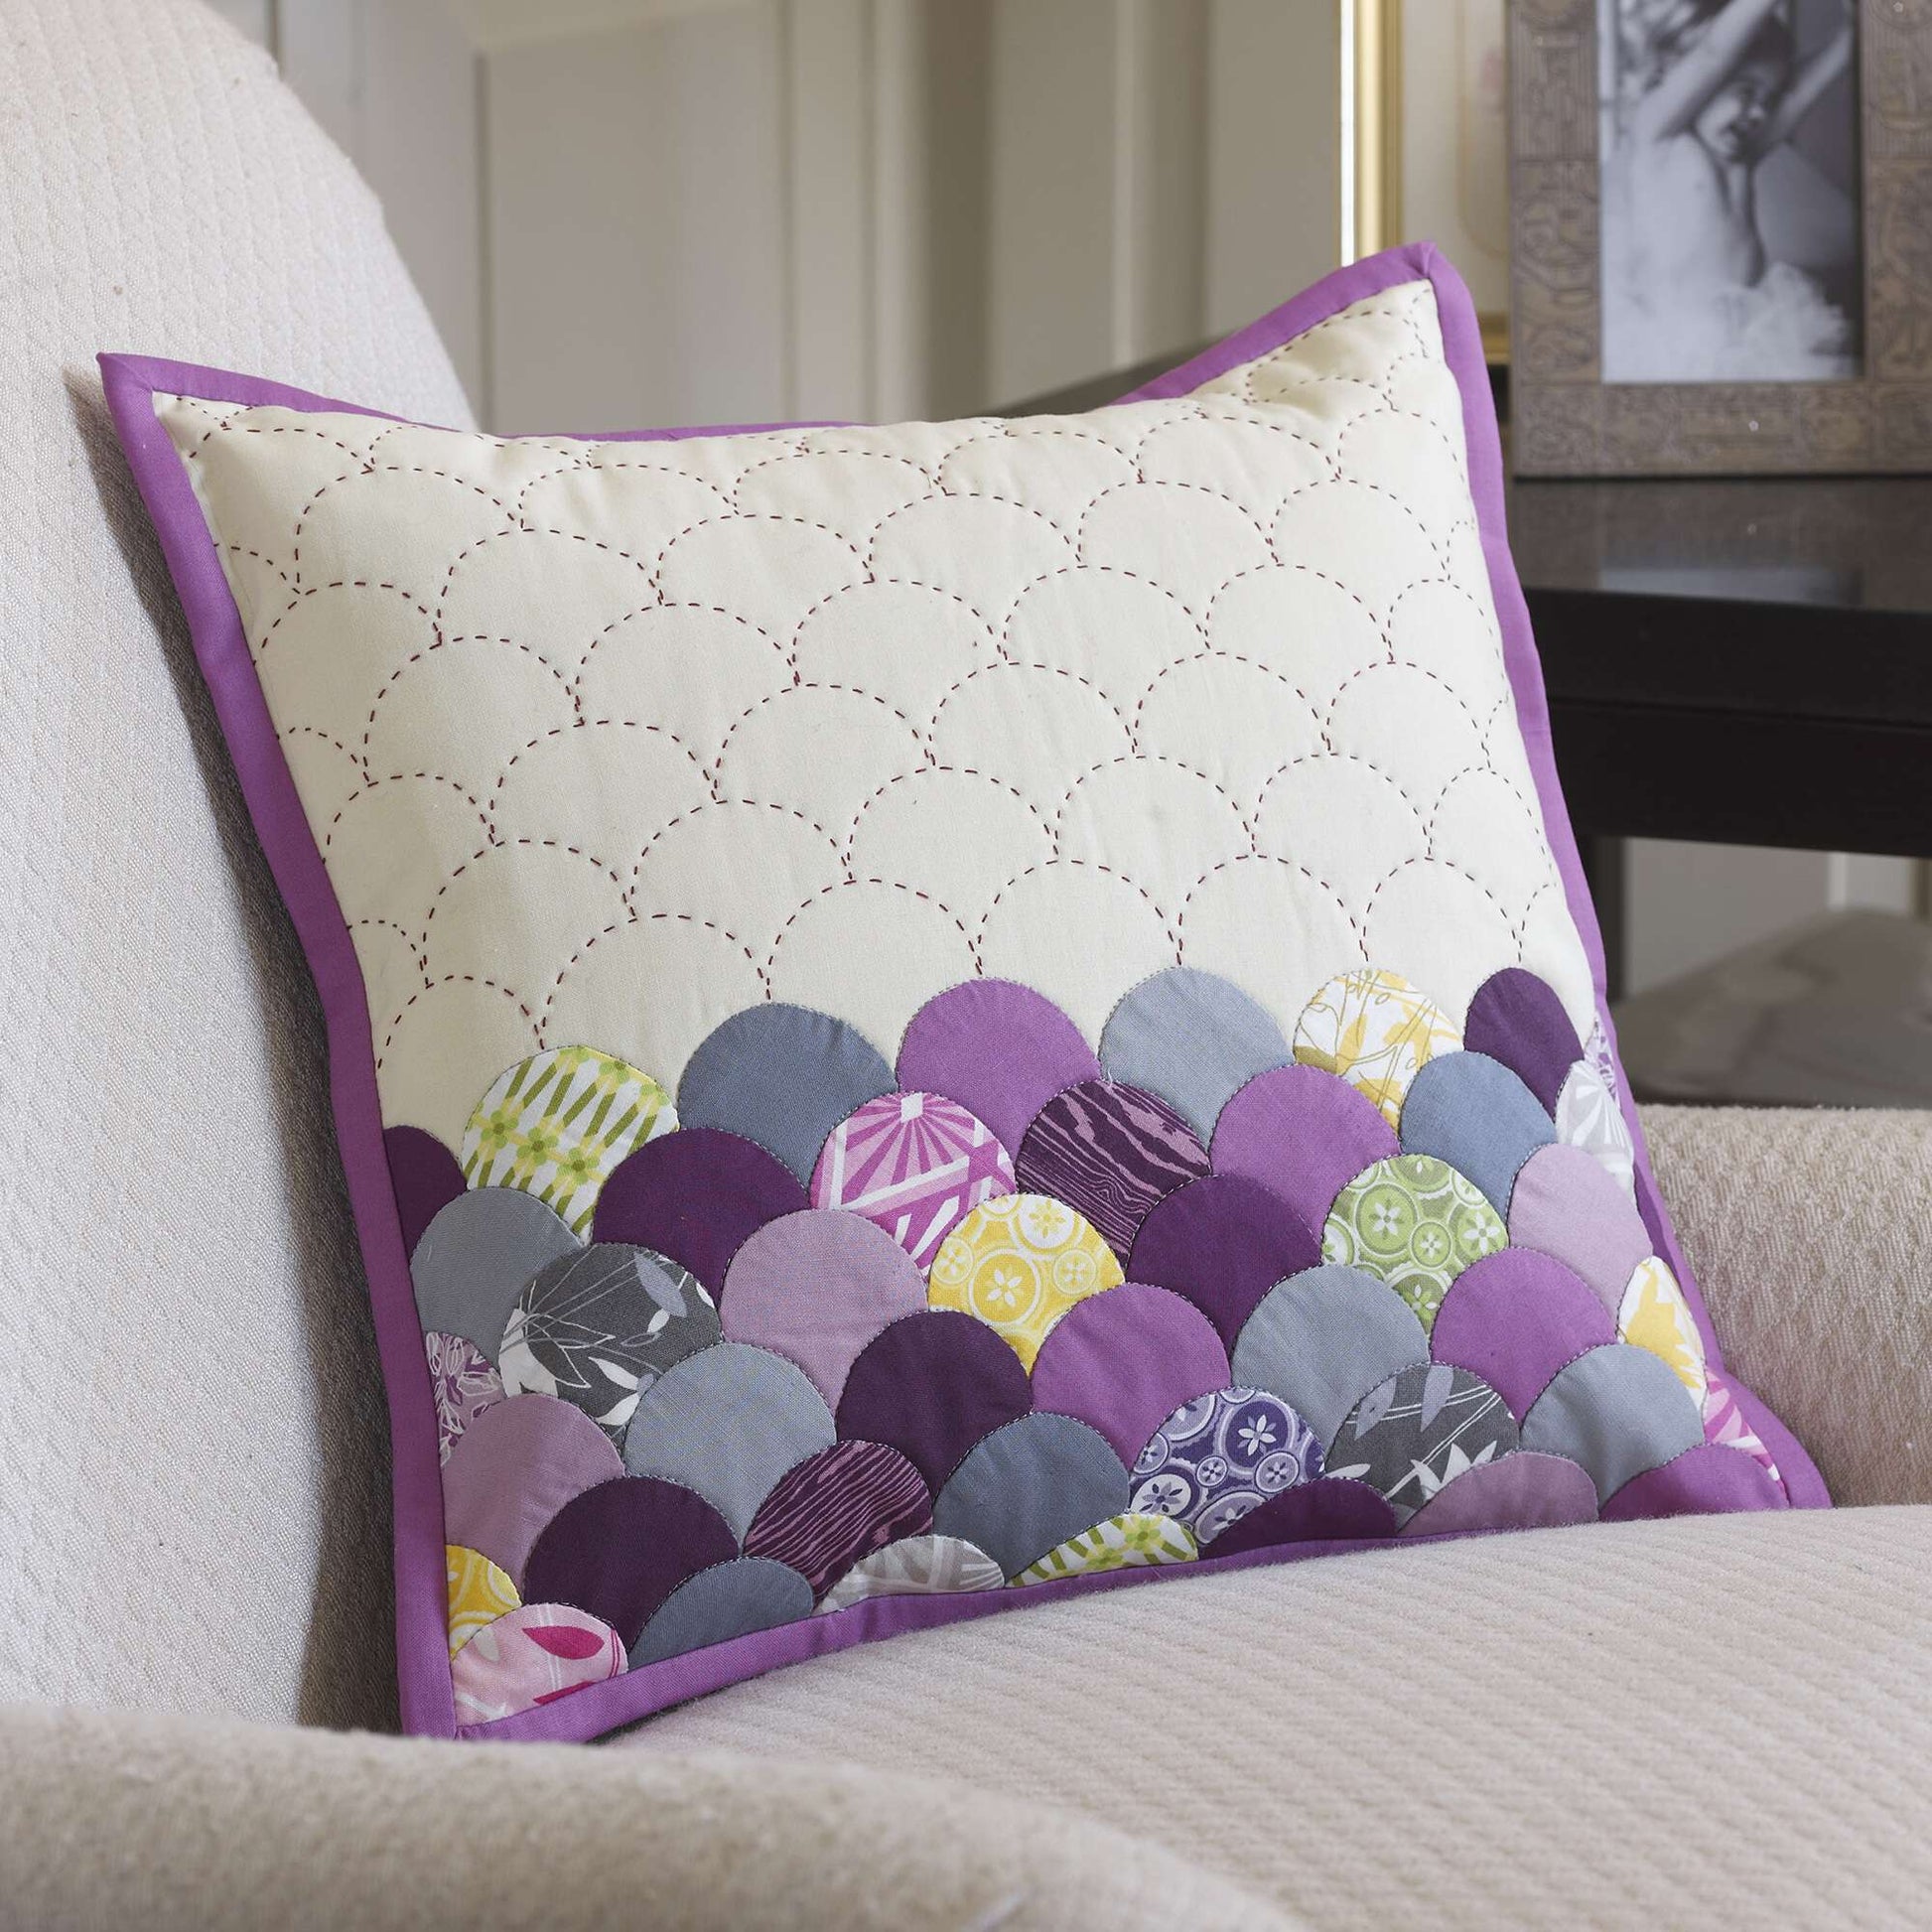
I’m Julie, and today I’m thrilled to share my journey in creating the Clamshell Pillow.
You know, there’s something deeply satisfying about making pillows that are not only functional but also bring a cute pop of color into your home!
When I first stumbled upon the Clamshell Pillow design, it felt like I was embarking on an adventure, armed with fabric and imagination.
There’s a special kind of thrill that comes with crafting something from scratch, especially when it involves hand sewing and fun patterns.
Making the Clamshell Pillow took me back to weekends filled with fabric swatches and imagining the final masterpiece.
I remember spending the afternoon selecting the most whimsical prints for the clamshells.
Honestly, it was downright therapeutic!
There’s something enchanting about transforming a pile of fabric into a cozy accent piece.
If you’re ready to unleash your creativity and explore the art of quilting, let’s jump right into this exciting project.
Unlocking the Magic of English Paper-Piecing
The Clamshell Pillow utilizes the enchanting technique of English paper-piecing, which has been a favorite among quilters for centuries!
This method allows you to easily create stunning shapes like the clamshells we will use for our pillow.
Not only does it help achieve precision, but it also lends a lovely dimension to your work.
Trust me when I say that mastering this technique opens up a world of creative possibilities.
Implementing this technique transforms your quilting experience, making it feel like you’re piecing together a jigsaw puzzle.
Each clamshell can become a story, with colors and patterns reflecting your personal style.
So, as we embark on our journey to conquer the Clamshell Pillow, take a moment to visualize the final creation.
It’s going to be beautiful!
Getting Inspired by Fabric Choices
When it comes to the Clamshell Pillow, the fabric choices play a crucial role.
Selecting vibrant prints can breathe life into your project, turning an ordinary pillow into a vibrant piece of art.
The joy of digging through fabric remnants or browsing your favorite fabric store while brainstorming your color palette is an inspiration in itself.
It’s like a treasure hunt!
For the best results, I recommend choosing an assortment of prints that complement each other while adding a fun visual appeal.
There’s no right or wrong here—just let your creativity run wild!
The Clamshell Pillow is your canvas, so make sure it showcases your personality through your fabric choices.
Materials You’ll Need for the Clamshell Pillow
- Coats Dual Duty XP General Purpose thread
- Coats Paper Piecing Thread
- Coats Bold Hand Quilting thread
- Fabric squares in assorted prints (4 shells from a 5” square)
- 45 2” clamshell paper templates (available at paperpieces.com)
- Basting thread
- FreeSpirit Designer Essentials Cotton Linen, ½ yd.
- FreeSpirit Designer Essentials Cotton, 5/8 yd.
for binding and backing
- 16” square of cotton or muslin for pillow top backing
- Low Loft batting, 16” square
- Pillow form, 14”
- Hand sewing needles
- Scissors
- Rotary cutter, ruler and cutting mat
- Sewing machine
Prepare Yourself for the Clamshell Pillow Adventure
Before diving into the Clamshell Pillow project, I recommend organizing your workspace and preparing all your materials.
It’s like setting the stage for a fantastic performance!
Find a comfortable spot, lay out your fabric, and ensure your sewing machine is threaded and ready to go.
Also, taking the time to cut your fabrics and templates ahead of time can save you a lot of hassle down the road.
This project is perfect for a weekend’s worth of fun, so grab a cup of coffee, turn on some great tunes, and let the creative vibes flow!
Step-by-Step Instructions for the Clamshell Pillow
Below, you’ll find the step-by-step instructions to guide you through crafting your Clamshell Pillow.
For a complete pattern, be sure to check out the link waiting for you after the image!
Full Pattern: Click Here
Additional Tips for Crafting Success
Remember, practice makes perfect!
If you stumble on a step, don’t worry—just take a breath and enjoy the process.
English paper-piecing can be a bit fiddly at first, but with patience and practice, you’ll master it in no time.
Enjoy the experience of sewing each clamshell; it’s truly a delightful journey!
Another tip?
Don’t skip on the basting!
It holds your pieces in place and ensures a neat finish.
Also, adjust your needle and thread tension accordingly for hand quilting.
Using Coats Bold hand quilting thread highlights your stitching beautifully.
Elevate Your Clamshell Pillow with Hand Quilting
Once you’ve assembled your clamshells, consider the magic of hand quilting.
It’s the final touch that completes the Clamshell Pillow!
Hand quilting not only adds texture but also brings an element of charm to your work.
The stitches can turn simple shapes into mesmerizing designs.
There’s a beauty in the unique imperfections made by hand quilting that adds character to your pillow.
As part of your design, don’t shy away from experimenting with different stitching patterns.
Your Clamshell Pillow will be a conversation starter, with your personal touches shining through.
Celebrate Your Creativity with the Clamshell Pillow
As we wrap up this delightful tutorial on creating the Clamshell Pillow, reflect on the joy your crafting journey brings.
Each clamshell represents effort, creativity, and the meaningful love you put into your home decor.
You’ve achieved something lovely, something that reflects your unique style!
Now that you’re wrapped up in a world of creativity, I invite you to explore other fantastic articles on this blog.
There’s a treasure trove of tutorials and inspiring projects just waiting to be discovered!
To kickstart your next creative adventure, I’ve prepared an incredible piece you can discover by tapping here.
Happy quilting!


