When I first laid eyes on the Dream Weaver Quilt, I knew right away it was love at first sight!
I had been scrolling through my favorite quilting groups on social media when I stumbled upon a stunning photo of this pattern.
The vivid colors and intricate design seemed to call to me, whispering, “Julie, you have to give this a try!” And you know what?
I thought, why not?
After all, nothing sparks joy quite like a fresh quilting project.
Fast forward to a couple of weeks later, armed with my rotary cutter and a healthy dose of excitement, I dove into creating the Dream Weaver Quilt.
It felt like embarking on an adventure filled with creativity and endless possibilities.
Each stitch carried my dreams and ideas, revealing something truly magical on my sewing machine with each pass of the needle.
I knew I had to share my experience with you all so that you, too, can create your very own masterpiece!
The Art of Color Coordination
One of the most exciting aspects of the Dream Weaver Quilt is its brilliant use of color.
The pattern allows for endless combinations and arrangements, so you can truly make it your own.
While selecting fabrics, I found myself giddy with the thought of contrasting hues and harmonious blends.
Did you know that using a color wheel can really aid you in color selection?
It was an absolute game-changer for my fabric choices!
The beauty lies not just in the fabrics themselves, but also in how they come together to tell a story.
Whether you gravitate towards bright and bold, or soft and muted, the Dream Weaver Quilt offers a canvas for your imagination.
Just remember, it’s all about enjoying the process of experimentation.
After all, isn’t that the essence of crafting?
Piecing the Dream Together
When it comes to piecing fabrics for the Dream Weaver Quilt, precision is key!
You’ll want to take your time and measure each piece carefully to ensure everything fits together seamlessly.
Experienced quilters often say that sewing is like a puzzle, and each piece has its place.
So, don’t rush the wonderful process of fitting it all together!
If you’re using a sewing machine, ensure your quarter-inch seam allowance is on point, as it can make all the difference in achieving a flawless final product.
Once I got the hang of it and established my rhythm, I found such joy in seeing my quilt top come to life!
Trust me when I say that every small effort is worth it when you see the final result unfolding before your eyes.
Materials
- Fabric: Choose a selection of 10-12 coordinating fabrics (cotton works best!)
- Rotary cutter: A sharp blade will make cutting fabric easier.
- Cutting mat: To protect your surfaces while cutting.
- Ruler: For accurate measuring and cutting of your fabric pieces.
- Needles: Use a universal needle, size 80/12 is perfect for quilting.
- Thread: Find a coordinating color thread for sewing the quilt together.
- Iron and ironing board: Pressing seams open and fabric squares flat is essential.
- Batting: Choose the right thickness for your quilt.
Preparation Tips for Success
Before jumping into making the Dream Weaver Quilt, I recommend taking a little time to prep your workspace.
A clean and organized area helps cut down on distractions and improves your overall focus, making the experience much more enjoyable.
Lay everything out neatly so that you can easily grab what you need without rummaging around.
Also, consider washing and ironing your fabric before cutting!
Pre-washing can prevent shrinkage down the line, and pressing your fabric flattens it out beautifully, leading to better cuts.
It might add a bit of time on the front end, but trust me, it will pay off when you’re working on the Dream Weaver Quilt!
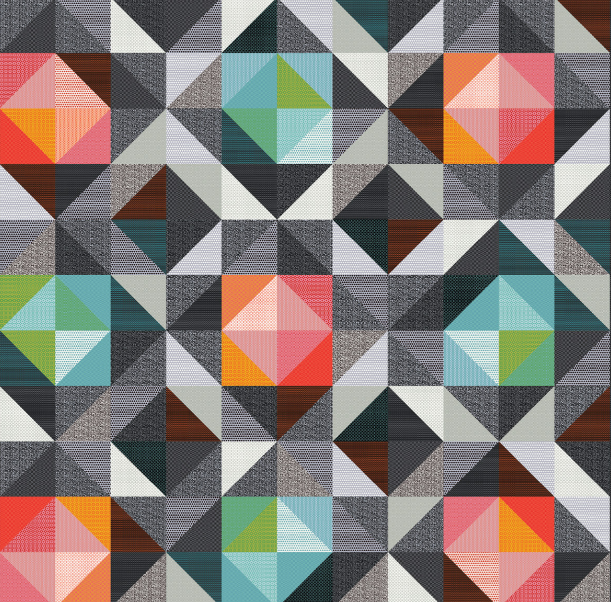
Now, the fun part—let’s jump into those step-by-step instructions!
Below the image, I’ve laid out exactly what you need to do to create your very own Dream Weaver Quilt.
And don’t forget, the full pattern can be accessed through the handy link provided!
Full Pattern: Click Here
Additional Tips for Success
Throughout your journey creating the Dream Weaver Quilt, don’t forget to take breaks when you need them.
Quilting can be quite intense, especially when you’re knee-deep in piecing.
Stepping away for a cup of tea or a short stroll can give you a rich surge of creativity and help you come back fresh!
And for those who may be feeling a little overwhelmed, remember that there is no wrong way to quilt.
Embrace your unique style and trust in your abilities.
The Dream Weaver Quilt is all about expression—so sprinkle in your personality and love as you work!
The Advanced Techniques to Try
After you’ve mastered the basics, why not experiment with advanced techniques such as paper piecing?
This technique adds a stunning degree of precision and can really elevate your Dream Weaver Quilt to the next level!
It’s a fun way to push your skills and see just how intricate you can get with your designs.
You may also want to explore machine quilting or hand quilting as you finish your quilt.
Each method offers a distinctive look, and trying both out can really broaden your quilting repertoire while deepening your appreciation for the craft!
Celebrating Your Craftsmanship!
As you wrap up your Dream Weaver Quilt, take a moment to reflect on what an incredible journey it has been.
Quilting is not just about the end result—it’s about the memories made, the skills developed, and the pure joy of creation.
So take a photo of your quilt, give yourself a high-five, and celebrate your efforts!
If you want to continue exploring exciting projects, I’ve got tons of amazing content ready just for you.
Dive into more fabulous stories and patterns that’ll keep your creative fire burning bright.
I’ve prepared an incredible piece you can check out by clicking here.
Happy quilting!


