Hey there, fellow quilting enthusiasts! Today, I’m thrilled to share with you a charming quilting project—the captivating Amish Squares Quilt Block! As we journey through this tutorial, let me take you on a trip down memory lane.
Picture this—warm summer days in the Amish countryside, with the sound of laughter and the hum of sewing machines filling the air. It was during one of my visits to an Amish community that I discovered the beauty of Amish quilting.
The stunning Amish Squares quilt block, with its exquisite design and rich history, captured my heart. And now, I’m excited to guide you through the process of creating your own Amish Squares masterpiece!
Unveiling the Amish Squares Quilt Block
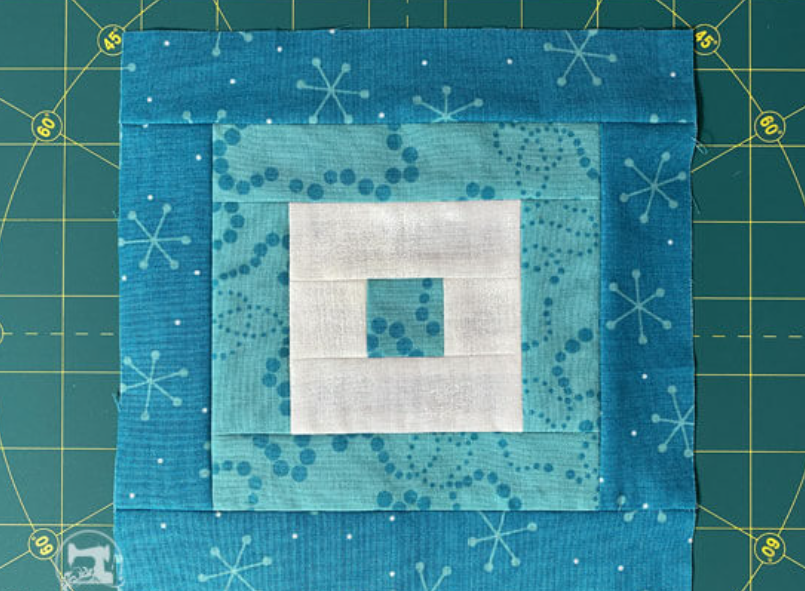
The Amish Squares quilt block is a delightful variation of the Courthouse Steps patchwork design. This particular version is quicker to piece than a standard Log Cabin block, as you can add patches to two opposite sides before jumping up to press.
This time-saving technique does not compromise accuracy and allows for a smoother and faster piecing process. In this tutorial, you’ll find step-by-step instructions and a cutting chart in five sizes, along with a coloring page for you to experiment with different color combinations.
Materials Needed
Before we begin, gather all the materials needed for this project:
- Fabric in various colors (refer to the cutting chart for quantities and sizes).
- Sewing machine and thread.
- Pins.
- Ruler and rotary cutter.
- Paper (for the coloring page).
- Iron (optional, for pressing).
Step-by-Step Tutorial:
Step 1: Cutting an Amish Squares Quilt Block
To start, we’ll cut the fabric pieces needed for the Amish Squares quilt block. Refer to the cutting chart below for the patch dimensions in three finished block sizes: 7″, 10½”, and 14″.
Cutting Chart for an Amish Squares Quilt Block: (Patch – Fabric – Quantity – Finished Block Size)
- Patch 1: Medium – 1 square – 1½” x 1½”, 2″ x 2″, 2½” x 2½”
- Patches 2 and 3: Light – 2 squares – 1½” x 1½”, 2″ x 2″, 2½” x 2½”
- Patches 4 and 5: Medium – 2 rectangles – 1½” x 3½”, 2″ x 5″, 2½” x 6½”
- Patches 6 and 7: Dark – 2 rectangles – 1½” x 5½”, 2″ x 8″, 2½” x 10½”
- Unfinished Block Size: 7½”, 11″, 14½”
- Grid Size: 1″, 1½”, 2″
Step 2: Stitch up an Amish Squares Quilt Block
With the fabric pieces cut, let’s start piecing the Amish Squares quilt block. We’ll use a traditional piecing method for this project.
- Begin by adding a light #2 square to each side of the center #1 square with right sides together (RST).
- Press the seams open to avoid bulk and shadowing.
- Next, add a light #3 rectangle to each long side of the #2/#1/#2 unit. Ensure that your seam allowance is precise for accurate piecing.
- Press the seams open, and the first round of logs is complete.
- Continue adding patches to opposite sides of the block, starting with a #4 on both sides of patches #2 and #3.
- Press the seams open.
- Add a #5 to the remaining opposite sides and press the seams open.
- Repeat the process for the #6 and #7 patches to complete the Amish Squares quilt block.
Don’t forget to check the accuracy of your stitching using the provided chart during each round to ensure the right-sized blocks.
Full Pattern: Click Here
Congratulations on crafting the charming Amish Squares Quilt Block! By following the step-by-step instructions and using your creativity, you’ve created a stunning piece of Amish-inspired art. The Amish Squares block’s rich history and captivating design make it a beautiful addition to any quilt project or a wonderful standalone piece.
As you continue on your quilting journey, remember that every stitch tells a story—a story of creativity, passion, and love for the art of quilting. Embrace the timeless tradition of quilting and let your imagination soar as you craft more delightful blocks and quilts.

