Welcome, quilting enthusiasts! In this guide, we’re taking a deep dive into the delightful world of quilting, showcasing the simple yet captivating Honeymoon Quilt Block.
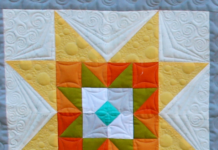
This charming star block may look complex at first glance, but it’s actually composed of basic quilting elements: half square triangles, hourglass units, and squares.
Read on to find a comprehensive, step-by-step tutorial that will guide you in creating this beautiful quilt block.
Gather Your Tools: Preparing for the Honeymoon Quilt Block
A perfect quilting project starts with having the right materials at hand. For a 12″ finished Honeymoon Block, you’ll need the following fabric requirements:
- Light/White Fabric: 2 squares of 5.5″, 4 squares of 3″, and 4 squares of 2.5″
- Medium 1/Floral Fabric: 1 square of 4.5″ and 4 squares of 2.5″
- Medium 2/Yellow Fabric: 4 squares of 3″
- Dark/Triangles Fabric: 2 squares of 5.5″
With your fabric pieces ready, we’re set to embark on our quilting journey.
Crafting Your Honeymoon Quilt Block: A Step-by-Step Guide
Half Square Triangle Units: Laying the Foundation
Step 1: Start your Honeymoon Quilt Block by creating eight Half Square Triangle units. Pair up the four Light/White 3″ squares and the four Medium 2/Yellow 3″ squares and sew them together. Make sure to trim/square up the units to a neat 2.5″ square each. These units form an integral part of your quilt block’s design, adding an intricate touch to its overall look.
Hourglass Units: Upping the Ante
Step 2: It’s time to shift gears and create four Hourglass units using the two Light/White 5.5″ squares and the two Dark/Triangles 5.5″ squares. These units, also known as Quarter Square Triangle units, will add a beautiful contrast to your Honeymoon Quilt Block. Once you’ve sewn them together, remember to trim/square up the units to 4.5″ square each.
Corner Units: Adding Intricacy
Step 3: The corner units are next on the agenda. To create these, layout a Light/White 2.5″ square, two of your Half Square Triangle units, and one Medium 1/Floral 2.5″ square.
Step 4: Bring these pieces together by sewing them into two rows. Press the seam allowances away from the Half Square Triangle units. This method will help you achieve a smooth, flat quilt block.
Step 5: The final step in creating your corner units involves sewing the two rows together. You have the flexibility to press the seam allowance as per your preference. Repeat this process until you have a total of four Corner units.
Assembling Your Honeymoon Quilt Block: The Final Countdown
Step 6: Now comes the fun part – assembly! Arrange the Corner units, the Hourglass units, and the Medium 1/Floral 4.5″ square according to your chosen layout.
Step 7: Sew the units into three rows. This is where your Honeymoon Quilt Block really starts to take shape.
Step 8: Make sure to press the seam allowances towards the Hourglass units. This will ensure that your quilt block lies flat and smooth.
Step 9: Join the three rows together to
form the complete block. This is an exciting moment as you see all your pieces come together!
Step 10: Finally, press the seam allowances toward the outside of the block. This is the last step in your crafting process. Take a step back and admire your beautifully crafted Honeymoon Quilt Block!

Full Pattern: Click Here
The Reward of the Quilting Journey
Sewing the Honeymoon quilt block can be an enjoyable and rewarding quilting journey. Despite its intricacies, this block comes together more quickly than you might anticipate.
Adding an extra color, as we did with the Half Square Triangles, can bring in an additional dimension and a touch of personal creativity.
Exploring Honeymoon Block Layout Options
The Honeymoon Block’s versatile nature allows for an array of layout options. A mere rotation of the Hourglass units can drastically transform the look of your block.
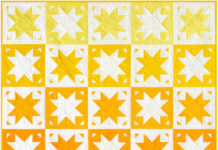
Try a simple 4 x 4 layout or experiment by alternating the Honeymoon block with an Hourglass block. Each layout brings out a unique charm, keeping your quilting adventure fresh and exciting.
Quilting, much like any art, improves with practice. Every stitch, every block, and every quilt you create contributes to your journey as a quilter. Remember to enjoy each moment of the process.
Your love for quilting and your dedication to the craft is the secret ingredient that transforms a piece of fabric into a work of art. Keep quilting, keep exploring, and most importantly, keep enjoying!


