Every time I sit down to quilt, I feel a wave of excitement wash over me.
SEE A NEW PATTERN HERE
It’s more than just fabric and thread; it’s a journey of colors and patterns that somehow turn into a beautiful piece of art.
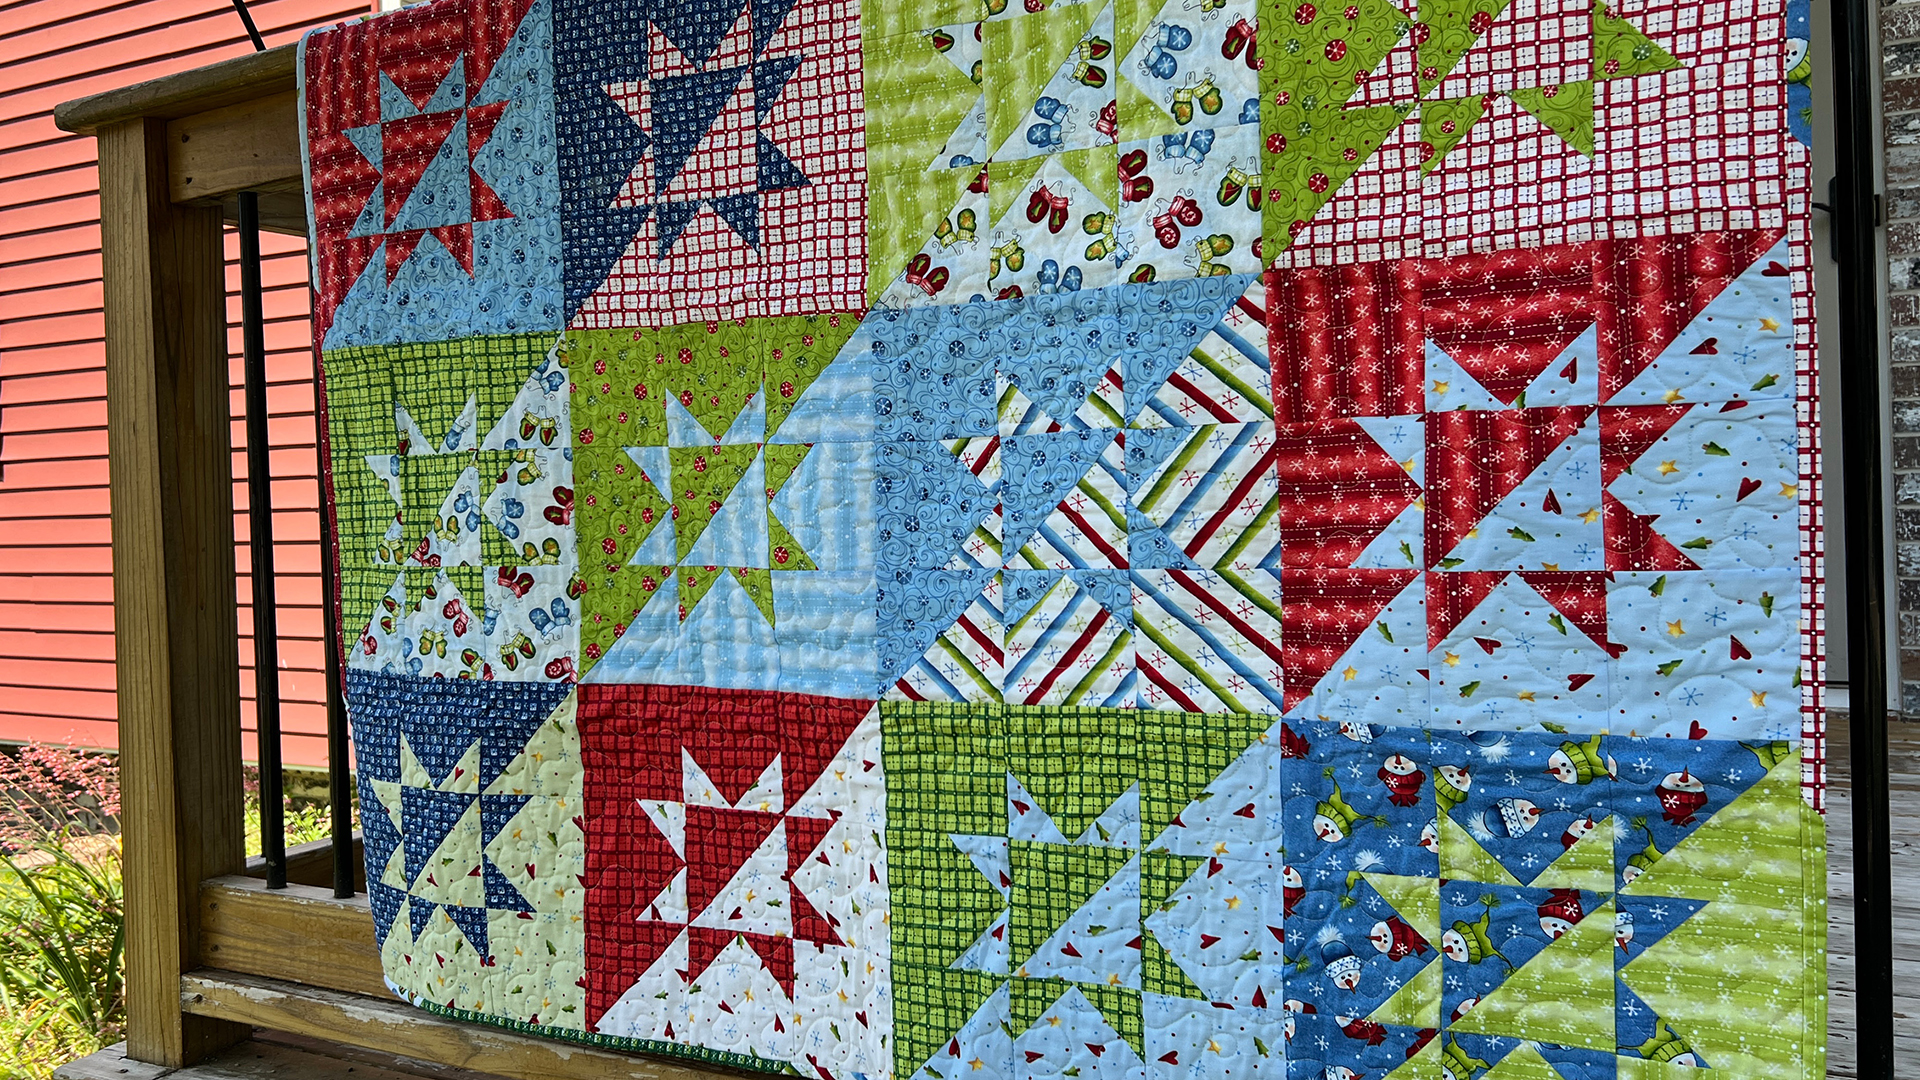
Today, I want to share my experience with the Split Stars Quilt.
This quilt not only reflects creativity but also is an incredible way to brighten up any room or gift to someone special.
When I first laid eyes on the Split Stars Quilt pattern, I knew I had to make it.
Bold colors and striking designs always pique my interest.
The way the star blocks come together creates such depth, truly lighting up my crafting space!
Let me take you along my journey of crafting this lovely quilt, and who knows?
You might feel inspired to join me!
Breaking Down the Split Stars Quilt Design
The Split Stars Quilt is not just a delightful project; it’s also an opportunity to explore various techniques of quilting.
Each star block consists of different shapes that can seem daunting, but fear not!
The design is quite forgiving and provides a great way for quilters of different skill levels to work together.
This quilt utilizes fat quarters, which makes it an exciting stash buster.
The vibrant colors can reflect the personality of the maker, making it a personal statement piece in any home.
The production of this quilt symbolizes creativity and individuality that every quilt maker yearns to express.
Getting to Know the Essential Components
For the Split Stars Quilt, thoughtful selection of your materials is paramount.
Gathering your fabric is part of the fun!
I’ll be using a mix of bold and soft prints to create a good contrast that will brighten the final quilt.
Additionally, it’s important to have the right tools ready at hand.
A rotary cutter, cutting mat, and sharp scissors are essential to help you achieve clean, precise cuts.
Enjoying the cutting stage helps me get in the right mindset for the sewing process ahead!
Gathering Your Supplies
- 16 Fat Quarters (FQs)
- 1/2 yard for optional binding
- 3 yards for backing
- Rotary Cutter
- Cutting Mat
- 8-1/2” x 24-1/2” ruler and a 6-1/2” square ruler
- 1” x 6” ruler for straight lines
- Best Press or spray starch (optional)
- Fabric marking pen/pencil
- Scissors
- Pins
- Seam ripper for any corrections
- Thread for piecing
- Iron and pressing mat
Preparing to Quilt with Split Stars
Before you delve into the sewing, I always recommend prepping your work area.
A tidy workspace helps to minimize distractions and keeps the creative juices flowing!
Make sure your workspace has enough light and that your tools are neatly organized.
Also, consider how you want to arrange your colors before you start cutting.
I like to spread out my fabric and arrange them in the order I want to cut.
This not only saves time but also helps me visualize how the colors will interact in the completed quilt.
Detailed Instructions for Creating the Split Stars Quilt
Below are the step-by-step instructions to help you create your own stunning Split Stars Quilt.
Trust me, it is a rewarding experience and the end result will leave you feeling accomplished!
Remember, if you’re looking for a full pattern, you can find it at the link below!
Full Pattern: Click Here
More Useful Tips for Successful Quilting
When piecing together your blocks, don’t rush!
It’s easy to make mistakes when you’re in a hurry.
Take breaks, measure twice, and cut once.
I like to work on one block at a time, ensuring everything lines up perfectly before moving forward.
Another tip is to use a pressing mat and iron to flatten your seams.
This simple step can significantly enhance the look of your quilt.
Pressing gives an excellent flatness to blocks before sewing them together, which can yield a more professional look to your quilt.
Advanced Techniques to Consider
If you’re feeling adventurous, try adding dimension to your Split Stars Quilt with additional embroidery or applique!
It adds a personal touch to every completed quilt square and allows for further customization.
Consider imposing borders for a stunning finish.
It frames your masterpiece beautifully and gives your quilt an added layer of sophistication.
Play with colors, perhaps picking a solid fabric that ties all your patchwork together.
Celebrate Your Crafting Journey!
As you finish your Split Stars Quilt, take a moment to admire your hard work!
Each stitch represents love, creativity, and countless hours of enjoyment.
Remember that quilting is not just about the finished product; it’s about all the moments and memories formed along the way.
If you’re hungry for more inspiration or tips, dive into the rest of my blog!
I have so much amazing content waiting for you, perfect for enlarging your quilting world!
Check out this incredible piece you won’t want to miss by clicking here.
Let’s stitch together our experiences and embrace the creative path we’ve chosen—every quilt tells a story, and yours is just waiting to be shared!


