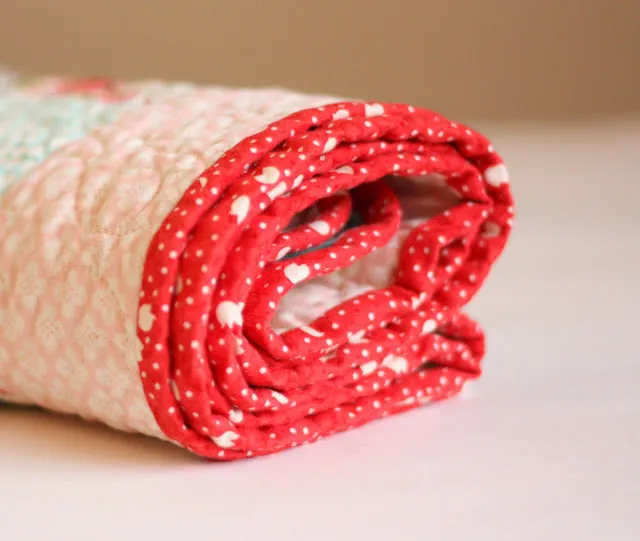
Quilting is a journey that intertwines creativity, patience, and tradition.
It’s a journey that takes you through the realms of colors, patterns, and textures. One of my earliest quilting memories is of my grandmother teaching me how to finish and bind a quilt.
This traditional quilting technique, with its simple yet elegant design, was my first foray into the world of quilting. Today, I want to take you on a detailed journey of finishing and binding a quilt, a process that’s perfect for both beginners and seasoned quilters.
The Art of Finishing and Binding a Quilt: A Closer Look
Finishing and binding a quilt is the final step in the quilting process. It involves adding that final finished edge to cover the raw edges of the fabric and batting layers after the quilt has been quilted.
One option is to roll over the back fabric edges and sew them to the front of the finished quilt. However, I personally like the look of a separate binding – it gives the quilt a clean finish and provides an opportunity to use another fabric to finish off the final design. In this tutorial, I’ll walk you through the process of finishing a quilt by sewing a separate binding to the outside edge. The best part? It’s so much easier than it looks!
Before you add the binding, you will need to “quilt” the three layers (quilt top, batting, and backing) – sometimes called a quilt sandwich. For more information on this process, you can visit the following links:
- Choosing the right batting for a quilt
- How to baste a quilt
- Tips for machine quilting a quilt at home (including free motion tips)
Materials Needed
Finishing and binding a quilt is a relatively straightforward process that doesn’t require a vast array of materials. To finish and bind a quilt, you will need:
- Binding fabric: The amount of fabric needed will depend on the size of your quilt. As a general rule, you will need enough fabric to cut strips that can go around the entire perimeter of your quilt. I typically cut my binding strips 2 ½” wide.
- Sewing machine: You will need a sewing machine to attach the binding to your quilt. I highly recommend using a machine with a walking foot, as it can help ensure that your binding is sewn on evenly.
- Thread: I recommend using 100% cotton thread, especially if your quilt is made of cotton fabric. Polyester thread may cut through the cotton layers over time.
- Cutting tools: You will need a rotary cutter and a quilting ruler to cut your binding strips. A cutting mat is also helpful to protect your work surface and ensure accurate cuts.
- Iron: An iron is essential for pressing your seams and your binding.
Step-by-Step Instructions
1. Cutting the Fabric to Finish your Quilt
I like to do a double binding on my quilts – meaning there are two layers to the binding edge. This gives the binding an extra layer of fabric to hold up against wear and tear. To get this, I typically cut my binding strips 2 ½” wide. You can cut your strips across the width of the fabric yardage, or cut them on the bias, which means to cut them diagonally across the fabric.
There are pros and cons to both methods. Cutting straight-edge is easier with less fabric waste. Bias bindings are sturdier because the fabric edge is not on the straight of grain, which helps it not wear as fast. If you are going to have any kind of curved or scalloped edge to your quilt, you will need a bias binding.
I talk more about how to finish a quilt with a Bias Bindings in this post, including how to cut the bias binding strips, piece the strips together, and sew the binding to a quilt. I also show how to bind a quilt with rounded corners.
One determining factor for whether you cut straight edge or bias binding is the fabric itself. You may want to put a stripe or a gingham on the bias to make a diagonal design for the binding. The fabric I’m using for this quilt already had a diagonal motif, so I choose the straight edge to keep the diagonal design as is.
2. How to Finish a Quilt with a Straight Edge Binding
When cutting a straight edge binding (or any straight strips of fabric) before you cut, make sure your selvage edges line up straight with each other. This may require refolding the fabric and pressing a new center fold as the fabric may come off the bolt with the selvage edges not matched up.
The square off the end of the fabric so that you get a 90-degree angle from the fold to the edge of the width of the fabric. To do this: line up the center fold on a straight line on your quilting mat. I like to put the side to be trimmed on the right side. This way I can use the straight bottom straight line on a cutting mat and the full width of my ruler to make sure I have a perfect 90-degree angle and a clean, square edge. Carefully trim the edge to create a straight edge and therefore, a straight strip of fabric.
(The reason this step is important, is that without a 90-degree again, you will end up with a V-shaped strip.)
Flip the squared-up edge to the far left of your cutting mat and use your ruler to measure the width of the binding strips. I generally cut my binding strips 2 ½” wide, unless it’s a small or mini quilt when I might cut them 2 ¼” wide.
Trim selvage edges off of all strips and sew them end to end with a ¼” seam allowance to create one long strip. Press connecting seams open (so you don’t have bulk) and then fold in half lengthwise and press.
Use a ruler and rotary cutter and the quilt top as a guide, trimming the excess batting and quilt back layers for a clean, straight edge. Be careful to keep the quilt’s sides square.
Pin the raw edges (non-folded-edge) to the raw outside edges of your quilt front. This is personal preference, but I like to pin the entire binding to the entire quilt before I sew it down. This helps keep the binding taught and prevents potential wavy quilt edges later.
3. How to Miter (or Mitre) Corners on a Quilt
When you come to the corner put a pin in the corner at a 45-degree angle. Fold strip to the side at that same 45-degree angle. Now fold the strip back on it self with the fold at the first edge of the quilt and matching up the binding edges to the edge of the second side of the quilt. Place one more pin on the new side at a 45-degree angle. This will create a little triangle flap of fabric in the corner. Repeat at all four corners. When the strip gets back around to the beginning fold the ends down so that the strips meet-up. Press with your iron to make a crease at both folds. Trim both ends to ¼” away from the folds.
Remove pins, match up strips right sides together and sew ¼” seam right on the pressed crease. Press seam open, refold strip and pin the joined binding to the quilt.
Sew binding in place using a ¼” seam allowance. I highly recommend using a walking foot if you have one. I also highly recommend 100% cotton thread – especially if your quilt is made of cotton fabric. Polyester thread may cut through the cotton layers over time.
4. Sewing Mitered Corners
When you get to the corner keep flap down and sew until you are ¼” away from the corner. Lift the needle, but do not cut the thread. Rotate the quilt and flip the little triangle flap so that it lies the opposite direction. Begin sewing next seam right at the edge of the last side. Repeat at all four corners.
When your binding is sewn to your quilt front fold the folded edge of the binding over to the back of the quilt and pin or clip in place. (I have finally started using Clover Wonder Clips which I really love – and so do the feet of my family members. Less worry about stray pins ending up in the carpet as I drag the quilt around to hand-quilt it.)
I suggest a matching cotton thread (or a thread that blends well) and a sturdy needle. Hand binding goes much more quickly if you have a needle that is longer and heavier – and I can do it with out a thimble with a heavier needle too.
After putting a knot in the end of the thread, hide the knot at the edge of the quilt where the binding will fold over and hide it. Bring the needle through the very bottom edge of the bias strip and tack it down on the backing fabric, right underneath where the needle came through. Then slide the needle through the backing fabric, behind the binding strip bringing the needle out the bottom edge again. This creates a blind stitch. Repeat!
5. Finishing Mitered Corners When Binding a Quilt
Tacking down the mitered corners is even less intimidating than attaching the binding to the quilt in the first place. And they really do look so tidy and neat.
Continue blind stitching the folded binding edge to the backside of the quilt until you get about ⅛th inch away from the edge. Make a nice 45-degree crease in the binding at the corner and then fold it back over it self. Use a couple stitches to tack down the fold for durability and then continue to blind stitch the remaining edges. Repeat at each corner.
That’s it. Honestly, it’s so much easier than it looks and once you get the hang of it, you can bind a quilt without even thinking about it.
Personally, I really like binding a quilt by hand because not only does it create a clean finish with invisible stitching, but it’s also mindless sewing and pretty much the only time I sit down to watch a movie or TV.
But binding a quilt by machine can be faster and more efficient and look equally clean and tidy. For more tips and explanation I have a Machine Binding tutorial here. There is another great machine binding tutorial by Cluck Cluck Sew.
I personally love to machine wash my machine-quilted-quilts when they are done because they soften up a lot and have a more loved, crinkly look. If you’ve used cotton batting they are likely to shrink slightly more. (I don’t machine-wash hand quilted quilts as liberally.)
I wash the quilts on a gentle cycle with a very mild soap and dry on a low heat setting. If you’re at all worried about color bleeding, the first time you wash a quilt throw in a Shout Color Catcher (available in the laundry aisle at the grocery store). Remember from our discussion on choosing fabrics for quilts, if you’re using high-quality quilt fabrics, you should have very little worry about colors bleeding.


