Hello, fellow fabric enthusiasts!
I’m Julie, and if there’s one thing I absolutely love, it’s diving into vibrant colors and patterns while crafting quilts.
With that said, let me take you on a journey into the fascinating world of quilting as I explore the Center Stage quilt pattern.
This isn’t just any quilt—it’s a canvas where whimsy meets meticulous design.
As I sit down to create this masterpiece, I can’t help but feel a rush of excitement just at the thought of watching those layers of fabric come together in a symphony of patterns.
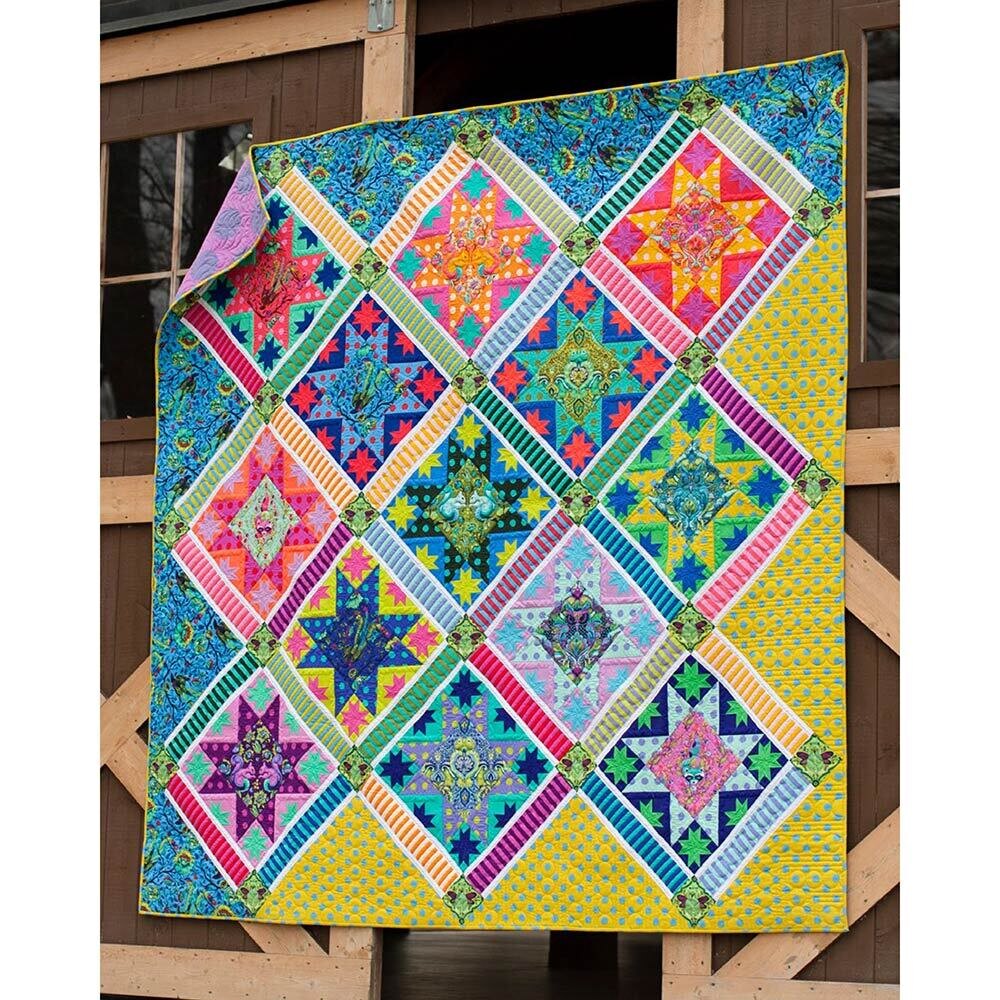
Last weekend, while scrolling through my favorite fabric store’s site, I stumbled upon the Center Stage pattern, and my heart skipped a beat.
I mean, come on—Tula Pink’s All Stars collection is not only eye-catching, but it also perfectly represents the lively and cheerful spirit I’m always aiming for in my projects.
I could already picture the finished quilt draped across my living room couch, showcasing all those adorable animal motifs.
I couldn’t resist; I just had to give it a go!
The All-Star Adventure of Fussy Cutting
When creating the Center Stage quilt, one of my favorite elements has to be the art of fussy cutting.
This technique allows you to center specific designs in your squares so that each piece showcases the charm of the fabric.
Think of it as framing a beautiful picture to ensure it stands out.
For this pattern, the fussy-cut squares will allow those beautiful animal motifs to truly shine, making the quilt an eye-catching centerpiece in any room.
Fussy cutting takes a little practice, but trust me, it’s worth the effort!
As you’re cutting, don’t be afraid to experiment with various placements until you’ve found the perfect look.
This meticulous approach is what makes the Center Stage quilt so unique; every piece tells its own story while contributing to the overall charm of the quilt.
Ready to get started?
Let’s go!
Understanding Quilt Construction
The Center Stage quilt pattern is perfect for those who consider themselves experiencing beginners.
It involves sewing a range of different units together to create a stunning layout.
As you follow the pattern, you’ll notice several techniques such as making half-square triangles (HSTs) and quarter-square triangles (QSTs).
If these terms feel a little intimidating, don’t worry!
With each step, you’ll become more comfortable and find your rhythm as you bring your vision to life.
Not only does the Center Stage quilt give you a chance to get familiar with these techniques, but it also helps you develop your cutting and precision skills.
By the end of this project, you can proudly say you tackled each aspect of quilt construction like a pro!
Materials Needed for Center Stage
- Variety of fabrics from Tula Pink’s All Stars collection
- Coats Dual Duty XP® All-purpose Thread
- 99” x 99” batting
- Sewing machine
- Rotary cutter, mat, and ruler
- Basic sewing and pressing supplies
- Your unending creativity and joy!
Once you gather all your materials for the Center Stage quilt, you’re bound to have a blast through the entire sewing process!
I recommend organizing your fabric pieces before you start cutting.
Having everything in order makes it way easier to focus on the joy of sewing rather than searching for that one elusive piece.
Each fabric carries its personality, and together, they will transform into a quilt that you can cherish for years!
Don’t forget to pay extra attention to fabric placements and colors.
Choosing which pieces to highlight provides fun choices along your journey, leading to a quilt that tells your unique story.
Prepare Yourself for Quilting
Before you start sewing, it’s important to be mentally prepared.
The Center Stage quilt is not just a project; it’s a labor of love!
So grab your favorite drink, clear your workspace, and put on some upbeat music.
Getting your groove on while you prepare to sew can make a huge difference!
As you dive into the instructions, take them one step at a time.
It’s perfectly fine to revisit steps or consult additional resources if you feel unsure.
Remember, quilting is all about enjoying the process.
If you need a break, take one!
Walking away for a bit can give you a refreshed perspective.
Step-by-Step Instructions:
Prepare to dive into the creativity with the detailed step-by-step instructions listed below.
Make sure to check out the full pattern for Center Stage via this link to ensure you have all the information you need to succeed!
Full Pattern: Click Here
Additional Tips for Success
Throughout the sewing process, always keep in mind that pressing seams accurately is key to achieving those crisp, clean edges that make your Center Stage quilt extra special.
Don’t rush it; take your time to ensure that each seam is perfect because they will set the tone for the entirety of the quilt.
Also, do a little jig of excitement when you’ve completed a section!
Celebrate those small wins—they make all the difference.
Quilting is a journey, and the more you enjoy every checkpoint along the way, the more fulfilling the experience will be!
Unwinding with Creativity
As you wrap up this adventure with the Center Stage quilt, take a moment to sit back with a sense of achievement!
Celebrate your creativity and the transformation of fabrics into a wonderful piece of art.
Trust me; there’s nothing quite like the feeling of snuggling up under your own hard work while reflecting on the fun times had during the crafting process.
If you’re hungry for more creative projects, explore the blog to discover a treasure trove of amazing content on quilting, crafting, and everything in between.
Seriously, there’s an incredible piece waiting for you that you can uncover by clicking here.
Let your creativity flow, and happy quilting!


