Greetings quilting enthusiasts! Embark on a journey back in time with a free quilting pattern that’s steeped in history. Today, we’ll be unraveling the intricate art of Manx Quilting by crafting a traditional Manx Quilt Block. Originating from the Isle of Man, Manx quilting is both a resourceful and captivating method of creating stunning quilts. So, let’s dive into this enriching project together!
Understanding the Manx Quilt Block
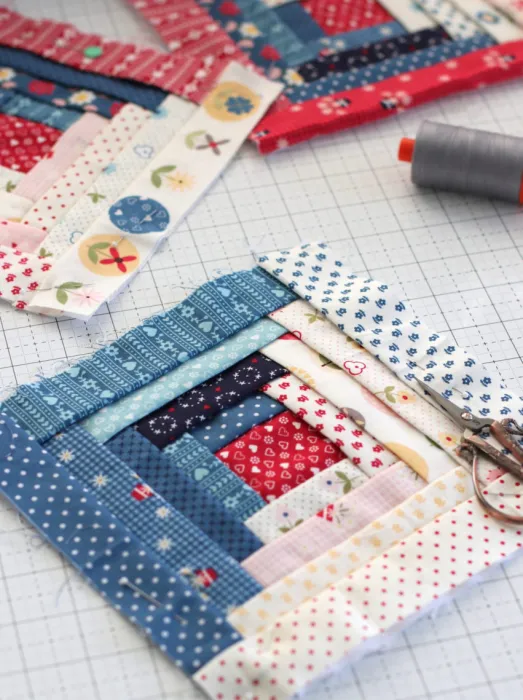
The Manx Quilt Block holds a striking resemblance to the traditional American Log Cabin quilt block, but with unique twists. This method was born out of necessity and ingenuity, using materials on hand, such as scraps of fabric, a needle, and thread. Notably, no batting, rulers, rotary cutters, or even scissors are required. An additional charm is its historical measurement system, which utilizes the span of the hand and length of the fingers.
Materials Needed
Before we begin, let’s gather our materials:
- Scraps of fabric from worn-out clothing or any fabric collection you have.
- A needle and thread.
- Your hands (for measurement).
- Pins.
Step-by-Step Guide to Creating a Manx Quilt Block
Step 1: Foundation Square
The first step is cutting a foundation square. This is done using the span of your hand as a measurement. It ensures consistent block size.
Step 2: Center Square
Next, create the center square, symbolizing the hearth of the home. This is traditionally red, with its length equivalent to the length of your middle finger.
Step 3: Surrounding Strips
The width of the surrounding strips is based on the length from the base of your thumb joint to the bottom of your thumbnail. After an initial cut, you can tear the fabric pieces.
Step 4: Backing Fabric Guide
Prepare and “mark” the backing fabric by folding it on both diagonals to get an X in the fabric. Center the ‘hearth’ square in the middle of the foundation fabric.
Step 5: Creating the Grid
Next, create a grid guide for placing the fabric “logs” by folding the edge of the foundation square up to meet the edge of the center hearth square.
Step 6: Stitching the First ‘Log’
Place the first ‘log’ or strip at the top of the hearth square and hand stitch it at about a ¼″ seam allowance. Then fold it back to line up with the first crease in the foundation square.
Step 7: Adding Logs
Repeat the process to add more logs along the edge of the existing pieces. Use the creases on the backing fabric to keep the logs uniform in size. Each time you add a new strip, rotate the foundation block clockwise 90 degrees.
Step 8: Building the Block
Continue to build the block, moving the pins to the outer strips as you go, until you have 4 logs or strips on each side of the hearth center.
Step 9: Final Touches
Stop stitching ¼″ away from the edge of each strip. This leaves space to join the pieced blocks together, creating your finished Manx Quilt Block.
Connecting the Blocks
Joining the blocks together is the final step. Decide on your layout and place the blocks right sides together. Fold back the foundation square fabric, pin in place to hold it out of the way, and then sew the blocks together with a ¼″ seam allowance. Once joined, pull the foundation fabric back in place and overlap the two.
Full Pattern: Click Here
Embarking on this quilting adventure will connect you to the rich heritage of Manx quilting and offer you a rewarding journey into the world of crafting. Creating a Manx Quilt Block may initially seem challenging, but remember, practice makes perfect! The more you immerse yourself in the quilting process, the more your skills will improve, and your love for this art will grow. So, let’s thread our needles, get our hands to work, and create beautiful, heartwarming quilts. Enjoy your journey into the world of Manx Quilting!


