Not too long ago, a vivid memory came to life when I walked into a charming old quilt shop tucked away in a rustic corner of my town.
As I ran my fingers over a beautiful array of colors and patterns, I was suddenly taken back to my grandmother’s cozy living room.
It was filled with a scent of freshly brewed tea and accompanied by the rhythmic hum of her old sewing machine. It was there that my love for quilting was born, all while marveling at the way my grandmother magically transformed bits of fabric into beautiful keepsakes.
One quilt in particular struck a chord with me that day in the shop. It was not one of those intricate, traditional designs but a simple and practical drawstring bag. It had the unique, inviting warmth of the patchwork quilt on my grandmother’s favorite chair. And in that instant, I knew I had to bring it to life again.
Let’s revisit that fond memory together and learn how to create our own Fat Quarter Drawstring Bag. This project is perfect for beginner quilters, but even experienced hands will find joy in crafting this practical and adorable bag.
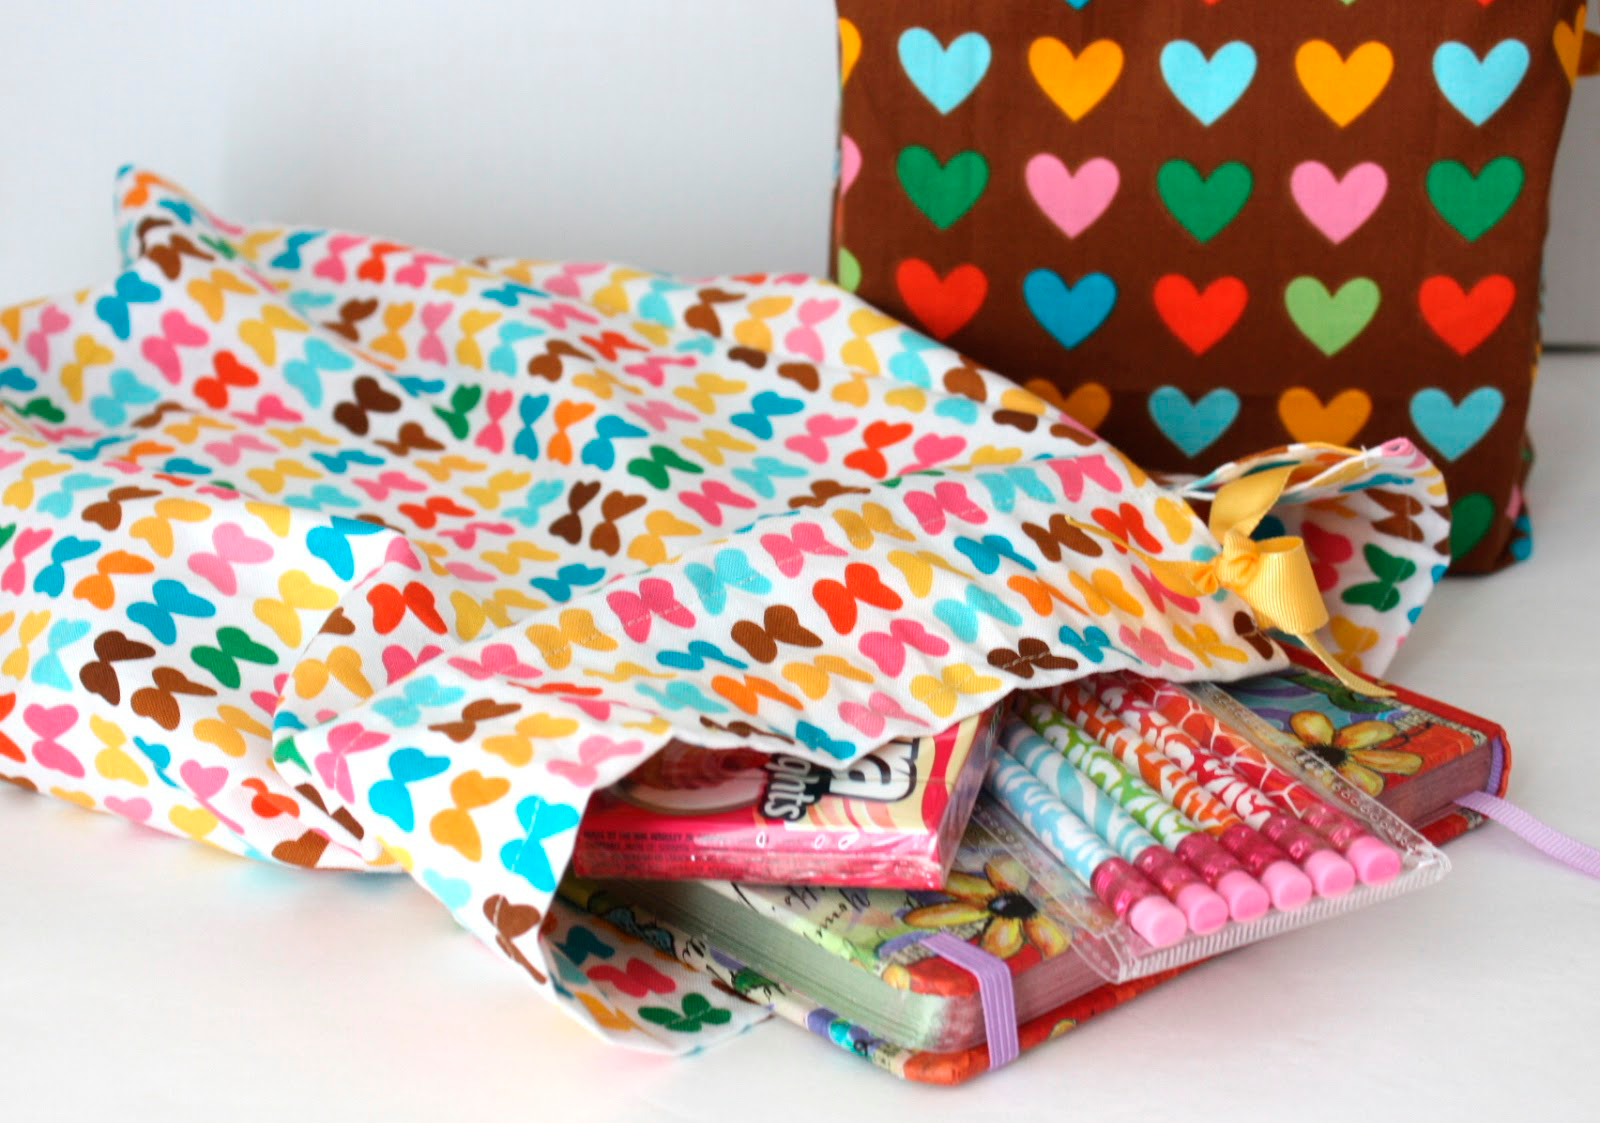
An Overview of the Project
Our project, the Fat Quarter Drawstring Bag, is a delightful and easy way to put those beautiful fat quarters to use. The simplicity of the project lets the colors and patterns of the fabric shine through. The bag is not only visually appealing but also highly functional. It’s perfect for holding quilting tools, treats, or even as a unique gift bag. Let’s dive in!
What You’ll Need
- 2 Fat Quarters of coordinating fabric
- 1/3 Yard of coordinating fabric for the drawstring casing
- 2 pieces of 1/4 inch or wider ribbon or twill tape, each 18 inches long
- A ruler
- A rotary cutter (or a pair of fabric scissors)
- Pins
- A sewing machine
- Iron and ironing board
Step-by-Step: An In-Depth Guide to Creating Your Fat Quarter Drawstring Bag
Step 1: Prepare Your Fabric
Start by thoroughly ironing your chosen fat quarters. This step is essential to remove any wrinkles or creases that could potentially interfere with the accuracy of your cuts and the overall aesthetic of your final product. Then, with the help of a ruler and a rotary cutter, or a pair of fabric scissors if you prefer, accurately cut each fat quarter into a rectangle measuring 13.5″ x 18″. This size is ideal for a versatile bag that can hold various items, but feel free to adjust if you desire a smaller or larger bag.
Step 2: Prepare the Drawstring Casing
From your 1/3 yard of coordinating fabric, cut two strips each measuring 2″ wide by the width of the fabric. These will serve as the casing for your drawstring. This element not only adds an attractive detail to your bag, but it also ensures your bag can be securely closed to protect its contents.
Step 3: Sew the Main Body of the Bag
Once you have your fabric cut to size, it’s time to start sewing. Place the two rectangles together with the right sides facing each other. Sew around three sides of your paired rectangles using a 1/4″ seam allowance. Be sure to leave one of the shorter sides open – this will become the top of your bag. After sewing, consider trimming the corners of your sewn sides for a sharper and cleaner turn once you flip the bag right side out.
Step 4: Create and Attach the Drawstring Casing
Return to the 2″ strips you previously cut for the casing. Press these strips in half lengthwise with the wrong sides together. Then, open the strip and fold each raw edge to meet at the crease in the middle. Press once more. You’re now ready to attach the casing to the bag. Position the casing on the bag, aligning the bottom edge of the casing with the top edge of the bag, and sew in place along both the top and bottom edges. This step creates the channels through which your drawstring will run.
Step 5: Thread the Drawstring
Finally, it’s time to add your drawstring. Cut your chosen ribbon or twill tape into two 18″ lengths. Using a safety pin attached to one end of your drawstring, thread one piece through both casings on one side and repeat this process with the second piece on the other side. To secure the drawstring, tie the ends together.
Voilà! After carefully following these steps, you now have your handmade, charming Fat Quarter Drawstring Bag!
Tips to Keep in Mind
While this project is straightforward, here are a few tips to make the process even more enjoyable:
- Experiment with different color and pattern combinations for a unique look.
- Always press your seams as you go. This will give your bag a neater finish.
- Consider adding a pocket or other embellishments to make the bag your own.
Full Pattern: Click Here
As I finished threading the drawstring through the casing of my bag, I felt a surge of satisfaction. The memories of my grandmother and her enchanting quilting room flashed vividly in my mind, as though stitched into every fiber of this piece. The drawstring bag wasn’t just a product of fabric and thread; it was a tangible reflection of my past, a nod to my initiation into quilting, and a testament to the countless hours spent on my grandmother’s side.
Creating the Fat Quarter Drawstring Bag was like taking a journey back in time. Each stitch, every snip of the scissors, each press of the iron seemed to resonate with the rhythms of my childhood, echoing the comforting sounds of my grandmother’s sewing machine. I realized that this simple, practical bag held much more than just my quilting tools or favorite books. It held memories, emotions, and stories passed down through generations.
This project, while simple, reconnected me with my roots. It allowed me to relive those cherished moments spent in my grandmother’s company. It reminded me of how she transformed ordinary pieces of fabric into extraordinary keepsakes and how she passed down that magical skill to me. But more than that, it was a testament to the transformative power of quilting itself – the ability to weave together not just pieces of fabric, but memories, love, and a piece of oneself into a simple yet profound creation.
