Classic Quilt Blocks have been a cornerstone of quilting for centuries.
These blocks, with their timeless designs and intricate patterns, have been passed down through generations, becoming a beloved part of every quilter’s journey.
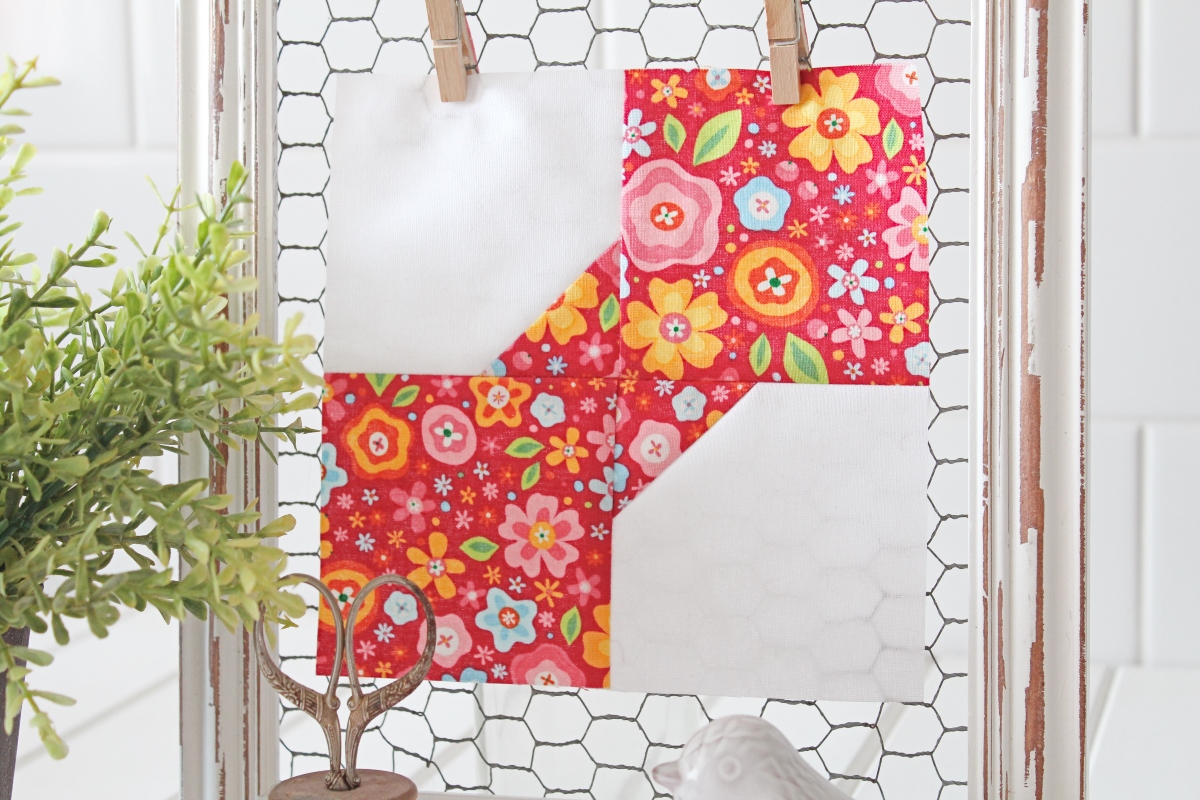
Today, we celebrate one of these iconic blocks, the Bow Tie block.
This tutorial will guide you through the process of creating your own Bow Tie block, a project that is as rewarding as it is beautiful.
Materials Needed
To make the Bow Tie quilt block, you will need:
- Background fabric
- Print fabric
- Contrasting print fabric (for the two-toned block)
- A ruler
- A fabric marker or pencil
- A sewing machine
- Thread
- Scissors or a rotary cutter
- An iron for pressing
Instructions
Step 1: Cut the Fabric
For a basic Bow Tie block (Option 1), cut the following:
- From your background fabric: 2 x 3 1/2″ squares (A)
- From your print fabric: 2 x 3 1/2″ squares (B), 2 x 2″ squares (C)
For a two-toned Bow Tie block (Option 2), cut the following:
- From your background fabric: 2 x 3 1/2″ squares (A)
- From your main print fabric: 2 x 3 1/2″ squares (B)
- From your contrasting print fabric: 4 x 2″ squares (C)
Step 2: Draw Diagonal Lines
Using a fabric marker or pencil, draw a diagonal line from corner to corner on the wrong side of each of the print (C) squares. This line will serve as your sewing guide in the next step.
Step 3: Position and Sew the Squares
With right sides together, position a print (C) square in one corner of each of the two background (A) squares. Align the raw edges, ensuring the correct orientation of the sewing line. Secure in place with a pin. Repeat this process with the print (B) squares if you’re making the two-toned block.
Using your sewing machine, sew along the drawn lines. Once sewn, trim the excess corners 1/4″ from the sewn lines. This step is crucial as it reduces bulk and allows your block to lay flat. Press the seams towards the print fabric.
Step 4: Arrange and Sew the Units
Arrange the four units into two rows of two units each. Pay close attention to the orientation of the units; the bow tie pattern emerges from the correct positioning of these units.
Sew the units together into the two rows. Press the seams in alternate directions. This technique, known as “nesting,” allows the seams to fit snugly together, reducing bulk and ensuring a flat, smooth block.
Carefully matching the center seam, sew the two rows together. Press the long seam open to complete your Bow Tie block. Your finished block should measure 6 1/2″ square.
Full Pattern: Click Here
The Bow Tie block, with its simple construction and charming design, is a testament to the enduring appeal of classic quilt blocks. Whether you’re a novice quilter just starting your journey or an experienced quilter looking for a quick and satisfying project, the Bow Tie block offers a delightful quilting experience. So, gather your materials, warm up your sewing machine, and let’s create something beautiful together. Remember, every stitch you make brings you one step closer to a finished quilt, and every quilt you make adds to the rich tapestry of your quilting journey.


