As a child, I remember visiting my grandmother’s house.
It was a cozy, warm place filled with the smell of freshly baked cookies and the soft hum of her sewing machine.
She was a quilter, and her house was adorned with her beautiful creations.
One of my favorites was a baby quilt she had made for me when I was born.
It was a simple design, but the love and care she put into each stitch made it special.
It was this quilt that inspired me to start quilting myself.
Now, I want to share with you a simple, yet beautiful quilt pattern that reminds me of my grandmother’s love for quilting. It’s called the Bricks Baby Quilt, and it’s perfect for beginners or experienced quilters looking for a quick project.
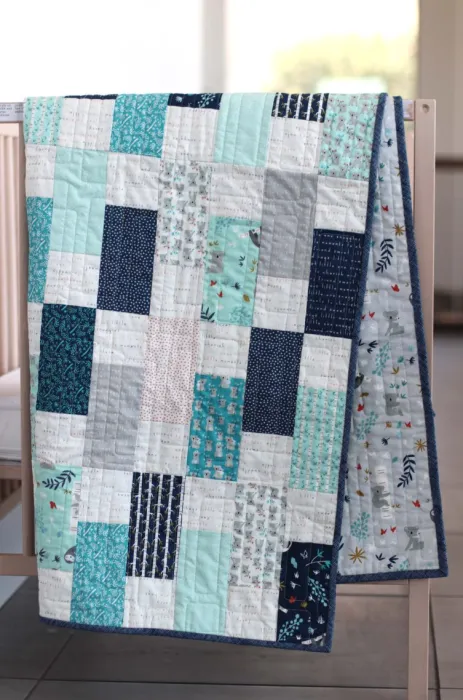
The Bricks Baby Quilt
This quilt is a modern take on the traditional bricks quilt pattern. It’s a fat quarter-friendly design, perfect for showcasing cute fabrics or using up your stash. The finished quilt measures 42″ x 54″, but you can easily modify the size by adding or removing bricks.
Materials Needed
- Bricks: 7-8 Fat Quarters OR 8 strips of fabric 6 ½″ x 42″ (Width of Fabric – WOF)
- Background fabric: ¾ yard
- Binding: ⅜ yard (if you’re cutting bias strips like I did you may want ½ yard)
- Backing: 2 ½ yards for a pieced back OR I used 1 ¾ yards + leftover front fabric bricks to piece my back.
Cutting Instructions
From the assorted prints: cut 14 pieces 6 ½″ x 21″ – you can easily cut two from a Fat Quarter, or cut them from assorted yardage.
From the Background Fabric: cut 7 strips 3 ½″ x WOF (width of fabric). Cut them in half on the fold to get 14 strips 3 ½″ x 21″.
Piecing the Quilt
- Sew a 3 ½″ x 21″ background strip to the top of a 6 ½″ x 21″ print strip. Press seam toward the print strip. Carefully trim off the end to square-up the outside edge.
- Measure over 3 ½″ and cut a 3 ½″ x 9 ½″ Brick Unit from the strip set. Continue cutting 3 ½″ units. You should be able to get 6 units per 21″ strip set.
- Repeat with 13 remaining strip sets to get 84 total 3 ½″ x 9 ½″ Brick Units.
- For each row, layout 14 Brick Units, alternating directions. You will make 6 rows of 14 Brick Units.
- Sew 14 Brick Units together to make each row. Press seams to the left on the odd rows (rows 1, 3, 5) and to the right on the even rows, (rows 2, 4, 6).
- Sew six rows together and press seams one direction.
And voila! You have a beautiful Bricks Baby Quilt.
Full Tutorial: Click Here
Quilting is more than just a hobby. It’s a way to create something beautiful and meaningful. Whether you’re making a quilt for a loved one or for yourself, each stitch is a testament to your creativity and dedication. This Bricks Baby Quilt is a simple yet beautiful pattern that any quilter, beginner or experienced, can enjoy. So grab your materials, and let’s start quilting!


