Creating a quilt is like piecing together memories, and I absolutely adore that process!
SEE A NEW PATTERN HERE
Recently, I found myself rummaging through my fabric stash, searching for a project to spark some joy and challenge my skills at the same time.
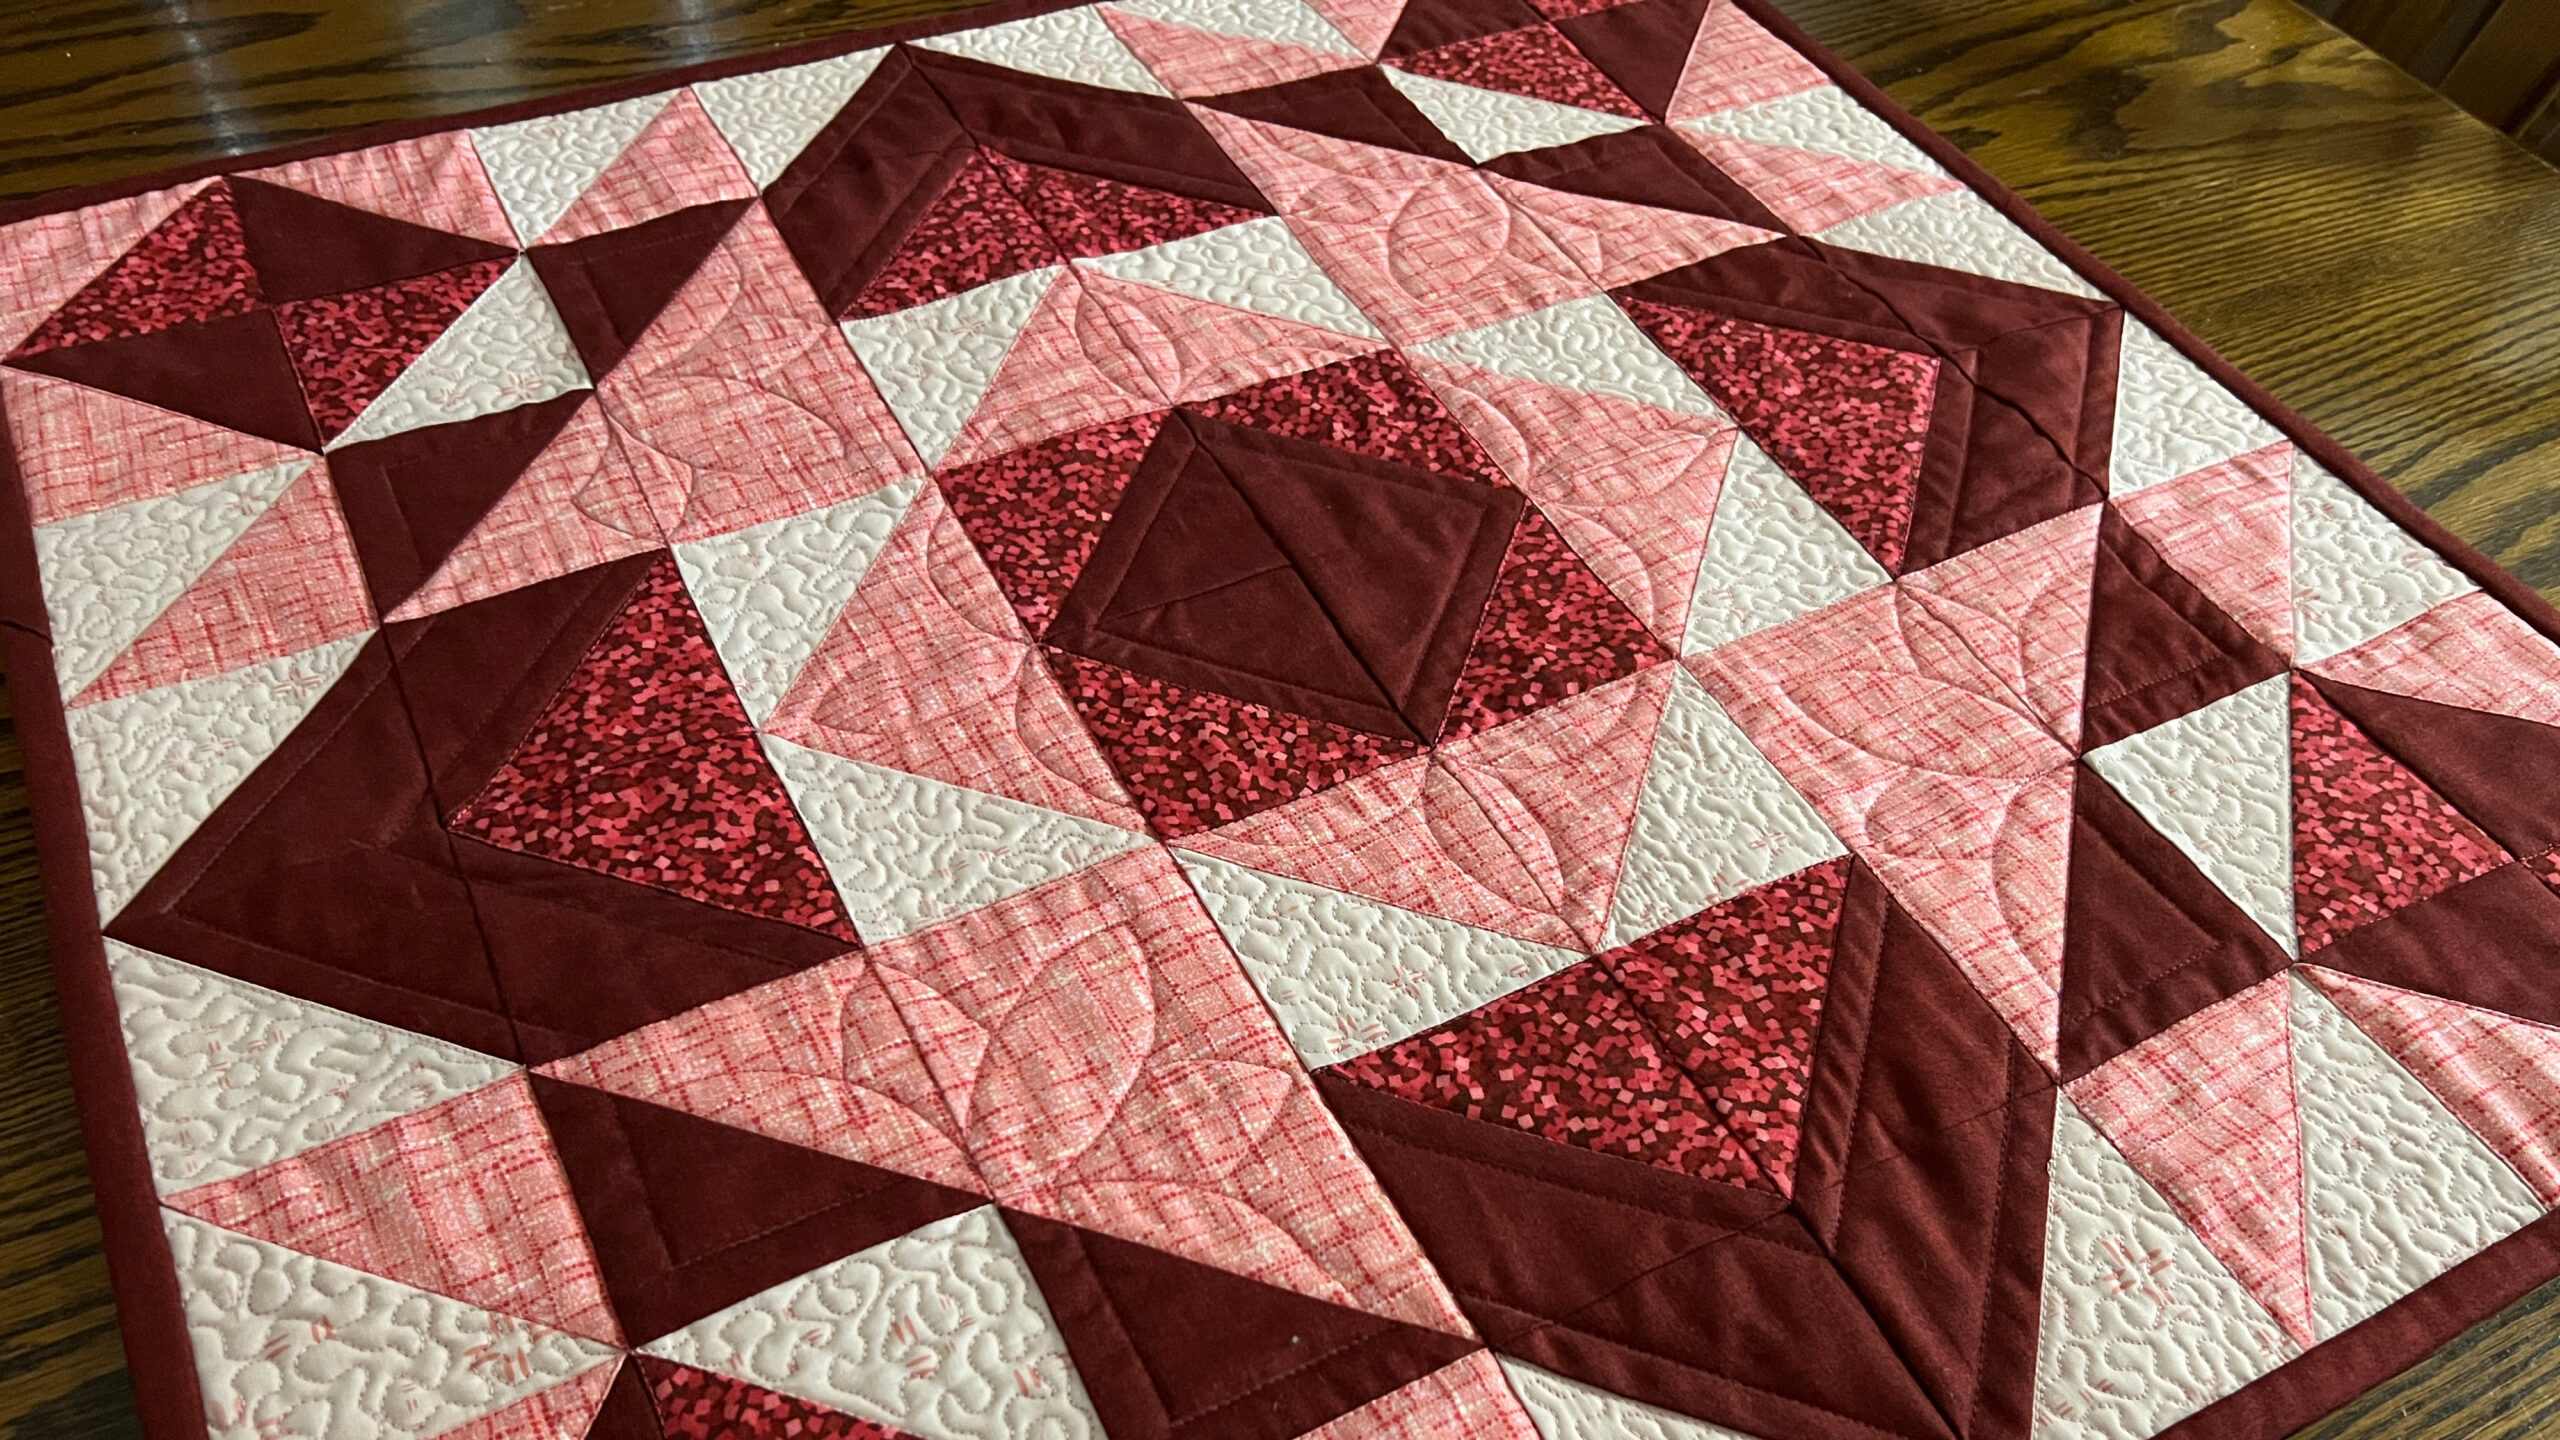
That’s when I decided to dive into the lovely Radiant Ruby quilt pattern.
This vibrant design isn’t just stunning; it also weaves together fun techniques and a splash of color that will lift your spirits.
As I started cutting the fabrics, I realized how much I enjoy the meditative nature of quilting.
Each snip of the rotary cutter felt like a tiny victory, guiding me toward the beautiful quilt top that awaited.
The Radiant Ruby quilt boasts a delightful combination of pinks and reds, which made my heart sing, especially as I watched the colors come together.
If you’re looking to elevate your quilting game with a cheerful, eye-catching project, you’re in the right place!
Adding Modern Flair to a Timeless Craft
This quilt design is a fantastic blend of traditional techniques and modern flair, making it appealing to quilters of all skill levels!
The simplicity of the Radiant Ruby quilt allows for personal customization, meaning you can play around with your favorite color combinations or even add a bit of flair with unique prints!
This pattern ensures that anyone who sees it will be captivated by its charm.
Throughout this project, I kept discovering little surprises in the design.
There’s something so rewarding about putting your own spin on a pattern, and the Radiant Ruby quilt allows exactly that.
Changing hues or even using fabric scraps can give the quilt an entirely different look, so don’t hesitate to get creative!
Materials for Your Radiant Ruby Quilt
- 1/4 yd light pink fabric
- 3/8 yd pink fabric
- 1/4 yd red fabric
- 1/2 yd dark red fabric
- 1/4 yd binding
- 3/4 yd backing
- 28” square of batting
- Rotary cutter
- Cutting mat
- 8” x 14” ruler or similar
- 4-1/2” square ruler or Tucker Trimmer I
- Fabric marking pen/pencil
- Quarter Inch Seam Marker (optional)
- Best Press or spray starch (optional)
- Scissors
- Pins
- Thread for piecing
- Iron and pressing mat
Prepping for a Flawless Finish
Before jumping into the sewing process, make sure to prep the fabric thoroughly!
Pre-washing your fabrics can save you a lot of heartache later on due to shrinkage.
It also helps to press your fabric before cutting to ensure you get those clean, crisp edges that will keep your quilt looking professional.
Trust me, starting with well-prepped fabric goes a long way.
Also, take your time while cutting your squares and triangles for the Radiant Ruby quilt.
Accuracy is key to ensure that all pieces fit together perfectly later on.
I typically crank up my favorite tunes and enjoy the rhythm of cutting and preparing the fabric.
It’s not just work; it’s part of the creative process!
Step-by-Step Instructions:
Below, I’m excited to guide you through the steps to bring your Radiant Ruby quilt to life.
I’ll be following along with you, so let’s embark on this creative journey together!
You can access the full pattern of the Radiant Ruby quilt by clicking here.
Full Pattern: Click Here
Additional Tips for Your Quilting Journey
As you work through the Radiant Ruby quilt pattern, remember to take breaks!
Quilting should be fun and relaxing, so don’t rush the process.
If you feel tired or frustrated, step away for a cup of tea or a walk.
Clear your mind, and don’t forget to enjoy the journey as much as the outcome!
Also, don’t hesitate to experiment with the quilting styles on the finished quilt!
Whether you decide to stitch in the ditch, quilt mesmerizing designs, or keep it simple, this is an opportunity to express your creativity.
Each quilt is an individual masterpiece, and yours will be extraordinary!
Exploring Advanced Techniques
If you feel adventurous, you might consider adding a few more advanced quilting techniques to your Radiant Ruby quilt.
Free motion quilting or echo quilting can add dynamism and texture to your quilt.
These techniques allow for personalized creativity that can make your quilt even more special.
Just remember to practice on a scrap piece before transferring it onto your quilt!
Additionally, consider playing with how you arrange your colors to add more depth.
Use darker shades for shadows and lighter colors for highlights to give your Radiant Ruby quilt dimension and character.
It’s all about taking your creativity to the next level and enjoying every minute!
Let’s Celebrate Every Stitch!
Once you’ve completed your Radiant Ruby quilt, take a moment to appreciate the journey you’ve just taken!
Each stitch represents your creativity, passion, and persistence.
Whether you hang it on your wall or use it as a beautiful tabletopper, your hard work deserves to be celebrated.
I hope you had as much fun reading and preparing to make the Radiant Ruby quilt as I did sharing it with you!
The world of quilting is vast and has so much incredible content to explore.
You’re sure to find more inspiration in my other blog posts, including the delightful pieces I’ve prepared for you by clicking here.
Let’s keep the quilting spirit alive together!


