Oh boy, do I have a story to share about my journey into the enchanting world of quilting!
A little while ago, I decided it was high time to step out of my comfort zone.
With a desire to create something both beautiful and functional, I stumbled upon the Geese Take Flight quilt pattern and was immediately captivated.
I mean, who wouldn’t be inspired by a design that makes you feel like you’re soaring through the sky with every stitch?
That’s when I knew this quilt was meant to be mine!
With my fabric swatches sprawled everywhere, I felt a mix of excitement and trepidation.
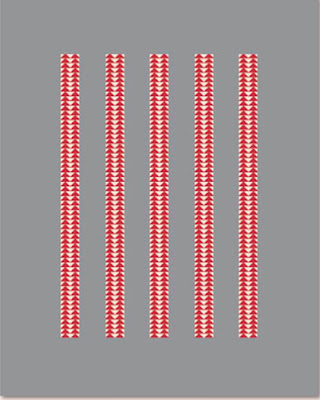
The vibrant reds and soothing gray jumped out at me, promising to transform the quilt into a stunning piece of art.
But little did I know that diving into the Geese Take Flight pattern would be an adventure full of challenges and glorious little victories!
Understanding the Artistry of Geese Take Flight
The Geese Take Flight quilt pattern is a delightful dance of colors, shapes, and textures.
As I navigated through the instructions, I truly began to appreciate the creativity and artistry behind quilting.
This pattern isn’t just a project; it’s a journey through various techniques that educate and inspire.
I found myself immersed in the world of flying geese, discovering how these charming shapes can evoke feelings of freedom and grace.
What intrigued me most about Geese Take Flight was its elegant design, which cleverly uses the concept of movement.
The precision required in cutting and assembling the pieces gave me a new respect for the craft of quilting.
Each flying geese unit came together like a mini marvel of artistry, and I couldn’t help but feel a sense of accomplishment each time I completed a row!
A Closer Look at Fabric Choices
Speaking of fabric, let’s dive into the materials needed for crafting the Geese Take Flight quilt!
It’s important to choose fabrics that not only capture your aesthetic but also work beautifully together.
After much deliberation, I chose the classic red flying geese for that pop of color, complemented by a soft gray solid.
Together, they strike a harmonious balance that really brings the quilt to life!
I’ll highlight the specifics: you’ll need 1 7/8 yards of red fabric (for those adorable flying geese), 3¾ yards of gray solid, 5/8 yard for binding, and 5 yards for the backing.
Trust me, using quality fabrics makes a world of difference not just in appearance but also in the quilting experience.
The texture of the materials can truly enhance the joy of creating!
Gathering Your Supplies
- 1 7/8 yards (1.75 m) red flying geese fabric (C946 Red)
- 3¾ yards (3.45 m) gray solid fabric (C100-13 Gray)
- 5/8 yard (60 cm) for binding
- 5 yards (4.6 m) fabric for backing
- Rotary cutter and mat
- Quilting ruler
- Sewing machine
- Thread in contrasting colors
- Iron and ironing board
There you go!
With these supplies in hand, you’re almost ready to take off on the Geese Take Flight quilt!
It’s important to mention that before you jump in, take a moment to set your workspace.
A clean, organized area can significantly improve your focus and productivity, making the creation process even more enjoyable!
Preparing for Quilting Success
Before you start cutting fabric for your Geese Take Flight quilt, I highly recommend reading through the entire pattern first.
It’s like getting a sneak peek into the journey you’re about to embark on!
Make some notes about the intricate details and specific cutting instructions to ease your sewing experience.
Don’t forget to press your fabrics before cutting!
This simple step can make a significant difference in accuracy and the overall look of your quilt.
With everything prepped and ready, you’ll find that sewing those flying geese comes with such satisfaction!
Step by Step Instructions:
Now that we’re all set, let’s get down to the nitty-gritty.
Below you’ll find the essential steps to navigate your way through the Geese Take Flight quilt pattern.
Remember, I’ll be including an image and a link to the full pattern, so stay tuned!
Full Pattern: Click Here
Additional Tips for Success
As a fellow quilter, I can share some practical tips that helped me throughout this journey with Geese Take Flight.
Always ensure your seams are consistent!
It may seem trivial, but maintaining a ¼” seam allowance will drastically improve your final product, making your quilt look professional.
Also, take your time with pressing between steps.
This can help reduce any potential fabric distortion and ensures your pieces fit together perfectly.
Remember, friends, patience means perfection when it comes to quilting!
Diving Deeper into Techniques
A noteworthy aspect of the Geese Take Flight quilt is its use of Sashing Stash.
This unique technique not only enhances the quilt’s overall aesthetics but also allows for interesting layering.
Understanding how to properly use the Sashing Stash will help maintain the integrity of your quilt design.
Feel free to explore different fabric placements and orientations when using Sashing Stash.
You might be surprised at the lovely surprises that can come out of experimenting with your fabric cuts!
Celebrating Your Quilting Journey
Wow!
What an incredible journey it has been diving deeply into the Geese Take Flight quilt pattern.
From the careful selection of fabrics to mastering the techniques along the way, you’ve taken each step with dedication and creativity.
As you put the finishing touches on your quilt, take a moment to appreciate your hard work!
If you’re itching for more quilting inspiration, I’ve got a treasure trove of articles just waiting for you to explore.
Believe me when I say the blog is filled with tons of amazing content.
You can uncover new quilting adventures and ideas by venturing here.
So go on, treat yourself to some crafty charm!
In closing, just remember that every quilt tells a story—your story!
Keep stitching, keep creating, and continue to enjoy the beautiful journey of your quilting life.


