Hey there, fellow quilting enthusiasts!
SEE A NEW PATTERN HERE
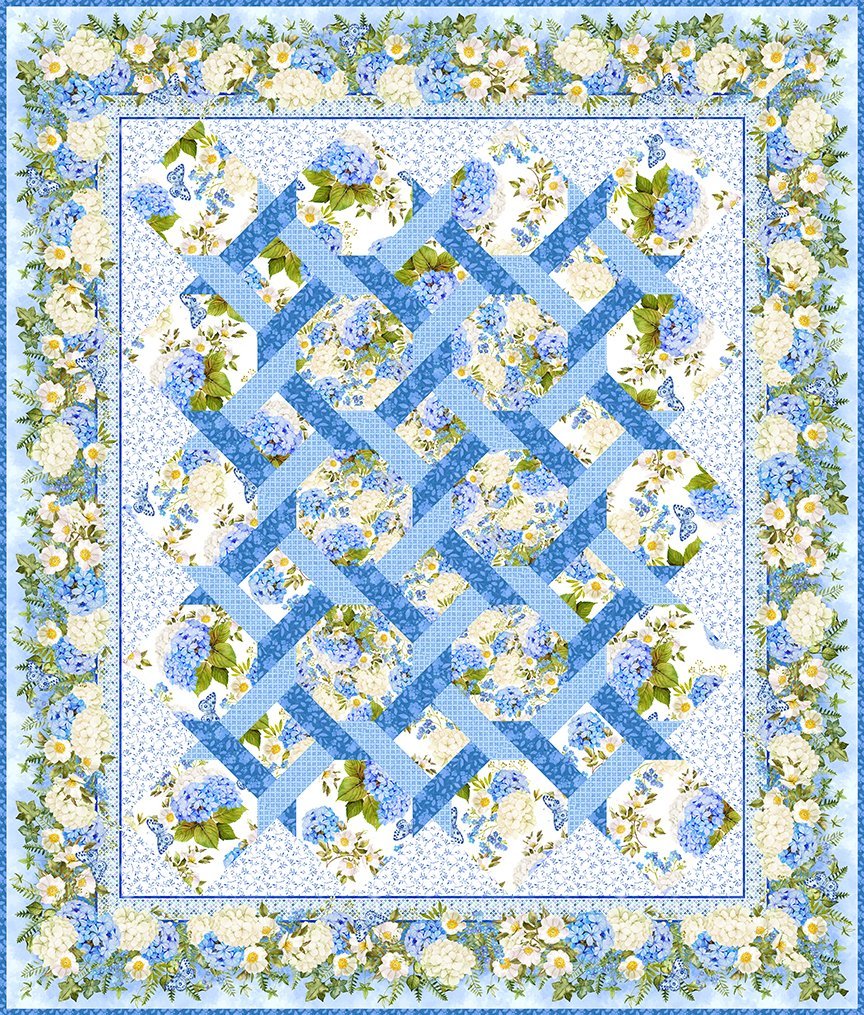
Julie here, and I can’t wait to share an absolutely fabulous project with you today—the Garden Twist Quilt!
I first encountered this stunning quilt pattern at a local craft fair, and immediately, the intricate lattice design drew me in.
It had the perfect blend of floral blocks and that clever twisting effect that just screamed creativity.
I had to give it a try!
As I embarked on making the Garden Twist Quilt, I found myself completely enamored with the process.
Each sewing session became a dance of colors and fabrics, and my love for quilting grew in leaps and bounds.
Whether you’re a seasoned pro or a daring beginner, I can promise you that this pattern is not only mesmerizing to look at but also a delightful challenge to piece together.
So, let’s get started, shall we?
Discovering the Magic of Lattice Design
The Garden Twist Quilt isn’t just any quilt; it’s a wondrous journey through fabric and design.
Its unique lattice-style creates depth and visual interest, which enables us to play with fabric choices to both highlight floral prints and unify solid colors.
It’s like putting together a puzzle, and each piece needs to fit just right to capture that twist!
It offers you the freedom to express your personality through color and pattern.
With the right combinations, you can create something that’s not only useful but also a piece of art for your home.
So, gear up for a fun adventure with this engaging quilt pattern that is bound to inspire both you and your friends!
Essential Techniques Behind Garden Twist
Let’s dive into the specifics of the techniques that make the Garden Twist Quilt truly special.
The secret lies in the expert piecing of strips and blocks which come together to form those feminine twists.
It’s about layering and positioning, making sure that each fabric shines without overshadowing the others.
This quilt pattern allows for exploration of different techniques like chain piecing which can save you loads of time and help in maintaining consistency in your stitch length.
Mastering these techniques will make the process not only efficient but also enjoyable.
You’ll be amazed at how quickly this quilt starts to come together!
Materials Needed
- Solid fabrics (at least two coordinating colors)
- Floral fabric (medium or large-scale prints)
- Rotary cutter and mat
- Quilting ruler
- Sewing machine
- Thread
- Iron and ironing board
- Pins or clips
Get Ready to Start Your Project
Before jumping into the fun, let’s prepare our workspace!
Make sure to have all your materials organized to keep chaos at bay during your sewing marathon.
Lay out your fabrics in an appealing manner; trust me, your future self will thank you as you’ll save time and avoid unnecessary frenzies.
It’s also a great idea to give your fabric a good press before cutting.
Soft, wrinkle-free fabric is not only more enjoyable to work with but also ensures more accurate cutting and piecing.
A bit of preparation will truly set the stage for the exciting adventure ahead with the Garden Twist Quilt!
Follow These Awesome Steps
Buckle up because here comes the best part: the step-by-step guide to piecing the Garden Twist Quilt!
Below this lovely image, the full pattern is at your fingertips, just a click away!
Full Pattern: Click Here
Additional Tips for Best Results
Now that we’ve discussed the steps, here are a few savvy tips to get the most from your experience with the Garden Twist Quilt.
Always remember to press after every seam.
This habit creates crisp, accurate blocks that not only look professional but are also easier to sew together.
Utilizing a consistent ¼” seam allowance can help prevent any surprises when your blocks come together.
And don’t forget about chain piecing; it’s a great way to speed up your crafting and keep everything in line.
Picking contrasting solids alongside your florals will guarantee a quilt that packs a visual punch!
Embracing Advanced Techniques
For those of you who are feeling daring, consider experimenting with free-motion quilting once you finish the top.
This technique can really accentuate the twisting lattice design and add a personal touch to each quilt!
It’s all about letting your creativity flow and making those stitches dance across the fabric.
You might also want to incorporate some decorative stitches along the seams to make the Garden Twist Quilt uniquely yours.
The possibilities are endless, and your imagination is your only limit!
Celebrating Your Creative Journey
Congratulations on taking the leap to create your very own Garden Twist Quilt!
You’ve transformed fabric into a masterpiece that showcases your hard work and creativity.
As you snuggle under your cozy quilt, take a moment to bask in the glory of your achievements.
Every stitch reflects your artistic flair, and you should be incredibly proud!
But wait, don’t just stop here!
We’ve got a treasure trove of amazing articles waiting for you to explore.
Dive into more quilting fun or perhaps find tips to tackle your next project.
If you’re ready to keep the creative juices flowing, I’ve prepared an incredible piece for you to discover by tapping your way over here.
Happy quilting!
As we wrap up this journey, let’s cherish the excitement and stories that the Garden Twist Quilt brings into our lives.
Keep your sewing machine humming and your hearts happy!


