Hey there, fellow quilting enthusiasts!
It’s Julie here, and oh boy, do I have something exciting to share with you today!
You know that feeling when you discover a new passion that just makes your heart sing?
Well, that’s how I felt when I stumbled across the world of QM Bitty Blocks!
I was binging on tutorials, and when I found out about these adorable little patterns, my creative juices started flowing uncontrollably.
The thrill of piecing together these tiny blocks makes every stitch feel like a celebration of fabric and colors!
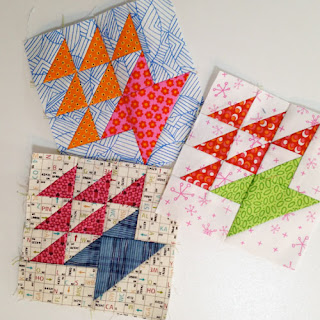
Last month, I got my hands on the QM Bitty Block pattern—the delightful 4” Basket!
It’s hard to believe something so small can spark such joy.
I thought to myself, why not share my journey with you all?
Whether you’re a seasoned quilter or just starting out, making your own QM Bitty Blocks is not only satisfying but also a gateway to creating beautifully charming quilts.
Let’s dive into this fun adventure together!
The Charm of QM Bitty Blocks
The QM Bitty Block project allows quilters of all levels to engage in an easy and joyous quilting experience.
Each month brings a fresh pattern, keeping the creative process lively and full of surprises.
What I love most is how these blocks pack a playful punch, despite their small size.
The Bitty Blocks are perfect for using up scraps, making them both practical and fun.
It opens up options to mix and match fabrics while creating unique designs for your quilts or home decor!
Additionally, these mini blocks are a fantastic way to connect with fellow quilters.
You can easily engage with the quilting community by sharing your creations through social media under the #qmbittyblocks hashtag.
There’s something special about seeing everyone’s individual interpretations of the same pattern—it brings a sense of camaraderie and inspiration that’s hard to find elsewhere!
Get Prepared: Here’s What You’ll Need!
- (4) 1-7/8″ squares of background fabric (light gray dot)
- (1) 2-7/8″ square of background fabric
- (2) Rectangles measuring 1-1/2″ x 2-1/2″ (light gray dot)
- (3) 1-7/8″ squares of Basket fabric #1 (teal)
- (1) 1-7/8″ square of Basket fabric #2 (red)
- (1) 2-7/8″ square of Basket fabric #2 (red)
Make sure to have your sewing machine threaded and ready!
I always find it helpful to have my rotary cutter, cutting mat, and iron close by.
The right tools will make the entire process smoother and more enjoyable.
And let’s be honest, if you’re like me, you want everything to be perfect when you’re creating your beautiful QM Bitty Blocks!
Tips Before You Start
Before diving into the assembly of your first QM Bitty Block, I recommend laying out all your fabric pieces and taking some time to familiarize yourself with the pattern.
This can really help you visualize the construction process and make it easier when you start sewing.
Good organization will also reduce the chances of misplacing or mixing up your squares—trust me, I’ve learned that the hard way!
Also, don’t hesitate to practice your triangle-squares technique if it’s new to you.
I found it tremendously fun and liberating!
Remember, everyone’s sewing journey is unique, so take your time, and don’t rush through it.
The goal is to have fun while creating the marvelous QM Bitty Blocks!
Step-by-Step Instructions:
Now that you’re all set with your materials and tips, let’s get to the juicy part!
Below this image, I’ll guide you through the fun and easy steps of making the 4” Basket block.
You can also find the full pattern available via the link!
Full Pattern: Click Here
Additional Tips for Success
Your journey with QM Bitty Blocks is just as crucial as the finished product, so embrace it!
One of my favorite tips is to press your seam allowances in opposite directions for each row as you sew them together.
This technique helps the seams nest, ensuring your blocks lay perfectly flat when finished.
It’s such a tiny detail, but it makes a world of difference in the overall look of your project!
As you proceed with sewing the triangle-squares and rectangles to create your basket block, enjoy the process!
Don’t sweat the small mistakes; they’re often the little quirks that add personality to your quilt.
Plus, there’s always the option to adjust and incorporate new ideas as you go along your crafting journey.
Exploring Design Considerations
As you gain confidence in creating QM Bitty Blocks, consider playing around with color combinations.
The Basket block looks stunning in various color palettes, so don’t hesitate to experiment!
Maybe something bold and bright for a playful look or a soft pastel palette for a vintage vibe—let your imagination run wild!
Also, keep in mind that the more you practice, the more skilled you will become at various sewing techniques.
Each QM Bitty Block you create brings you closer to mastering this art, and honestly, you’ll be amazed at how seamlessly your skills improve over time.
Let’s Celebrate Your Creativity!
As you piece together the glorious QM Bitty Blocks, take a moment to reflect on your creative journey.
Each block is a symbol of the joy, patience, and passion you poured into its creation.
Celebrate every tiny achievement, whether it’s making your first block or completing a whole quilt—or even sharing your creations with friends through social media!
If you’re craving more inspiration, I invite you to explore more crafty goodness on my blog!
We have a treasure trove of amazing content waiting for you.
Trust me, you don’t want to miss out on the wonderful Piece of information that awaits right here.
Keep stitching, keep creating, and remember, every QM Bitty Block is a step towards your magical quilting journey!


