Every time I pick up my sewing tools, I remember the exhilarating feeling of bringing fabric to life.
The possibilities are endless, especially when it comes to creating beautiful pieces like the Florence Quilt.
I vividly recall my first attempt at quilting; I was overwhelmed with excitement and maybe a hint of fear, as I gathered all my materials for this stunning project.
Little did I know that this journey would transform not only my crafting skills but also my outlook on creativity.
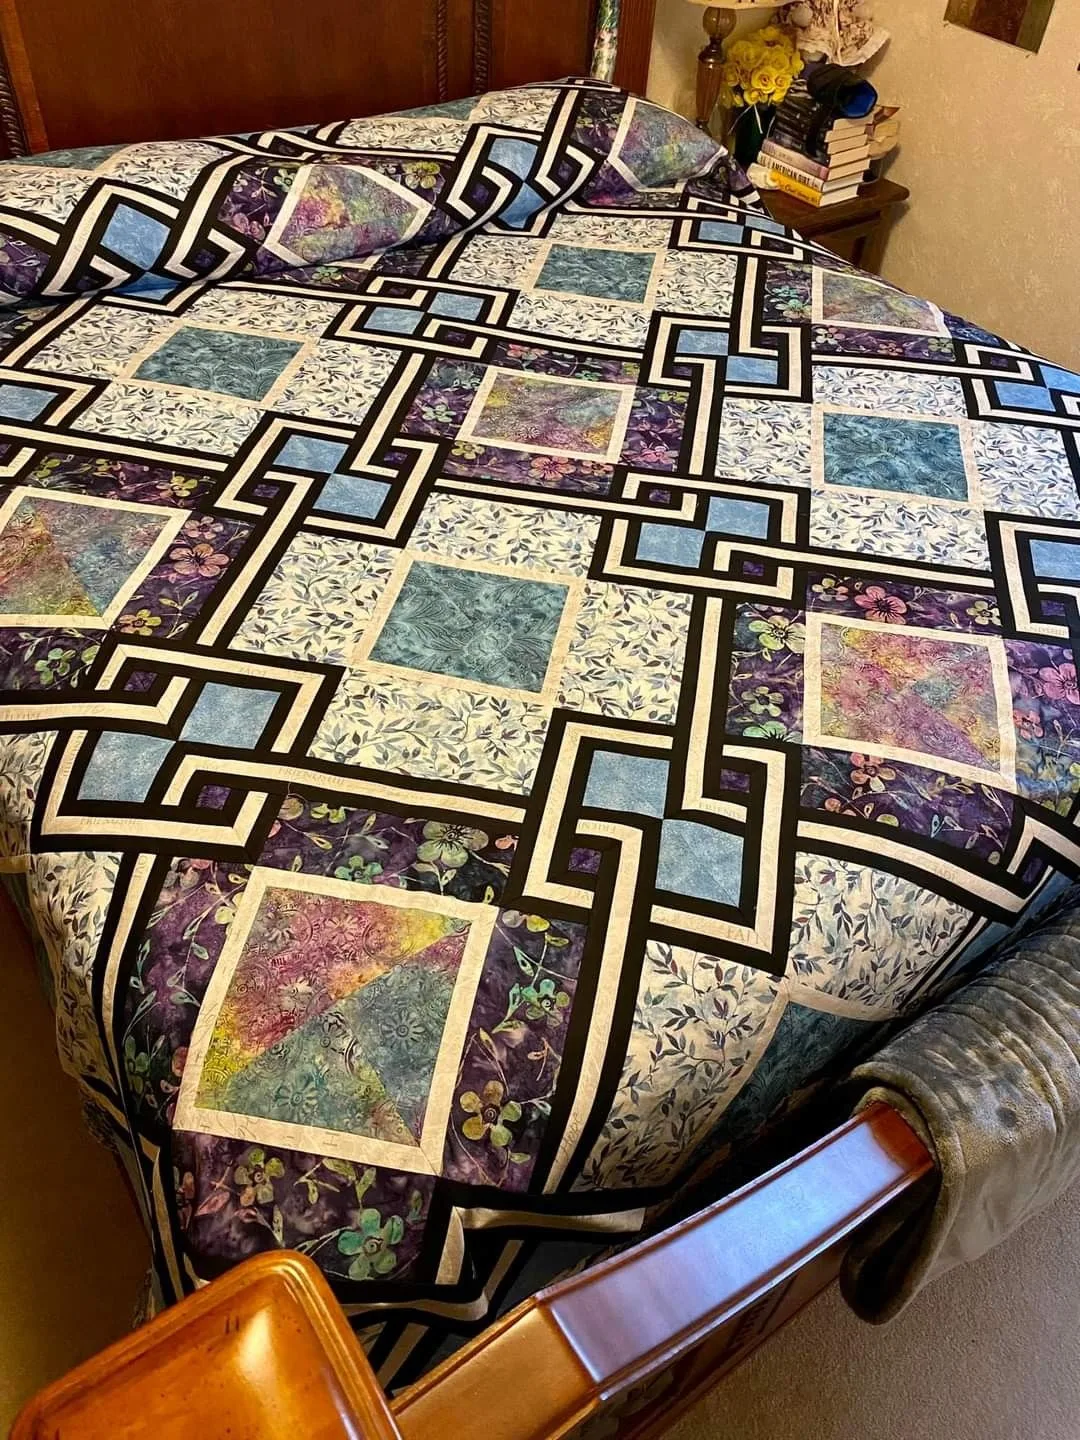
The Florence Quilt is a magnificent blend of vibrant colors and intricate designs.
It’s like a canvas where each block tells a story, and every stitch weaves a memory.
As I learned the patterns and steps involved in crafting this quilt, I felt a sense of community and shared enthusiasm amongst fellow quilters.
Each piece of fabric really does carry part of my heart, and that’s what makes the Florence Quilt so special.
A Symphony of Colors and Patterns
The Florence Quilt is designed using the Hoffman California Fabric’s Florence Collection, known for its rich, vibrant hues and eye-catching patterns.
What I love most about this collection is how the colors pop, making every finished piece a breathtaking work of art.
Each fabric from the collection—like the Black/Gold, Earl Grey/Gold, and Monaco/Gold—contributes to a harmonious blend that speaks to modern craftsmanship while honoring traditional techniques.
This quilt isn’t just about aesthetics; it has a depth that resonates with anyone who takes the time to fully immerse themselves in the creation process.
The intricate designs inspire creativity beyond the quilt itself.
The Florence Quilt serves as a reminder that art goes beyond the finished product; it encompasses the journey, the learning, and the friendships formed along the way.
Your Essential Toolkit for the Florence Quilt
- 1/2 Yard Fabric A (Black/Gold, Earl Grey/Gold, Monaco/Gold)
- 1/2 Yard Fabric B (Black/Gold, Earl Grey/Gold, Monaco/Gold)
- 1/2 Yard Fabric C (Black/Gold, Earl Grey/Gold, Monaco/Gold)
- 1-1/4 Yards Fabric D (Black/Gold, Earl Grey/Gold, Monaco/Gold)
- 5/8 Yard Fabric E (Black/Gold, Earl Grey/Gold, Monaco/Gold)
- 1-1/4 Yards Fabric F (Teal Gold, French Blue)
- 1-3/4 Yards Fabric G (Brown Gold, Black Gold, Navy Gold)
- 1-1/2 Yards Fabric H (Ivory Gold, Antique Beige Gold)
- 1-1/8 Yards Fabric I (Black/Gold, Earl Grey/Gold, Monaco/Gold)
- 5 Yards Fabric L (Backing for all colorways)
- Special Notions: Ruler, Rotary Cutter, Cutting Mat, Scissors, Pins, Thread, Iron, Sewing Machine
Before diving into creating the Florence Quilt, it’s important to gather all your materials.
I recommend pre-washing and pressing your fabrics with a spray starch to ensure everything lies beautifully flat while you work.
Taking this small extra precaution will make your life easier when piecing together the blocks.
Also, labeling your fabric as you cut makes recognizing different parts a breeze later on.
Additionally, using a quarter-inch seam allowance is crucial to ensure that all your pieces fit together perfectly.
I like to keep a seam guide next to my machine, as it keeps me steady and consistent.
Trust me, a little attention to these details will elevate your craftsmanship to new heights!
Preparing to Create: Tips to Set You Up for Success
Now that you have your materials ready, let’s talk about getting those initial cuts done before we start sewing the Florence Quilt.
Begin by cutting your fabric into the necessary pieces according to the instructions.
For example, cutting Fabric A into (10) 6-7/8” squares will yield triangles needed for the first block.
Taking the time to measure accurately here is worth it!
I recommend creating a calm workspace where you can lay out your fabrics and visualize how each piece contributes to the overall design of your Florence Quilt.
Once you see the colors come together, you’ll find your excitement amplifying as the project unfolds.
Plus, having a tidy environment minimizes distractions and maximizes creativity—win-win!
Step-by-Step Instructions:
Here’s where the magic happens!
Below, you will find the step-by-step instructions for creating the Florence Quilt.
For the full pattern with detailed diagrams, be sure to check out the link provided.
Full Pattern: Click Here
Once you’ve completed these steps, you’ll see your quilt taking shape!
With every triangle you sew together, be proud of your progress.
My recommendation?
Enjoy the process and don’t rush.
Each piece reflects your hard work and passion!
Additional Tips for Quilting Success
I can’t stress enough how important it is to keep your pieces organized as you work through the Florence Quilt.
It’s all too easy to become overwhelmed with multiple elements at play.
Lay out your pieces for each block clearly before securing them with straight pins or by sewing them together.
This way, you can visualize the final outcome at a glance, reducing the chance of mixed up pieces.
Also, don’t be shy about experimenting with the layout before the final assembly.
Sometimes a fresh perspective can lead to exciting new design choices.
Remember, quilting is as much about the process as it is about the product.
So, have fun with it!
Time to Celebrate Your Craft!
As you stitch together the final pieces of your Florence Quilt, take a moment to truly appreciate the journey you just experienced.
Every seam represents hours of hard work and creativity, so stand back and admire the beauty you’ve crafted with your own two hands.
This quilt is a testament to your talent and perseverance!
And hey, if you’re feeling inspired after your epic Florence Quilt adventure, why not check out some more amazing articles on the blog?
There’s a treasure trove of creative content just waiting for you to explore.
Dive into more quilting wonders as you unleash your creativity further; you can get started by tapping here.
Happy quilting!


