Quilting is more than just a hobby; it’s a journey into the world of creativity and color.
It’s a way to express oneself, to create something beautiful and functional, and to leave a lasting legacy.
Today, we’re going to embark on a quilting adventure together, creating a simple checkerboard pink and white patchwork quilt.
This beginner-friendly project is perfect for using up your stash or extra 5″ precut charm squares.
It’s not only a super easy stash-buster but also a perfect project to get your creativity flowing again. So, let’s dive in!
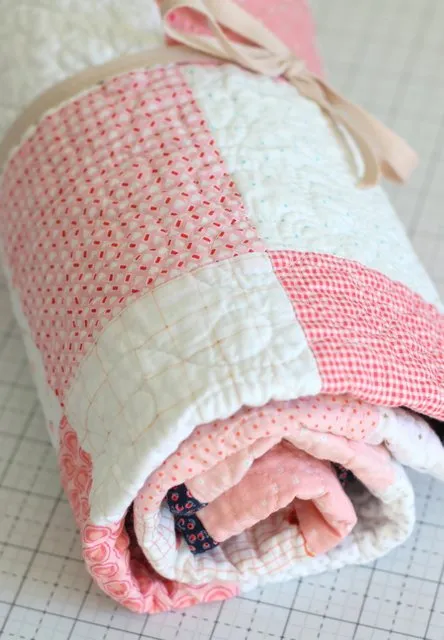
The Beauty of the Checkerboard Pink Patchwork Quilt
The charm of this quilt lies in its simplicity and versatility.
The checkerboard pattern is a classic design that never goes out of style. It’s a beautiful blend of tradition and modernity, making it a perfect fit for any decor.
The pink and white color scheme adds a touch of warmth and femininity, making it an ideal gift for a new baby girl or a cozy addition to your own home.
Materials Needed
Before we start, let’s gather all the materials we need:
- Warm pink fabrics: These will form half of your checkerboard pattern. You can use a single shade of pink or a variety of shades for a more dynamic look.
- “Low volume” white background fabrics: These will form the other half of your checkerboard pattern. Low volume fabrics are subtly patterned, adding interest without overwhelming the design.
- Pink Riley Blake Basics (optional): These are great for adding variety to your pink squares.
- Whimsical prints for “i-spy” blocks (optional): These add a playful touch to your quilt, perfect for a child’s quilt.
- Fabric for backing (1 ½ yards): Choose a fabric that complements your patchwork design.
- Fabric for binding (⅜ yard): This will frame your quilt, so choose a color that matches your design.
- Cutting tools: A rotary cutter, mat, and ruler will make cutting your squares quick and accurate.
- Sewing machine: Any basic machine capable of a straight stitch will work.
Step-by-Step Instructions
Step 1: Prepare Your Fabric Squares
Start by cutting your fabric into squares. You’ll need 49 pink 5″ x 5″ squares and 50 white 5″ x 5″ squares.
These sizes are perfect for leftover charm square precuts too. If you’re using a variety of fabrics, mix them up to create a scrappy look.
Step 2: Layout Your Squares
Next, lay out your squares in rows. You’ll want 9 squares across by 11 rows down. This will give you a finished quilt size of 40.5″ x 49.5″.
Feel free to add more rows if you’d like a larger quilt. Take some time to arrange your squares in a way that pleases your eye. This is where you can let your creativity shine!
Step 3: Sew Together Your Squares
Now it’s time to sew your squares together. Follow a simple patchwork quilt tutorial to guide you through this process.
This project is beginner-friendly, so don’t worry if you’re new to quilting. Remember to take your time and enjoy the process. Quilting is not a race; it’s a journey.
Step 4: Prepare Your Backing and Binding
For the backing, if you’re careful, you can usually get away with a single width of fabric. In this case, 1 ½ yards works great. For the binding, you’ll need ⅜ yard.
Cut 5 strips that are 2 ½” x Width of Fabric. Your binding will frame your quilt, so choose a color that complements your patchwork design.
Step 5: Finish Your Quilt
Finally, finish your quilt by binding it. If you’re not sure how to do this, there are plenty of tutorials available online.
Binding can be a bit tricky if you’re new to it, but with a little practice, you’ll get the hang of it.
Full Pattern: Click Here
And there you have it! A beautiful, simple checkerboard pink and white patchwork quilt.
This quilt is not just a piece of fabric; it’s a labor of love, a testament to your creativity, and a cozy, functional piece of art.
It’s a great way to use up your fabric stash or extra 5″ precut charm squares, and it makes a perfect gift or a cozy addition to your own home.
Remember, the beauty of quilting is that each piece is unique and a reflection of the quilter’s creativity. So don’t be afraid to experiment with different fabrics and colors.
Happy quilting!


