Discover the Charm of the Antique Tile quilt block—easy to make, yet far from dull!
This beginner-friendly design is perfect for honing your strip piecing skills, resulting in a gem of a quilt block that’ll leave you in awe.
In this tutorial, I’ll guide you through crafting the Antique Tile block in three different sizes: 6″, 9″, and 12″ finished blocks.
Trust me; you’ll be able to whip up this little beauty in no time!
Unraveling the Antique Tile Quilt Block
If you’re yearning to create a quilt block that is effortlessly charming, then the Antique Tile quilt block is just the ticket! Though the design may seem simple, it is anything but dull.
I’ll show you how to choose fabrics that create a striking contrast, making the patchwork design pop!
Materials Needed
Before we begin, gather the following materials:
- Fabric in light, medium, and dark shades with good contrast.
- Sewing machine and thread.
- Pins.
- Ruler and rotary cutter.
- Iron (optional, for pressing).
Step-by-Step Tutorial
Step 1: Choosing and Cutting Fabrics
The first step to creating your Antique Tile quilt block is choosing the right fabrics. Opt for light, medium, and dark fabrics with noticeable contrast to showcase the patchwork design.
To create a 6″, 9″, or 12″ finished block, follow the cutting chart provided for each size. Once the patches are cut, you’re all set to begin sewing!
Step 2: Create the Units
To streamline the process and minimize trips to the iron, we’ll start by completing all the strip piecing. Sew together strips #2 and #3, as well as #4 and #5. After pressing, straighten one short edge of each strip set.
For the sides, subcut the #2/#3 stripset into units as indicated in the chart. Repeat this process for the corners, subcutting the #4/#5 stripset into equal units.
Next, join the #6 rectangle to the #4/#5 patch for the corner units. Make sure both patches are equal in size before sewing.
Press the seam allowance towards the #6 rectangle to reduce bulk. Now, your corner units are ready!
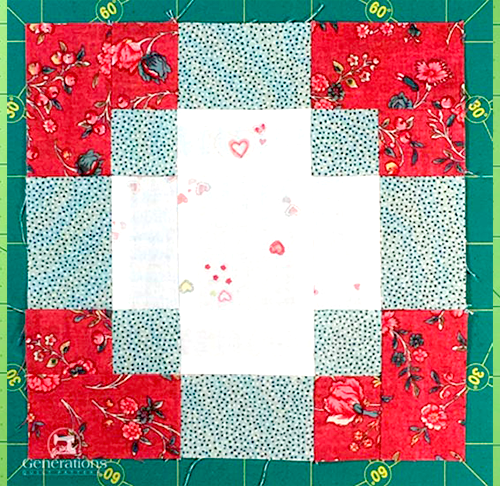
Step 3: Assemble the Antique Tile Quilt Block
Arrange your patches into rows, ensuring that the lighter fabric is closest to the center. Take advantage of the pressed seam allowance in the #2/#3 stripset, as it will nest with the seam in the corner units, making seam matching a breeze.
Stitch the units into rows, pinning if desired. Afterward, press the seam allowance in the direction indicated.
Now, sew the rows together, pinning as needed. You’ll end up with your beautiful Antique Tile quilt block!
Full Pattern: Click Here
Congratulations on creating the Antique Tile Quilt Block—a true simple beauty! With its delightful charm and alluring design, this block proves that simplicity can be far from boring.
Now, you might be wondering, “What’s next?” Well, here’s a little secret—I promise that there’s a dazzling way to set these blocks together. Head over to the next page to discover a terrific sashing strip technique that completely transforms the design, blurring the block’s edges and fooling the eyes. Your friends will be astounded by your quilting prowess—soon they’ll be calling you ‘The Quilting Houdini’!
As you continue your quilting adventure, remember that even the simplest designs can hold immeasurable beauty. Embrace the joy of quilting, and you’ll create masterpieces that speak to your unique style and creativity.
Happy quilting, and let the magic of the Antique Tile quilt block inspire your quilting journey!


