Hello, dear readers! It’s Julie here, and today I want to take you on a journey back in time. A few years ago, I received a call that I still remember vividly.
It was from a dear friend who was about to host her first big family gathering. She was filled with excitement and a bit of nervousness, as we all are when we’re about to embark on something new and significant.
She had everything planned out, from the menu to the seating arrangements, but she felt like something was missing.
She wanted to add a personal touch to the gathering, something that would make her family feel the warmth and love she wanted to share. That’s when she asked me if I could help her create a table runner that would symbolize the love and warmth she wanted to fill her home with.
The request took me back to a beautiful design I had come across in the past – the Blazing Stars table runner pattern. The pattern, filled with bold patriotic prints, was perfect for the occasion.
It was a symbol of unity, of coming together, and of the love that binds us all. Although I didn’t create the table runner myself, I guided my friend through the process, and the result was a stunning piece of art that she cherishes to this day.
Today, I want to share this beautiful pattern with you. Whether you’re a seasoned quilter or a beginner, this step-by-step guide will help you create your own Blazing Stars table runner, a piece that can add warmth and love to your gatherings.
Description of the Blazing Stars Table Runner
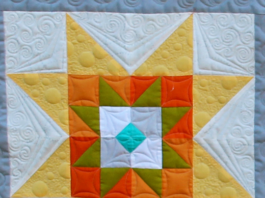
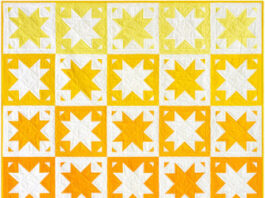
The Blazing Stars table runner is a beautiful project that you can undertake to bring a touch of patriotism and warmth to your dining table. The pattern is versatile and can be adapted for various occasions and purposes. The table runner features a three-block design, complete with bold patriotic prints, that is both intricate and charming.
Materials Needed
Before we start, here’s a list of materials you’ll need:
- 1/2 yard blue tone-on-tone (blocks, inner border, binding)
- 1/4 yard each tan star print, red star print, and mottled cream (blocks)
- 18×21″ piece (fat quarter) red tone-on-tone (blocks)
- 10″ square cream word print (blocks)
- 1/3 yard blue stripe (blocks)
- 1/3 yard red-and-cream print (outer border)
- 2/3 yard backing fabric
- 24×42″ batting
Step-by-Step Instructions
Step 1: Choose Your Pattern Size
The Blazing Stars table runner pattern is designed for a specific size: Approximately 15-1/2×33-1/2″. The finished block size is 9″ square. This size is perfect for most dining tables, providing a beautiful centerpiece without overwhelming the space.
Step 2: Gather Your Materials
Once you’ve chosen your pattern size, it’s time to gather your materials. This is an exciting part of the process, where you can choose the colors and textures that will make your table runner unique. Make sure you have enough fabric for your chosen size. The materials you’ll need include blue tone-on-tone fabric, tan star print, red star print, mottled cream, red tone-on-tone, cream word print, blue stripe, red-and-cream print, backing fabric, and batting.
Step 3: Cut and Prepare Your Fabric
With your materials gathered, it’s time to start preparing your fabric. Cut white fabric pieces according to the quilt pattern downloaded from the above link. Snip a small cut at the edge of the fabric, and tearing along the way is always better than cutting by using a scissor or rotary cutter. It will give you absolutely straight grain lines by tearing the fabric. This step requires precision, so take your time to ensure accurate measurements.
Step 4: Assemble the Blocks
Now comes the exciting part – assembling the blocks. Measurements include 1/4″ seam allowances. Sew with right sides together unless otherwise stated. Press seams in directions indicated by arrows on diagrams. If no direction is specified, press seam open. This step is where the design starts to come to life, as the individual pieces start to form a cohesive pattern.
Step 5: Assemble the Table Runner Top
With your blocks assembled, it’s time to create the table runner top. Referring to the Table Runner Assembly Diagram, lay out blocks in a row. Sew row together to make table runner center; press seams open. The table runner center should be 9-1/2×27-1/2″ including seam allowances. This step brings together all of your hard work from the previous steps, as the blocks come together to form the table runner.
Step 6: Finish the Table Runner
The final step is to finish the table runner. Layer table runner top, batting, and backing; baste. Quilt as desired. Bind with blue tone-on-tone binding strips. This step is where your table runner truly comes to life, as the layers come together to form a beautiful and functional piece of art. Take your time with this step, as the finishing touches can make all the difference in the final product.

Full Pattern: Click Here
Quilting is more than just a hobby; it’s a way to express love, creativity, and dedication. Each stitch, each piece of fabric, and each design choice tells a story. It’s a story of patience, of creativity, and of the love that goes into creating something truly unique and beautiful. The Blazing Stars table runner is a perfect example of this. It’s not just a table runner; it’s a symbol of love, unity, and the warmth of home.
As you embark on this quilting journey, remember to take your time and enjoy the process. Each step, from choosing your fabrics to making that final stitch, is an important part of the journey. Don’t rush through it; instead, savor each moment, each decision, and each stitch.
And remember, it’s not just about the end product. The process of creating your quilt is just as important. It’s about learning, growing, and creating something truly unique. It’s about putting a piece of yourself into your work and creating something that is truly yours.
So, as you embark on this quilting journey, remember to have fun, be creative, and most importantly, enjoy the process. I can’t wait to see your beautiful creations. Remember, each stitch is a symbol of love, and each table runner you create is a testament to your creativity and dedication. Happy quilting!


