Hello, everyone! This is Julie, and today I’m thrilled to take you on a special quilting journey.
As a child, my grandmother would guide my hands as we stitched together pieces of fabric, always reminding me, Julie, every quilt tells a story.
Back then, I didn’t fully grasp the depth of her words, but as I grew older and more immersed in the world of quilting, I realized that every quilt indeed weaves a tale of patience, creativity, and love.
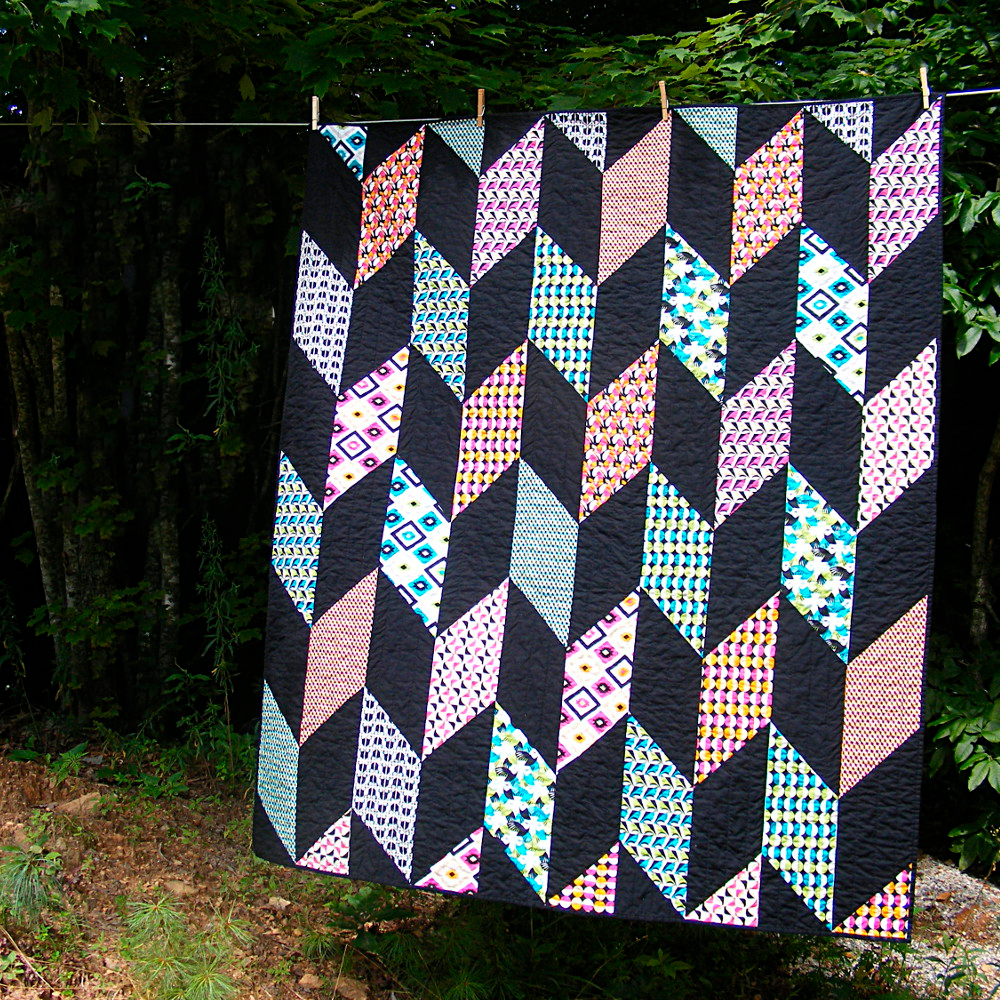
Years later, I discovered the Fletcher pattern. This design, with its use of diagonal lines, struck me as a perfect blend of simplicity and elegance.
It’s an excellent project for both beginners and experienced quilters, offering a unique way to express creativity and skill.
The moment I saw it, I was reminded of my grandmother’s teachings and the stories we used to weave together.
So, here we are, ready to embark on this quilting journey together.
Let’s dive into the Fletcher pattern, stitch by stitch, creating our own stories and continuing the legacy of love and creativity that is the essence of quilting.
Description of the Fletcher Quilt Pattern
The Fletcher quilt pattern is a fantastic introduction to using diagonal lines in your quilts. It’s designed especially for beginners, making it an easy and relaxing pattern for more experienced quilters.
The pattern uses an efficient technique that minimizes any bias stretch on those diagonal seams, leaving you with a bunch of leftover half-square triangles you can use on the quilt back. It’s easy and thrifty, making it an ideal quilt for everyone.
Materials Needed
Before we start, let’s gather our materials. Remember, the choice of fabric can dramatically affect the look of your quilt, so choose colors and textures that resonate with you. Here’s what you’ll need:
- Black fabric
- Pink fabrics (use a variety or scraps)
- Blue fabrics (use a variety or scraps)
- Fabric for backing (plus scraps)
- Fabric for binding
The exact yardage will depend on the size of the quilt you want to make. The pattern provides detailed requirements for different sizes, including a crib quilt, a napping quilt, a twin quilt, a queen quilt, and a king quilt.
Step 1: Cut Your Fabric
The first step in creating your Fletcher quilt is to cut your fabric. The pattern provides detailed cutting instructions for each size of the quilt. You’ll need to cut your black fabric, pink fabrics, and blue fabrics according to these instructions. Remember, precision is key in quilting! Take your time with this step, ensuring each piece is cut accurately. This will make the assembly process much smoother.
Step 2: Sew the Rectangles and Squares
Once your fabric is cut, it’s time to start sewing. You’ll begin by sewing the rectangles and squares together into columns. This is where the Fletcher pattern’s unique design starts to take shape. The pattern uses a technique that involves sewing a seam from corner to corner of the block, creating dramatic angled seams. The pattern provides clear instructions on how to do this, including how to mark your fabric and where to sew. This step may seem a bit challenging, especially if you’re a beginner, but don’t worry! With a bit of patience and practice, you’ll get the hang of it.
Step 3: Assemble the Quilt Top
With your columns assembled, it’s time to sew them all together to make your quilt top. This is where you’ll start to see the full design of the Fletcher pattern. The pattern provides a diagram to guide you in this process. It’s important to align your seams carefully to ensure the pattern comes out correctly. To help with this, make sure to pin at each intersection. This will help keep your fabric in place as you sew and ensure your seams line up perfectly.
Step 4: Prepare the Quilt Back
Now that your quilt top is assembled, it’s time to prepare the quilt back. The back of the quilt will be a few inches larger than the front all the way around. The pattern provides a diagram and instructions on how to do this. One of the unique aspects of the Fletcher pattern is that it includes instructions on how to use your half-square triangle scraps to create a fancy pieced strip in the middle of the quilt back. This not only adds a beautiful design element to the back of your quilt but also allows you to use up your fabric scraps, making this pattern a thrifty choice.
Step 5: Layer, Baste, Quilt, and Bind
The final step in creating your Fletcher quilt is to layer, baste, quilt, and bind. Start by layering your quilt top, batting, and quilt back together. Basting is the process of temporarily securing these three layers together so they stay in place during quilting.
Next, you’ll move on to quilting. This is where you’ll sew through all three layers of your quilt, adding texture and design. The choice of design is entirely up to you, allowing you to add a personal touch to your quilt.
Finally, you’ll bind your quilt. Binding is the fabric that wraps around the raw edges of your quilt, giving it a finished look. The pattern includes instructions on how to create and sew on your binding, ensuring your quilt is neatly finished and ready to be used or displayed.
Full Pattern: Click Here
And there you have it! Your very own Fletcher quilt. This pattern is not just about creating a beautiful quilt; it’s about embarking on a journey of creativity and patience. It’s about telling your own story through the stitches and seams of your quilt. So, whether you’re a beginner or an experienced quilter, I encourage you to try the Fletcher quilt pattern. It’s easy, it’s fun, and most importantly, it’s a story waiting to be told.
Remember, every quilt you make is a testament to your creativity and love for this craft. So, don’t be shy to show off your work. Share your quilting journey with others and inspire them to start their own. Happy quilting, everyone!


