Every quilt has a story. For me, the story of the Lattice Baby Quilt is one of family, love, and tradition.
I remember watching my mother, a seasoned quilter, meticulously crafting a lattice quilt for my newborn cousin.
The simplicity of the design, coupled with the intricate craftsmanship, left a lasting impression on me.
Today, I want to share with you a detailed tutorial for creating your own Lattice Baby Quilt, a pattern that’s close to my heart.
The Lattice Baby Quilt: An Overview
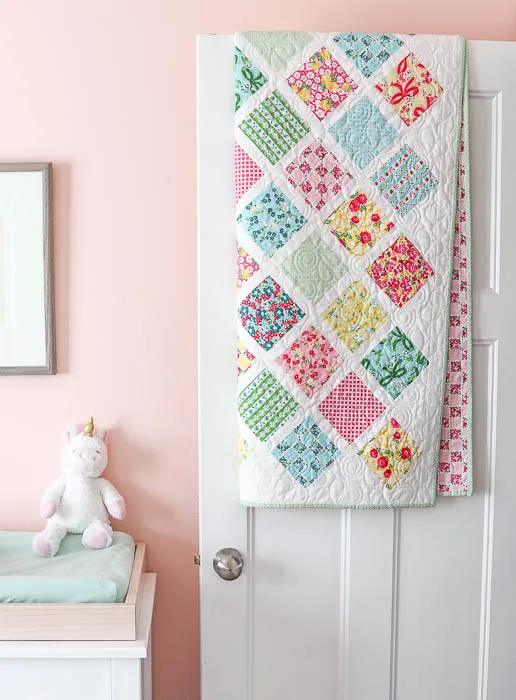
The Lattice Baby Quilt is a charming pattern that’s perfect for utilizing 5″ charm squares.
It’s a skill-builder quilt, ideal for those new to the quilting world, as it helps build your skills for piecing a quilt on the diagonal.
The finished quilt measures 41″ x 49″, making it an ideal size for a baby quilt.
Materials Needed
To create a Lattice Baby Quilt, you will need:
- 50 5″ x 5″ print squares: These will form the main body of your quilt. Choose prints that complement each other and match your desired color scheme.
- 1 ¼ yards sashing fabric: This will be used to create the lattice effect between your squares.
- 2½ yards backing fabric: Choose a fabric that complements your print squares and sashing fabric.
- ⅜ yard binding: This will neatly finish off your quilt edges.
Step-by-Step Instructions
1. Cutting Your Fabric
The first step in creating your Lattice Baby Quilt is to cut your fabric. From the sashing fabric, cut the following:
- 2 strips 5″ x wof (width of fabric)
- 1 strip 7 ¾” x wof
- 10 strips 1 ½” x wof
- 5 strips 2″ x wof for borders
From the binding fabric, cut 5 strips 2 ½” x wof.
2. Assembling the Quilt
Begin by laying out your 50 5″ x 5″ squares on point, starting with 5 squares across and 6 squares down. This layout will give you a design and balance of colors and prints that you like.
Next, start assembling rows diagonally with a side-setting triangle at the beginning and end of each row. Rows 2-9 will have a 5″ x 1½” sashing strip between the squares. This sashing creates the lattice effect that gives the quilt its name.
3. Sewing the Rows
Once all 10 rows are pieced, take the 10 1½” x wof sashing strips and trim or sew strips together to get a generous length to sew in between the pieced rows. Begin to assemble pieced rows with a sashing strip in between. Leave about 2″ of strip at the end of each row. This will allow for adjustments as you continue to piece the quilt together.
4. Adding Borders
Adding the final borders will help keep your quilt ‘square’ and prevent wavy edges. Trim the selvage edges off your 2″ x wof border strips. Stack 2 strips on top of each other and line them up down the center of the quilt. Use a pin to measure the edge of the quilt. Trim with a rotary cutter. This ensures that your borders will fit your quilt perfectly.
5. Binding
Finally, sew 5 binding strips together end to end. This binding will be used to neatly finish off the edges of your quilt, giving it a professional and polished look.
Full Pattern: Click Here
The Lattice Baby Quilt is a beautiful and simple pattern that’s perfect for showcasing a variety of fabrics. It’s a great project for both beginners and experienced quilters alike. The key to a great looking patchwork is a big variety of prints. Don’t be afraid to mix and match and make the quilt your own. With patience and creativity, you can create a beautiful Lattice Baby Quilt that will be cherished for years to come. Happy quilting!


