Quilting has always been a way for me to connect with my loved ones, weaving stories and memories into every stitch. Continuing the tradition of naming my quilt patterns after family members, I’m excited to introduce the “Kendra” quilt, named after my fifth niece. Kendra lives in Texas with her husband Cody and their three sons, and this quilt is a celebration of their vibrant, dynamic life.
The “Kendra” quilt, with its bold colors and intricate design, is not only a beautiful addition to any home but also a project that brings joy and creativity to the quilting process. This pattern is perfect for quilters who enjoy working with colorful fabrics and are looking for a project that is both challenging and rewarding. Let’s dive into the details and start creating this stunning quilt together.
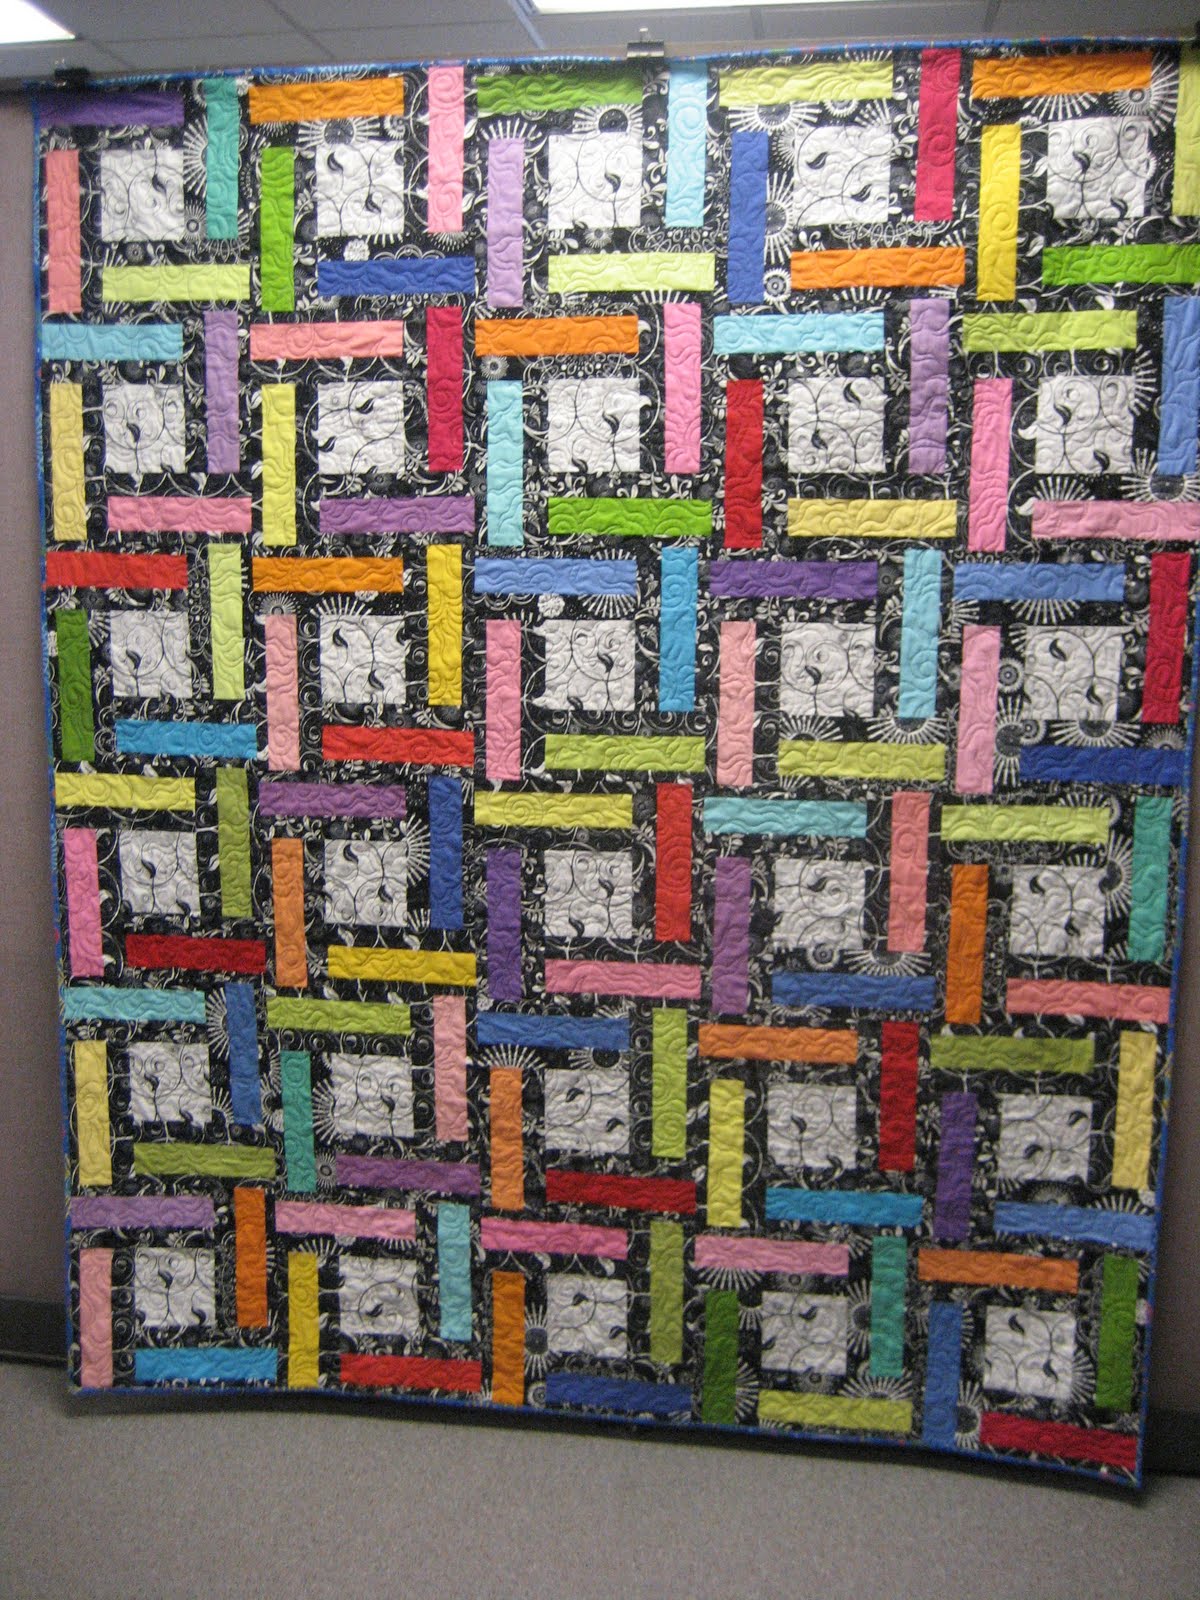
Colorful Connections: The Essence of the “Kendra” Quilt
The “Kendra” quilt pattern features a striking combination of colorful strips and contrasting black and white prints, creating a visually stunning design that is both modern and timeless. The use of Kona Cotton Rollup strips paired with fabrics from the Northcott Califon collection by Mark Lapinski adds a rich depth to the quilt, making each block a unique piece of art. This quilt is not just a project; it’s a labor of love that embodies the spirit of family and the joy of quilting.
Materials: Gathering Your Supplies
To create the “Kendra” quilt, you will need the following materials:
- Kona Cotton Rollup: Contains 42 – 2 1/2″ strips. You will use 30 strips for this quilt.
- Black Print Fabric: 4 yards (Used 4 – 1 yard cuts of different black prints from the Northcott Califon collection).
- White Print Fabric: 1 yard for block centers (from Califon collection).
- Backing Fabric: 5 1/4 yards.
- Batting: 70 x 84 inches (or larger if desired for extra quilting).
- Binding Fabric: Cut from the black print fabric.
Preparing to Quilt: Initial Steps and Tips
Before you begin piecing your “Kendra” quilt, here are some tips and initial steps to ensure a smooth quilting experience:
- Choose and Cut Your Fabrics: Ensure you have all your fabrics ready and cut to the specified sizes. Precision in cutting will make the piecing process much easier and more accurate.
- Organize Your Pieces: Lay out all your cut pieces in the order they will be sewn. This helps you visualize the final design and ensures that you don’t miss any pieces.
- Set Up Your Workspace: Make sure your sewing area is well-lit and organized, with all your materials within reach.
Step-by-Step Instructions: Creating Your “Kendra” Quilt
Full Pattern: Click Here
Follow these detailed steps to piece together your “Kendra” quilt:
- Cutting the Fabric:
- From the Kona Cotton Rollup: Pull 30 strips and cut each into 4 – 10″ strips (total 120 – 2 1/2″ x 10″ strips).
- From the Black Print Fabric:
- Cut 30 LOF (length of fabric) 2″ strips, then subcut each into 4 – 10″ strips (total 120 – 2″ x 10″ strips).
- Cut 30 LOF 1 1/4″ strips, then subcut each into 4 – 10″ strips (total 120 – 1 1/4″ x 10″ strips).
- Cut 8 LOF 2 1/2″ strips for binding (joined together diagonally).
- From the White Print Fabric: Cut 5 LOF strips 5 3/4″, then subcut into 30 – 5 3/4″ squares.
- Piecing the Strip Sets:
- Sew one 1 1/4″ and one 2″ black print strip to each side of a 2 1/2″ Kona Cotton strip. Press towards the black print.
- Arrange the strip sets on a design wall to finalize the order.
- Constructing the Blocks:
- Start with the center white print block (5 3/4″ square) and attach it to the left strip set. Sew halfway down, leaving the seam open.
- Press the seam towards the center block.
- Add the top strip set, then the right, and finally the bottom strip set, always sewing halfway down and pressing towards the center.
- Complete the block by sewing the remaining open seams. Make a total of 30 blocks (5 across and 6 down).
- Assembling the Quilt Top:
- Lay out the blocks in 5 rows of 6 blocks each.
- Sew the blocks together row by row, pressing seams as you go.
- Sew the rows together to complete the quilt top.
- Quilting and Binding:
- Layer the quilt top with batting and backing fabric.
- Quilt as desired, using your favorite quilting technique.
- Trim the edges and bind the quilt using the black print binding strips.
Additional Tips: Perfecting Your “Kendra” Quilt
- Stay Organized: Keep your strips and blocks organized by labeling them and laying them out in the order they will be sewn.
- Press Seams Carefully: Pressing seams correctly ensures that your blocks will align perfectly and lay flat.
- Take Your Time: Precision is key in quilting. Take your time to ensure that each piece is cut and sewn accurately.
Creating the “Kendra” quilt is a rewarding experience that combines vibrant colors, intricate design, and the joy of crafting something beautiful. As you wrap yourself in the finished quilt, take a moment to appreciate the artistry and effort that went into each stitch. Whether it becomes a cherished gift or a treasured addition to your home, the “Kendra” quilt is sure to bring warmth and happiness for years to come.


