Growing up in a quaint coastal town, my earliest memories are intertwined with the vast, mesmerizing sea and the colorful sails dotting the horizon.
My grandmother, a skilled quilter, often drew inspiration from our surroundings, creating quilts that seemed to capture the essence of the sea itself.
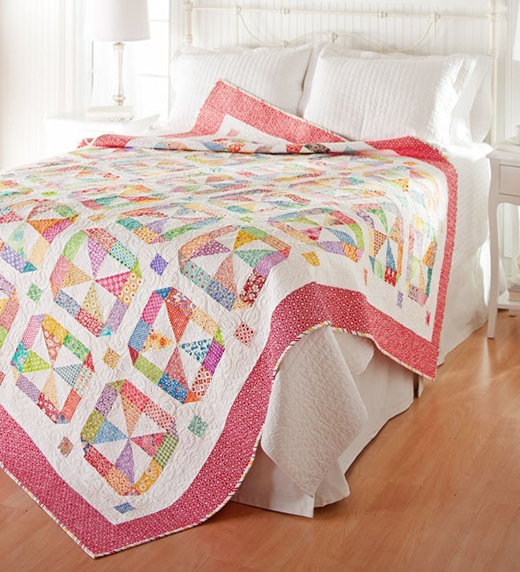
As I embarked on my latest project, the Nautical Pinwheels Quilt, memories of my childhood washed over me, reminding me of the stories and laughter shared under quilts that felt like warm hugs. This project, inspired by the Merry-Go-Round design from Kimberly Walus, is not just a quilt; it’s a homage to those cherished moments and the beauty of the sea that continues to inspire me.
A Whirlwind of Color and Sea Breezes
The Nautical Pinwheels Quilt is a vibrant ode to the sea, designed to bring the dynamic movement of waves and sails into your home. Utilizing a striking combination of navy blue and crisp, solid white, the quilt mimics the captivating dance of light on water, while the pinwheel blocks evoke the playful twirl of sails in the wind.
Each fabric in this project, sourced from the Going Coastal collection by Emily Herrick for Michael Miller Fabrics, has been chosen to embody the spirit of the sea, making this quilt a perfect piece for anyone who holds the ocean close to their heart.
Crafting Waves and Wind
This quilt project, though deeply rooted in the traditions of quilting, introduces a refreshing twist with its nautical theme. The choice of fabrics—solid white for the large triangle-squares and a variety of bright prints—brings to life the quilt’s dynamic theme.
The navy-and-white print, reminiscent of the deep, mysterious ocean, contrasts beautifully with the bright hues, representing the playful side of the sea with oranges, blues, greens, browns, and grays. The incorporation of a novelty print for the sashing squares adds an element of surprise, echoing the unpredictable nature of the sea.
Materials: Your Voyage Begins
- 7/8 yard solid white (for blocks, sashing, inner border)
- 2/3 yard total assorted bright prints in orange, blue, green, brown, and gray (for blocks)
- 18×22″ piece (fat quarter) navy-and-white print (for blocks)
- 18×22″ piece (fat quarter) novelty print (for sashing squares)
- 1 yard multicolor plaid (for outer border, binding)
- 3 yards backing fabric
- 53″ square batting
- Finished quilt size: 44-1/2″ square
- Finished block size: 12″ square
The list above gathers all the materials you will need to embark on this quilting journey. Before diving into the project, take a moment to appreciate the fabrics in front of you. Touch them, imagine the waves they will form, and visualize the completed quilt. This preparation phase is crucial, as it aligns your creative spirit with the project ahead.
Full Pattern: Click Here
Setting Sail: Preparation and Anticipation
As you stand at the threshold of this creative voyage, it’s important to remember that quilting, much like navigating the sea, requires patience, precision, and a willingness to adapt. Before cutting into your fabrics, ensure that your measurements are accurate and your tools are in good condition. This project, while offering a beautiful outcome, is a journey that will test and improve your quilting skills.
Embarking on the Creation: Step-by-Step Instructions
Assemble Triangle-Squares
- Begin by preparing your workspace. Spread out your materials, ensuring that the solid white and the assorted bright prints are within easy reach. This initial organization will streamline the process, making it a smoother sailing.
- On the wrong side of each solid white 2-7/8″ square and 4-7/8″ square, use a pencil to draw a diagonal line. This line will serve as your guide, a lighthouse guiding you through the fog, ensuring that your stitches create the perfect triangle-square.
- Place a marked solid white 2-7/8″ square on top of a bright print 2-7/8″ square, right sides together. Imagine these pieces as two ships meeting on the vast sea. Stitch 1/4″ on each side of the drawn line. This method will yield two triangle units when cut along the drawn line. Press the units open, with seams toward the bright print, forming two small triangle-squares, each a little beacon of color and light.
- Repeat the process with the solid white 4-7/8″ squares and navy-and-white print 4-7/8″ squares to create 16 large triangle-squares. These larger pieces symbolize the vastness of the ocean, framed by the solidity of the shore represented by the navy-and-white print.
Assemble Blocks
- With the small and large triangle-squares at hand, begin laying out your pieces. Place a small triangle-square, a large triangle-square, and two assorted bright print 2-1/2×4-1/2″ rectangles in two vertical rows. This step is akin to mapping out your course, ensuring each element is perfectly aligned for your journey.
- Sew together the pieces in each row, then join the rows to form a block unit. This unit, now measuring 6-1/2″ square, is a testament to the harmony between the sea and the shore, a cornerstone of your quilt’s narrative.
- Continue this process until you have 16 block units. With each unit, you’re adding another chapter to your quilt’s story, each one a reflection of the ocean’s many moods.
- To assemble a full block, sew four block units together, taking care to press seams in opposite directions for a smooth, flat finish. Your completed block should measure 12-1/2″ square, a window into the nautical world you’re crafting.
Assemble Quilt Center and Add Borders
- With your blocks ready, lay them out interspersed with solid white sashing strips and novelty print sashing squares, creating a five-horizontal-row arrangement. This layout is the quilt’s foundation, each piece a wave in the larger ocean you’re depicting.
- Sew together the pieces in each row, then join the rows to complete the quilt center. The seams pressed away from the sashing strips help maintain the quilt’s fluidity, mimicking the continuous flow of water.
- Add the inner border strips to encase the quilt center, followed by the multicolor plaid outer border strips, extending the quilt’s narrative to the edges, framing the sea of pinwheels within.
Finishing Touches
- With the quilt top assembled, layer it with the batting and backing fabric, then baste. Quilting patterns can mimic the ripple of waves, the direction of the wind, or even the paths of ships across the sea, adding another layer of storytelling to your project.
- Bind your quilt with the multicolor plaid binding strips, a final nod to the nautical theme that has guided this entire project.
Navigational Aids: Additional Tips
- When drawing the diagonal lines on your squares, use a ruler and a pencil with a fine point for precision. The sea forgives no mistakes, and neither does quilting.
- Press your fabrics as you go. Just as a ship must be in prime condition to sail, your quilt blocks must be crisp and flat for seamless assembly.
- Consider the quilting pattern as part of the quilt’s story. Whether you choose to hand quilt or machine quilt, let the pattern enhance the nautical theme, adding texture and depth to your creation.
Charting New Waters: Conclusion
As you step back to admire your completed Nautical Pinwheels Quilt, reflect on the journey you’ve undertaken. From the initial selection of fabrics to the final stitches binding the edges, you’ve woven a narrative rich with maritime lore and the timeless appeal of the sea.
This quilt, much like the sails it depicts, is a testament to skill, patience, and the beauty of setting sail into the unknown. May it bring warmth and the spirit of adventure to all who rest beneath its waves.


