Spring has always held a special place in my heart—a season of renewal and vibrant colors.
With the sunshine breaking through winter’s gray cloak, I find myself wanting to bring a bit of that bright energy into my home.
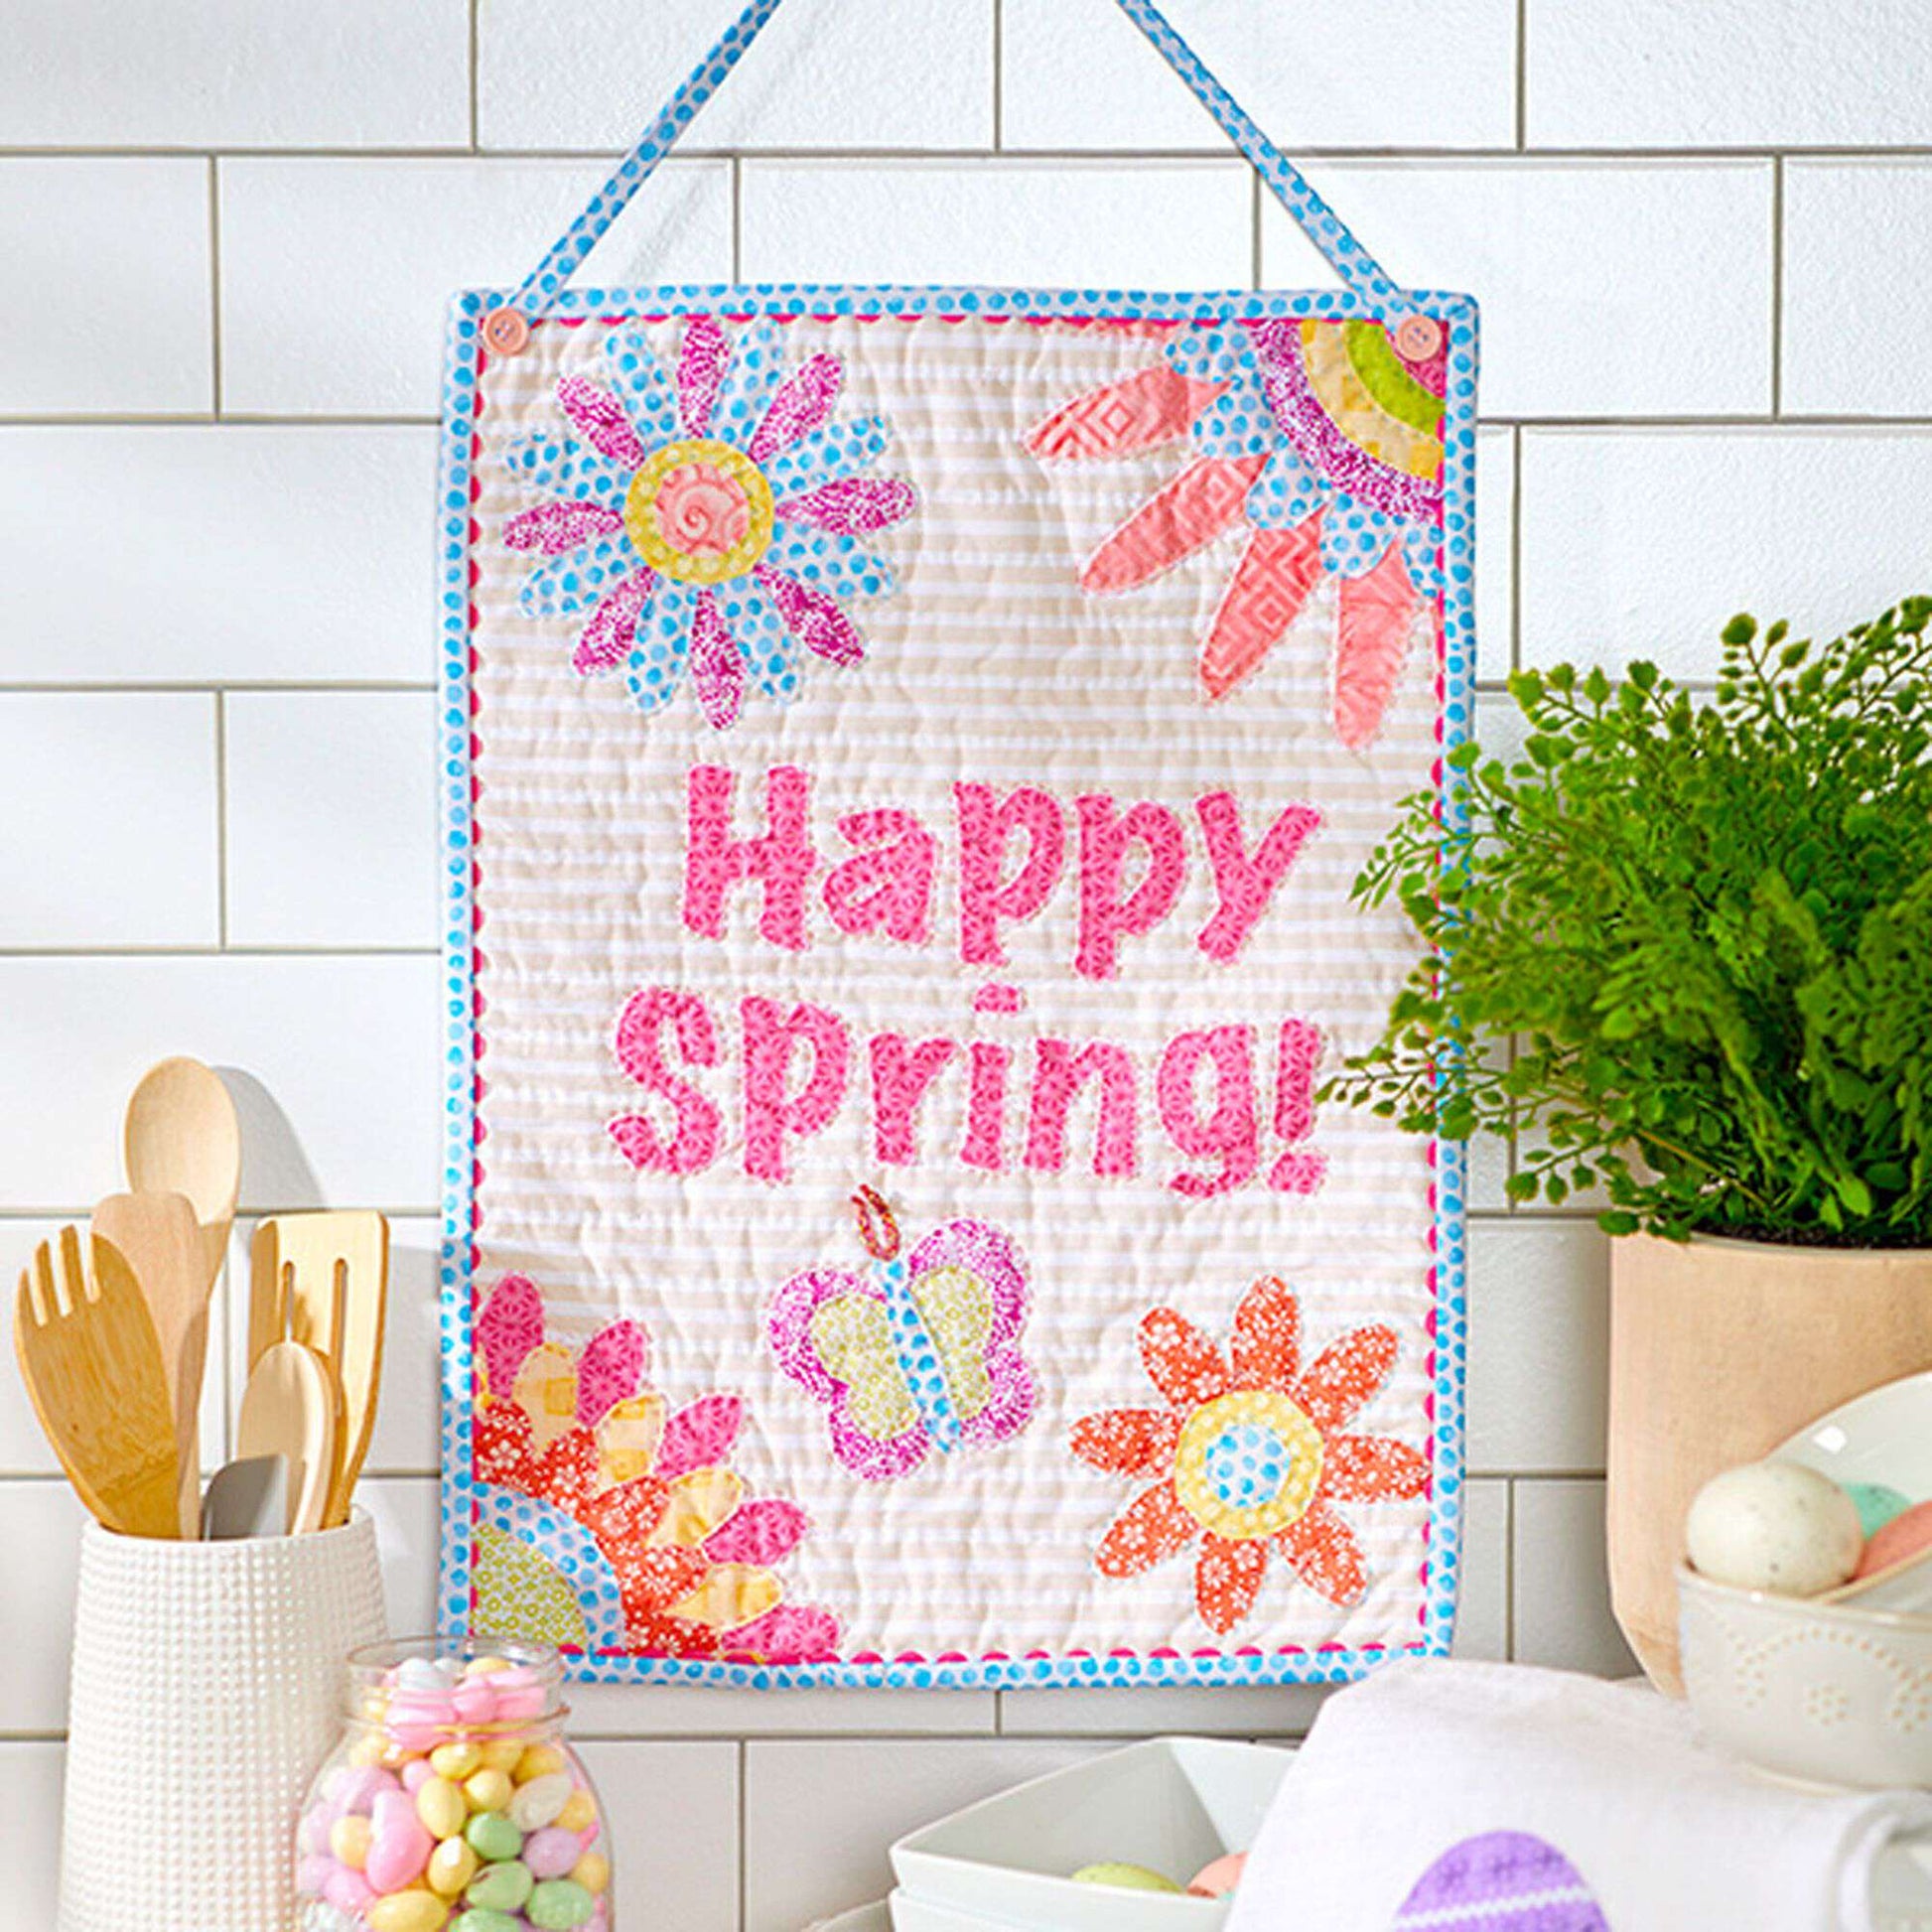
That’s when I stumbled upon the Happy Spring Wall Hanging!
The perfect project to infuse my living space with some stylish blooms and cheerful vibes.
From the moment I decided to create this delightful decoration, I felt a rush of excitement.
Gathering the scraps from my fabric stash felt so freeing, and the thought of transforming these remnants into a stunning wall hanging had me buzzing.
I envisioned the smiles it’d bring to my family and friends, making it so special to welcome the blossoming season!
Bringing Life to Your Walls: The Raw Edge Applique Technique
One of the most exciting aspects of creating the Happy Spring Wall Hanging is the raw edge applique technique.
This method allows for a carefree and artistic approach, letting your creativity shine!
It’s perfect for those of us who love a bit of whimsy in our projects.
The applique makes it easy to layer colors and shapes, ultimately leading to a cheerful finished product.
This technique not only helps utilize those cute fabric scraps but also adds a dreamy, playful quality to the quilt.
Imagine flowers and butterflies popping off the fabric in all their glory!
What a way to celebrate the arrival of spring than with this visual feast hung proudly on your wall!
Let’s Dive Into the Details of the Design!
So, what makes the Happy Spring Wall Hanging come to life?
Well, aside from the colorful fabrics you can choose, there are also some playful elements, like decorative buttons and cute rick rack that add flair.
Each section provides an opportunity to personalize the piece with your style and creativity.
Think of how delightful it will be to select vibrant yellows, greens, and pinks for your flowers, reflecting the essence of spring.
The color combinations are practically endless!
You can even include tiny embellishments to make it uniquely yours, turning your wall into a vibrant spring garden!
Materials You’ll Need for a Successful Project
- Coats Dual Duty XP® all-purpose thread
- Coats® Cotton Machine Quilting Thread or Coats All Purpose Cotton thread
- Optional: Dual Duty Plus Hand Quilting thread
- Cotton quilting fabric scraps or purchased yardage for flowers and letters
- Cotton fabric – ½ yard for background
- Cotton fabric – ¼ yard for binding and hanger
- Fusible fleece – ½ yard
- Cotton batting
- 1 pkg.
medium rick rack
- Two decorative buttons
- 5/16” dowel 12” long
- Straight pins
- Safety pins
Getting Ready: Prep Tips Before You Dive In
Before jumping into the Happy Spring Wall Hanging, some preparation goes a long way!
Start by collecting the fabrics and threads you’ll need.
It helps if you lay them out and envision how they’ll all fit together before cutting anything.
I promise it’ll make the process smoother and way more enjoyable!
Also, I recommend pre-washing your fabric to avoid any surprises like shrinkage post-project.
Just a quick cycle in the washer and a tumble dry, and you’ll be good to go.
This will also help the colors stay vibrant and fresh, keeping your wall hanging beautiful for years to come!
Step-by-Step Instructions:
Alright, it’s time to get our hands glowing with creativity!
Below are the instructions that will guide you through the construction of the Happy Spring Wall Hanging.
For those who prefer detailed patterns, feel free to check out the full pattern linked below!
Full Pattern: Click Here
Extra Tips for Success
As you create your Happy Spring Wall Hanging, don’t forget to have fun along the way!
Embrace the small imperfections; they make your piece genuine and one-of-a-kind.
I like to use contrasting threads for stitching because it adds an unexpected pop that brings everything together.
Keep a close eye on your stitch quality as you sew; if you find your fabric shifting, pin it down strategically to avoid those pesky fabric bunches.
And remember, practice makes perfect, so don’t be discouraged if it takes a couple of tries to get it just right!
Embrace the Joy of Crafting: Advanced Techniques
If you’re looking to elevate your Happy Spring Wall Hanging, consider adding a few advanced techniques.
For example, how about using embellishments along with your raw edge applique?
Mini pom-poms or beads can add an additional layer of texture that’s visually engaging!
You can even experiment with free-motion quilting in areas to create lovely designs that complement your flowers and letters!
Your wall hanging will be a statement piece fusing creativity with skilled crafting!
Celebrate Your Creation and Explore More Inspirations!
As you admire your finished Happy Spring Wall Hanging, take a moment to appreciate the creativity and effort you’ve poured into it.
This beautiful decoration brings the essence of spring into your space, and I hope it serves as a constant reminder of the joy that crafting can bring!
If you’re hungry for more crafting adventures, you should definitely explore other articles on my blog!
Each post is brimming with helpful guides and delightful projects.
I’ve prepared an incredible piece waiting for you to discover by clicking here.
Happy crafting, and may your spring be as beautiful as your new wall hanging!


