Quilting is a journey that intertwines creativity, patience, and tradition. It’s a journey that takes you through the realms of colors, patterns, and textures. One of my earliest quilting memories is of my grandmother teaching me how to piece together a Star Bright Mini Quilt.
SEE A NEW PATTERN HERE
This traditional quilt block, with its simple yet elegant design, was my first foray into the world of quilting. Today, I want to take you on a detailed journey of creating your own Star Bright Mini Quilt, a pattern that’s perfect for both beginners and seasoned quilters.
The Star Bright Mini Quilt: A Closer Look
The Star Bright Mini Quilt is a classic, traditional quilt block that’s been a staple in the quilting world for generations. The beauty of this block lies in its simplicity – it’s a simple star within a square design that’s perfect for showcasing a variety of fabrics. Despite its simplicity, the finished block creates a stunning visual effect, especially when multiple blocks are combined to create a larger quilt. The finished block measures 18″ x 18″, making it an ideal size for a mini quilt or a larger quilt when multiple blocks are combined.
Materials Needed
Creating a Star Bright Mini Quilt is a relatively straightforward process that doesn’t require a vast array of materials. To create a Star Bright Mini Quilt, you will need:
- A center square of 4 ½” x 4 ½”: This will form the ‘heart’ of your block. You can choose a fabric that stands out or complements your other fabric choices.
- 2 squares 4″ x 4″ – cut once on the diagonal to make 4 triangles: These triangles will form the first ‘frame’ around your center square.
- 2 squares 5″ x 5″ – cut once on the diagonal to make 4 triangles: These triangles will form the outer ‘frame’ around your block.
Step-by-Step Instructions
SEE A NEW PATTERN HERE
1. Piecing Your Quilt Block
The first step in creating your Star Bright Mini Quilt is to piece together your block. Start by centering the long sides of two of the triangles from the 4″ x 4″ squares and sew them to opposite sides of the center 4 ½” x 4 ½” square. Press seams toward triangles and trim overhanging tabs. Repeat with 2 triangles on remaining sides of the center square. Press seams toward the triangles. This process will create a framed square, the first step in creating your Star Bright Mini Quilt.
2. Squaring Up Your Block
Once you’ve pieced together your framed square, the next step is to square up your block. Square up the pieced section to 6 ¼” x 6 ¼”. Be careful to square evenly on all four sides. This will ensure that your block is perfectly square and ready for the next step. Squaring up your block is a crucial step in the process, as it ensures that your finished block will be even and uniform, leading to a more professional-looking finished quilt.
3. Adding the Final Triangles
The final step in creating your Star Bright Mini Quilt is to add the final triangles. Repeat the process with the four triangles from the 5″ x 5″ squares. Add to two opposite sides, press seams away from center. Trim tabs and add final triangles to remaining sides. Square up block to 8 ½” x 8 ½”. This process completes your Star Bright Mini Quilt.
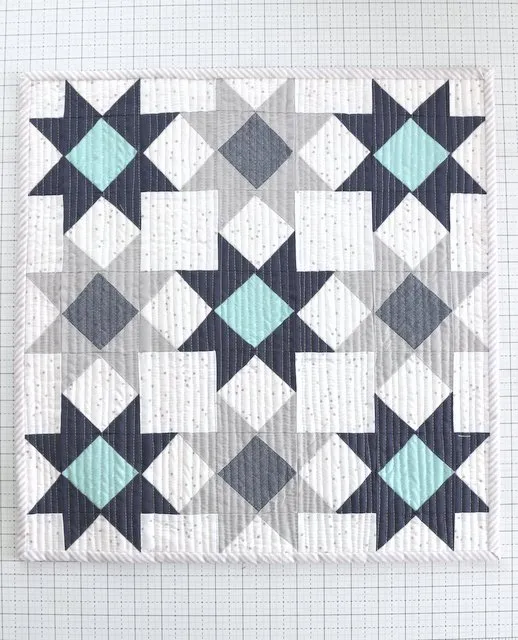
The Star Bright Mini Quilt is a simple yet beautiful pattern that’s perfect for showcasing a variety of fabrics. It’s a great project for both beginners looking to learn new skills and experienced quilters looking for a quick and satisfying project. The key to a great looking quilt block is a big variety of prints.
Don’t be afraid to mix and match and make the quilt block your own. With patience, creativity, and a love for quilting, you can create a beautiful Star Bright Mini Quilt that will be cherished for years to come. So why wait? Grab your fabrics and start your quilting journey with the Star Bright Mini Quilt today!


