Hello, quilting enthusiasts!
Today, we’re going to embark on a journey to the sea, all from the comfort of our quilting studios.
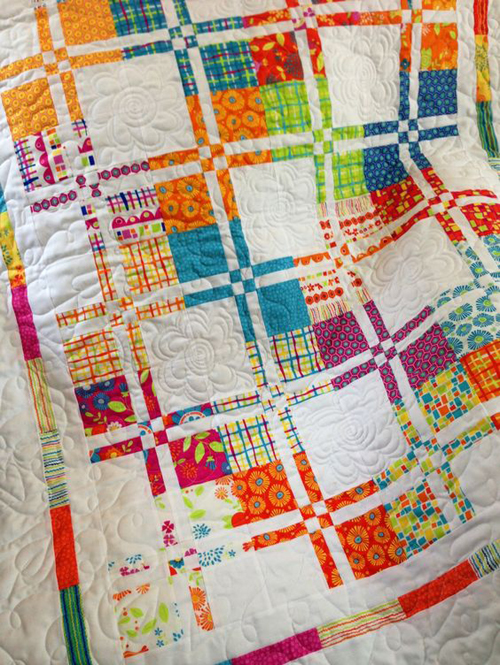
We’ll be creating the Landlocked Sea Lovers Quilt, a pattern inspired by the beautiful Seascapes fabric line by Deb Strain and the memories of summers spent by the beach.
This quilt is a testament to the power of fabric and design to transport us to different places and times.
So, let’s dive in!
Materials You’ll Need
To create this stunning quilt, you’ll need the following:
- 2 layer cakes (You need 40, 10″ squares that are light and 40, 10″ squares that are dark)
- Supplemental yardage for contrast in pattern
- 1/3 yd #19611-11 white with blue maps
- 1/3 yd #19614-11 white with blue netting
- 1/3 yd #19614-12 white with aqua netting
- 1/3 yd #19617-11 white with shells
- 1 yd #9900-97 Bella white
- 1/2 yd for inner border (I used #19615-15 navy with waves)
- 1 yd for outer border (I used #19618-12 tile print with green)
- 3/4 yd for binding (I used # 19619-15 dark stripes)
- 5 3/4 yd for backing (I used #19612-17 aqua on navy tapestry print)
- Masking tape is helpful but not necessary
The finished quilt measures 80″ x 98″ and is big enough to cover a full-sized bed.
Cutting the Fabrics
The first step in creating your Landlocked Sea Lovers Quilt is to cut your fabrics. Here’s what you need to do:
- For blocks: The goal is 80, 10″ squares, 40 dark and 40 light. If you needed to supplement the fabrics in your layer cake, cut 1/3 yd supplement fabric into strips 10″ x wof and sub cut each strip into 4, 10″ squares. Make two piles – one light, and one dark.
- For inner border: cut 8, 1 1/2″ x wof strips
- For Outer border: cut 9, 3 1/2″ x wof strips
- For binding: cut 9 strips, 2 1/2″ x wof
Sewing Instructions
Now that you’ve cut your fabrics, it’s time to start sewing. Here’s how:
Make 20 4-Patch Blocks
- Gather 10″ squares (40 dark and 40 light)
- Sew 40 sets of one dark to one light square
- Iron seam allowances to the dark side
- Sew 20 4-patch blocks – make certain that the darks and lights align on the diagonal.
- Pop center seam and twirl seam allowances.
- Iron flat.
Make 20 Disappearing 4-Patch Blocks
- Cut each one into 9 pieces and then reassemble them with the pieces moved around.
- Swap piece B with piece H and piece D with piece F, keeping the pieces oriented in the same direction.
- Sew pieced back together in their new arrangement. Iron seam allowances toward rectangle shapes.
- Trim block to 18″ square.
Repeat 19 times for a total of 20 blocks.
Piece Center of Top
- Arrange the blocks in a 4 x 5 block grid, turning the blocks so that dark patches touch dark patches and light touches light.
- Sew 4 blocks together to make 1 row. Repeat 4 times for 5 rows.
- Sew rows together to make the center of the top.
Add Borders
- Sew Inner border: Sew two sets of two strips together at the skinny end. Attach to narrow ends of top. Trim excess and set aside. Iron towards inner border.
- Sew Outer border: Sew two sets of two strips together at the skinny end. Attach to narrow ends of top. Trim excess. Iron towards outer border.
Full Pattern: Click Here
Finishing the Quilt
Finally, let’s finish the quilt:
- Sandwich layers and quilt as desired.
- Bind with dark stripes binding strips.
And there you have it! Your very own Landlocked Sea Lovers Quilt. This quilt is a testament to your skills and patience, and it’s sure to be a beautiful addition to your home or a cherished gift for a loved one. Remember, every stitch you make is a step towards creating something beautiful. So, keep quilting, keep creating, and keep dreaming about the sea!


