Hello, quilting lovers! Today, we’re going to embark on an exciting journey to create a vibrant Jigsaw Puzzle Quilt.
This project is perfect for those who love a good puzzle and enjoy the art of quilting.
This easy-to-follow tutorial will guide you through the process of constructing a jigsaw puzzle quilt, step by step.
Whether you’re a seasoned quilter or a beginner, this project is sure to add a splash of color and fun to your quilting repertoire.
Materials Needed
Before we begin, let’s gather the necessary materials. The materials listed below are for a small quilt made with 6″ square quilt blocks and finishes at about 30″ x 42″.
- A strip that measures at least 2 1/2″ x 22″ for each H block you plan to use in the quilt. You can use a rotary cutter to cut long strips of fabric.
- About 170 running inches of double-fold quilt binding in a width that’s sewn to the quilt with a quarter-inch seam allowance.
- About 1 1/4 yards of quilt backing if using standard quilting fabric.
- About 40″ x 52″ of quilt batting.
Step-by-Step Instructions
Step 1: Design Your Jigsaw Puzzle Quilt
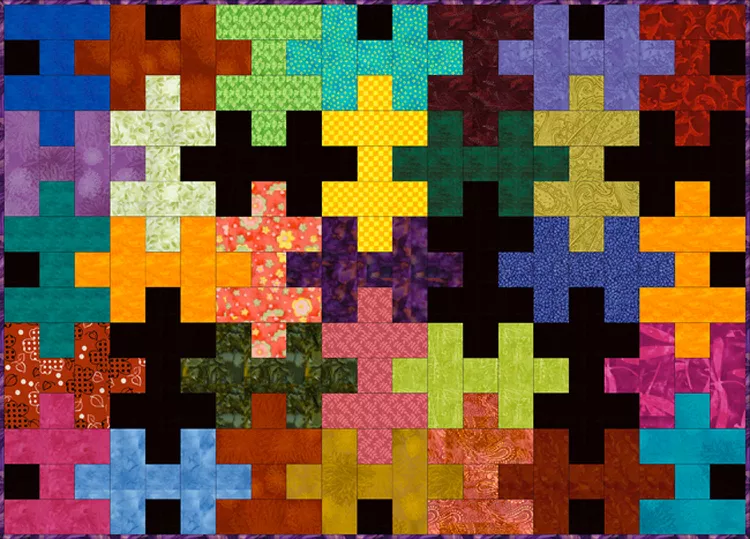
The first step in creating your jigsaw puzzle quilt is to design the layout. This involves cutting your fabric into specific shapes and arranging them to form a series of ‘H’ shapes. Each row of your quilt will be made from five H quilt blocks, and adjoining H blocks are rotated to create the jigsaw puzzle effect.
Start by cutting (2) 2 1/2″ x 6 1/2″ bars and (1) 2 1/2″ x 2 1/2″ square of each H block fabric from leftover scraps or the long strips referred to in yardages. You will need either (1) or (2) more 2 1/2″ squares of each fabric, depending on the block’s final resting place in the quilt, but do not cut them yet.
Arrange the three patches cut for each block to form a series of H shapes. Move H shapes around until you are happy with the layout, adding some black puzzle blocks if you like. This step may require some trial and error, but it’s all part of the fun of creating your unique quilt design.
Step 2: Fill in the Gaps of Your Jigsaw Puzzle Quilt Blocks
Once you’re satisfied with the layout of your jigsaw puzzle quilt, it’s time to fill in the gaps. This involves cutting the remaining patchwork. The squares are either black (for gaps along the quilt’s outer edges) or the color of the puzzle piece that inserts into the opening of an adjacent H.
Cut 2 1/2″ x 2 1/2″ squares to complete each puzzle block. This step requires precision and attention to detail to ensure that each piece fits perfectly into your quilt design.
Step 3: Finish Assembling the Jigsaw Puzzle Quilt
Now that all the pieces of your jigsaw puzzle quilt are ready, it’s time to assemble the quilt. Start by sewing the three squares in each block’s middle section together and press seam allowances in any direction. Then, sew each block’s two 2 1/2″ x 6 1/2″ bars lengthwise to opposite sides of the middle section. Press seam allowances towards the long bars.
Keep your design intact by working on one quilt block at a time and placing it back into the layout after it is assembled. When all blocks are complete, sew blocks in each row together. Press new seam allowances in adjoining rows in opposite directions. Join the rows. Press.
Finally, mark the top for quilting if necessary. Sandwich with batting and backing. Baste the layers together and quilt. Remove excess backing and binding. Sew binding around the edges of the quilt.
Full Pattern: Click Here
Congratulations on completing your Jigsaw Puzzle Quilt! Remember, each piece you’ve stitched together is a testament to your creativity and dedication. Quilting is not just about the end product, but the journey of creation. So, keep practicing, keep quilting, and keep creating beautiful works of art. Happy quilting!


