Greetings, quilting enthusiasts! Today, we’re going to delve into a project that combines the aesthetics of a star and a pinwheel – the Sarah’s Choice Quilt Block. This tutorial will guide you through the process of creating your own Sarah’s Choice Quilt Block, a pattern that offers a unique blend of design elements. Whether you’re an experienced quilter or just starting out, this project is sure to add a touch of elegance and complexity to your quilting journey.
Materials Needed
The materials needed will vary depending on the size of the quilt block you plan to make. Here are the materials needed for a 12-inch Sarah’s Choice Quilt Block:
Light Neutral Background:
- Four 3-1/2 x 3-1/2-inch squares
- Four 3-1/2 x 6-1/2-inch rectangles
Dark Brown Print:
- Two 3-7/8 x 3-7/8-inch squares
- Four 3-1/2 x 3-1/2-inch squares
Medium Brown Print:
- Two 3-7/8 x 3-7/8-inch squares
- Four 3-1/2 x 3-1/2-inch squares
Step-by-Step Instructions
Step 1: Make Half-Square Triangle Units
Start by gathering the two larger dark brown squares and the two medium brown squares of the same size. Use the quick pieced half square triangle method to sew a dark brown square to a medium brown square twice diagonally. Press as-is to set the seams. Cut the pair apart as explained and press seams towards the darker halves of units to create two half-square triangle units. Repeat to create two more units.
Step 2: Make Quick Pieced Flying Geese
Next, gather the four light background rectangles and the remaining dark brown and medium brown squares. Use the quick pieced flying geese method to create four flying geese for the outer rows of your quilt block. Be sure to orient the squares as shown to end up with a unit with a dark triangle on one end and a medium triangle on the other end.
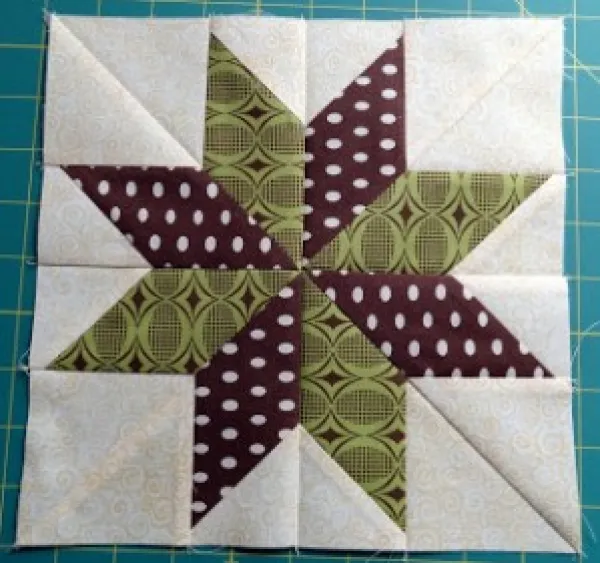
Step 3: Assemble a Sarah’s Choice Quilt Block
Arrange the pieced units and four background squares into three rows as shown. Sew components of each row together. Press seam allowances in the top and bottom rows towards the corner squares. Press seam allowances in the middle row toward the center unit. Sew the rows together, matching seams carefully. Your quilt block should be 1/2-inch taller and wider than its finished size.
Congratulations! You’ve just completed your Sarah’s Choice Quilt Block. Remember, the beauty of quilting lies in the journey, not just the destination. Each stitch you make is a step towards mastering this wonderful craft. The more you practice, the more perfect your quilts will become. So, keep quilting, keep creating, and most importantly, keep enjoying the process. Happy quilting!


