In a world that often moves at a dizzying pace, there are moments that ground us, reminding us of simpler times and cherished memories.
One such moment for me was marked by the unexpected arrival of a package.
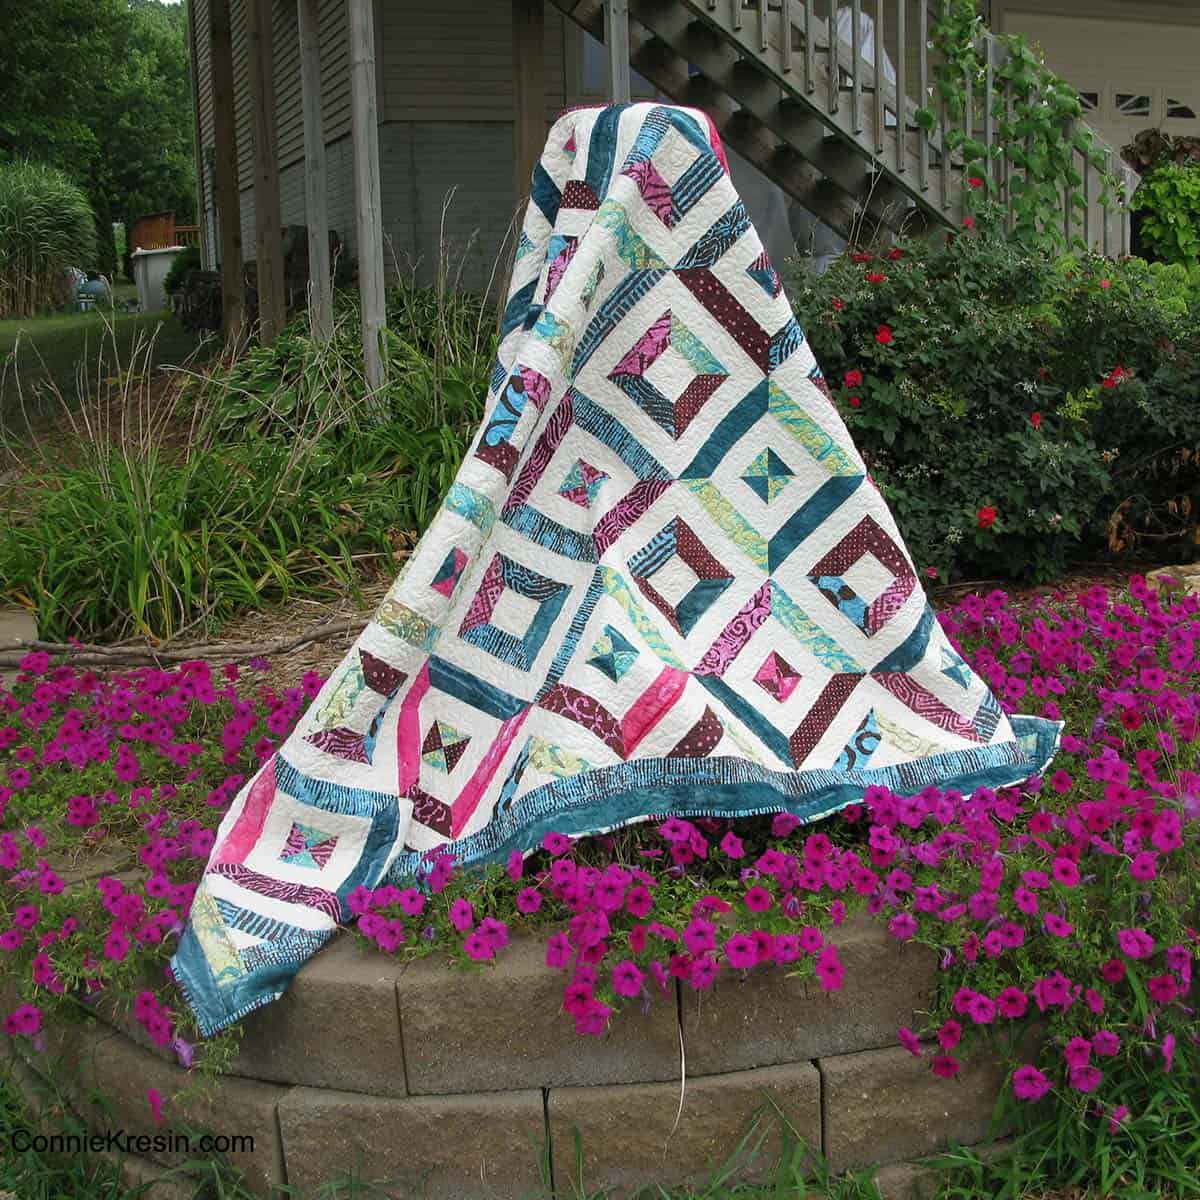
As I carefully unwrapped it, I was greeted by a meticulously crafted quilt, its vibrant colors seemingly dancing and patterns that whispered tales of old.
This quilt, which I later came to recognize as the “Petunia Strings” design, wasn’t just an object; it was a bridge to the past.
Each patch and every stitch transported me back to sunlit days spent with friends and family, laughing, sharing stories, and dreaming of what the future might hold.
While I wasn’t the artisan behind that particular quilt, it spoke to me on a profound level.
It reminded me of the beauty of simplicity, the significance of preserving memories, and the deep connections we can feel through seemingly ordinary objects.
The quilt became more than just a piece of fabric; it became a symbol of tradition, of shared experiences, and of the timeless nature of stories passed down through generations.
It evoked a sense of nostalgia, a longing for those moments of pure joy and connection, and a reminder of the importance of holding onto those memories in tangible forms.
Petunia Strings Quilt: A Glimpse
Using 2½-inch fabric strips for a quilt is always a delightful experience. Depending on the fabrics you choose, the outcome can be unique every time.
The Petunia Strings by the River quilt, especially when made with Batik fabrics, stands out beautifully. This easy-to-make string quilt pattern is versatile and can be customized to fit your personal style.
Materials Needed:
- Two jelly rolls
- 4 ¼ yards of muslin or a neutral fabric
- Batting
- Backing
Note: For this project, you can either use two jelly rolls with 40 strips each or cut your own 2½-inch strips from fabrics in your stash. The strips should be cut the width of the fabric, approximately 40 inches long.
Step-by-Step Guide to Crafting the Petunia Strings Quilt:
- 1. Preparing the Canvas: In the world of quilting, the foundation is everything. Begin by gathering your materials. The choice of fabric, especially the colors and patterns, will set the tone for your quilt. For this design, you’ll need two jelly rolls and 4 ¼ yards of muslin or a neutral fabric. Remember, the strips should be approximately 40 inches long, cut across the width of the fabric.2. Crafting the Sections: Dive into the heart of the process. Create two distinct sections:
- The first should have 2 print strips with a muslin strip nestled in the center.
- The second will feature 2 muslin strips, framing a single print strip in between. Sew these strips together using a consistent ¼” seam allowance. As you work, press the seams towards the darker fabrics. This not only gives a neat finish but also adds a subtle depth to the design.
3. Tube Formation and Block Cutting: This is where the magic happens. Sew both of the previously made sections together, forming a long tube. This tube will be the basis for your quilt blocks. To shape these blocks, make a 45-degree cut. While a longer ruler can be handy, it’s not essential. Align the bottom of your ruler with a straight seam line and cut along the angle. Flip and repeat. Aim for blocks that are about 8 1/2 inches in size.
4. Assembling the Masterpiece: With your blocks ready, it’s time to piece them together. From one tube, you’ll get six blocks. Four of these will come together to form one large block for the quilt’s design. Lay out the blocks, ensuring the patterns align harmoniously, and sew them together. This step requires precision, as the blocks have bias edges that might stretch. Handle with care.
5. Final Touches and Design Choices: The beauty of the “Petunia Strings” design lies in its versatility. Once you’ve assembled your blocks, you can experiment with different layouts. Whether you opt for a traditional design or something more contemporary, the choice is yours. Remember, the quilt’s size will be approximately 72 x 88 inches before adding any borders.
6. Backing and Binding: The final steps in your quilting journey involve adding the backing and binding. For this design, muslin works beautifully as a backing, paired with Warm & Natural batting. When it comes to binding, get creative. Use leftover strips, cut them into smaller pieces, and sew them together for a unique, scrappy binding. Attach it to the front of the quilt and machine stitch it down, sealing in all the love and hard work you’ve poured into your creation.
Every quilt tells a story, and the finishing touches are the final chapters of that narrative. Once your quilt is assembled, consider adding personalized elements. Embroidery, for instance, can be a beautiful way to add names, dates, or special messages. Additionally, think about the quilt’s practical use.
Bonus: Crafting a Pillow
If you have leftover blocks, consider making a pillow! Both pillows use a 16-inch pillow form and have muslin on the back. Each pillow requires 4 small strip blocks.
Full Pattern: Click Here
Quilting is more than just piecing together bits of fabric. It’s an art form, an expression of love, and a way to narrate stories. The “Petunia Strings” design encapsulates all of this and so much more. Each patch, each hue, and every pattern has a tale to tell, an emotion to convey. And as you embark on the journey of crafting your own quilt, I hope you discover the same passion and purpose that many before you have found.
At its core, quilting isn’t just about creating a beautiful object; it’s about weaving your own memories, dreams, and hopes into something tangible. Something that can be passed down from generation to generation, narrating tales and connecting hearts. The intricate patterns, the choice of colors, and the very stitches themselves are a testament to the quilter’s journey, their experiences, and the love poured into every inch.
May the “Petunia Strings” serve as a reminder of the beauty of tradition, the importance of connection, and the sheer joy that can be found in every stitch and patch. It’s not just a quilt; it’s a legacy, a testament to the stories we hold dear and the dreams we hope to weave into reality.


